Switching a PNGTuber's expression on Twitch notifications
5 min read
How to make a PNGTuber built with Peraravatar+ automatically switch to a chosen custom expression when you get a Twitch follow notification.
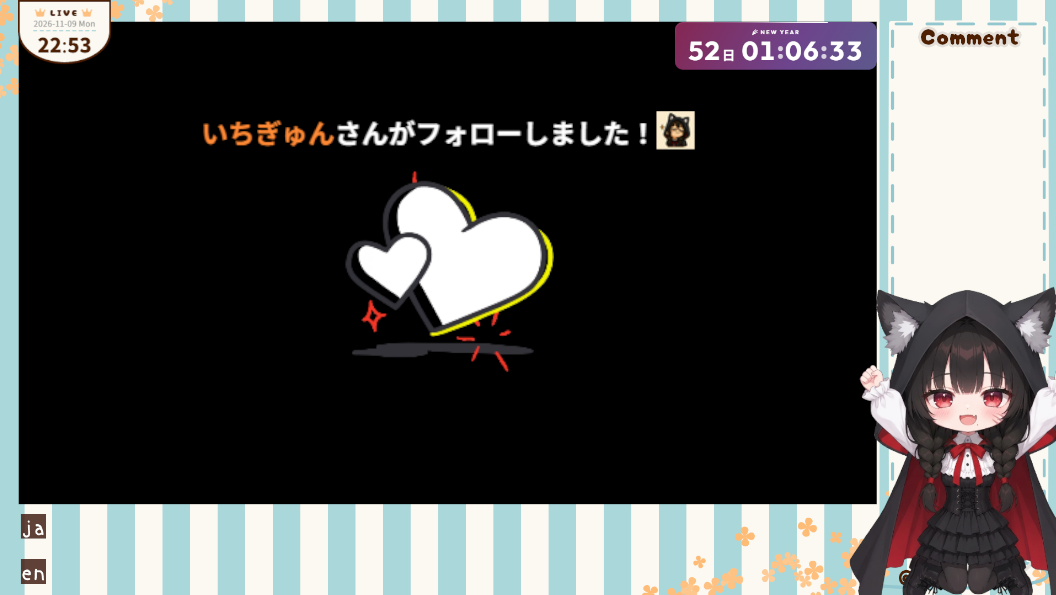
What you need
- An avatar made with Peraravatar+ (already added to OBS)
- A custom expression to show on a follow notification
- The hotkey script (already added to OBS)
- OBS Studio
- Streamer.bot
- A Twitch account
Set the Hold mode
Set the “Hold mode” of the expression to show on a follow notification to “For a set time”. Once that time has passed, the avatar returns to its previous expression.
Check the “Hold mode” of that expression under custom expressions in Peraravatar+. If it isn’t “For a set time”, set it up in one of these two ways.
- Change the current expression: change its “Hold mode” to “For a set time”
- Add it as a separate expression: use ”+ Add expression” to add an expression for follow notifications, and set its “Hold mode” to “For a set time”
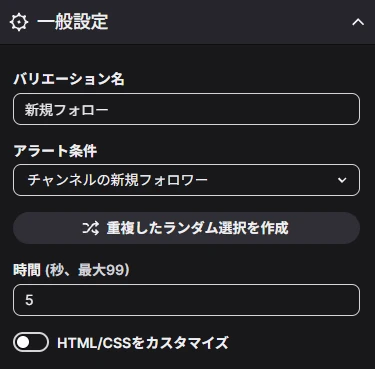
We recommend matching the time to how long the follow notification is shown. You can check that length in Twitch’s Creator Dashboard: open “Alerts”, open your alert set (choose “Create Alert Set” if you don’t have one), and check “Duration” (in seconds, up to 99) under “General Settings” for the follow alert.
If you changed or added an expression, apply it to OBS.
- On the “Export” tab, press “Export avatar as HTML” and overwrite the HTML loaded in OBS
- If you added an expression, press “Export OBS hotkey script” and overwrite the
.lua. Then press reload (↻) in OBS under “Tools → Scripts” - In OBS, open the properties of the avatar’s browser source and press “Refresh cache of current page”
Enable the OBS WebSocket server
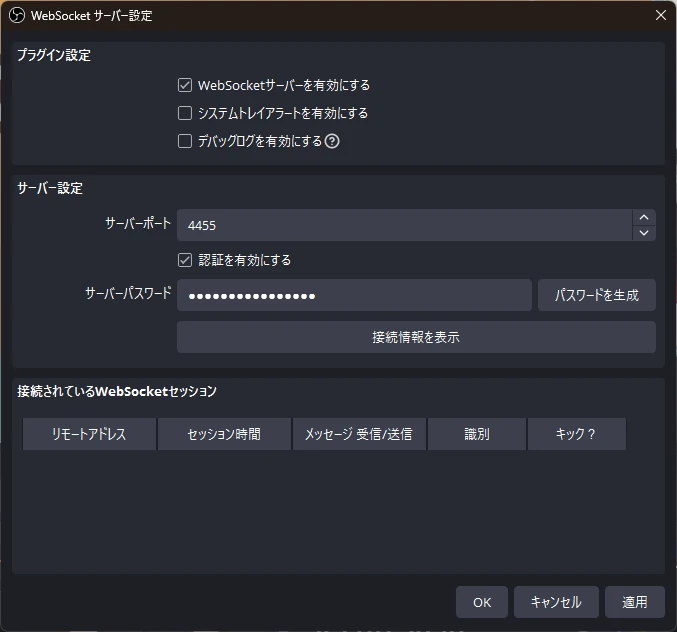
Streamer.bot connects to OBS over WebSocket, so enable the OBS WebSocket server.
- In OBS, open “Tools → WebSocket Server Settings”
- Check “Enable WebSocket server”
- Press “Show Connect Info” and check the port and password
Connect Streamer.bot to OBS
- Download Streamer.bot from the official site, extract it, and run
Streamer.bot.exein the folder - In the left menu, open “OBS Studio” under “Stream Apps”, right-click an empty part of the list, and choose “Add”
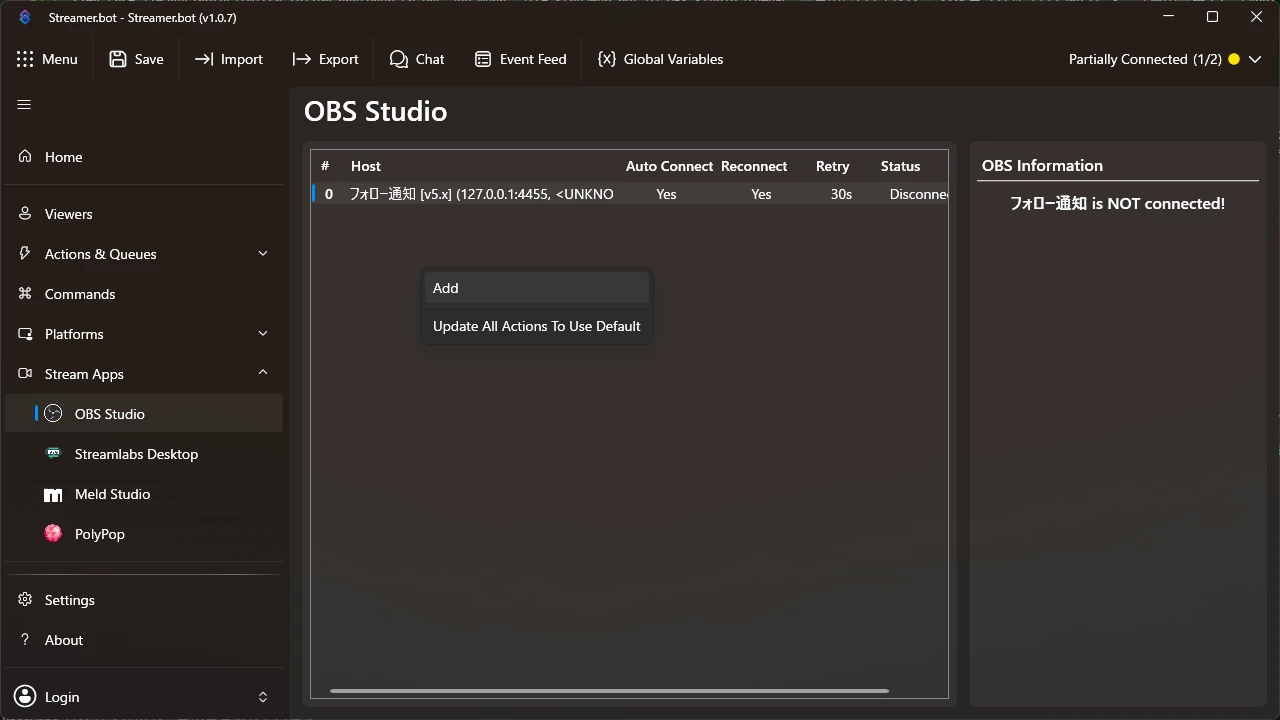
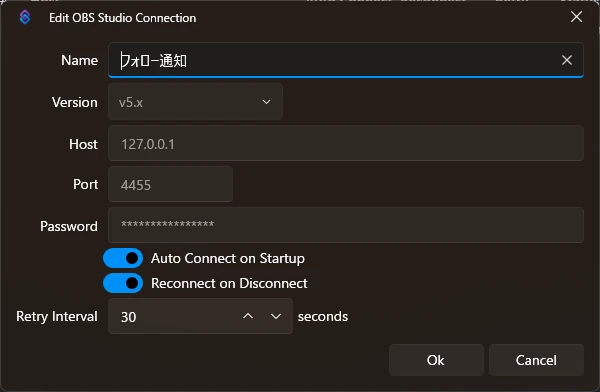
- Enter a name you’ll recognize in Name,
127.0.0.1in Host, and the port and password you checked in OBS in Port and Password - Turn on “Auto Connect on Startup” and “Reconnect on Disconnect”, then press “Ok”
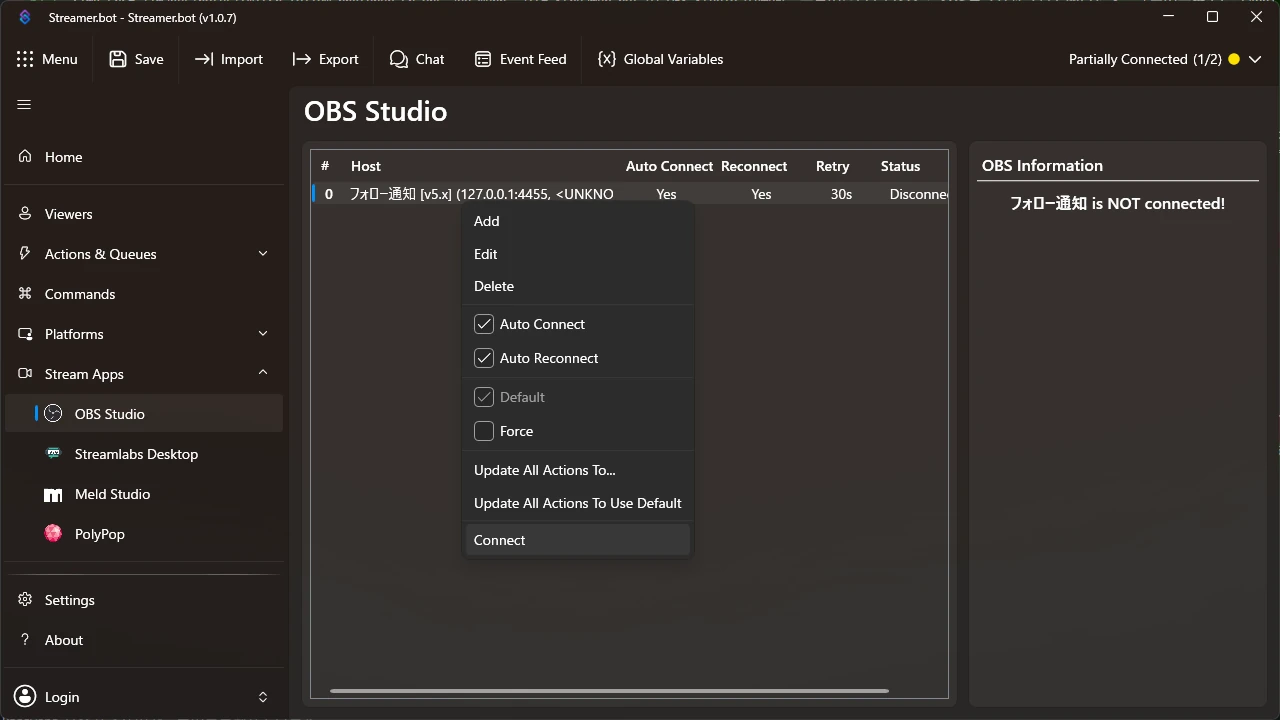
- Right-click the row you added and choose “Connect”
Once connected, the status of OBS appears under “OBS Information” on the right.
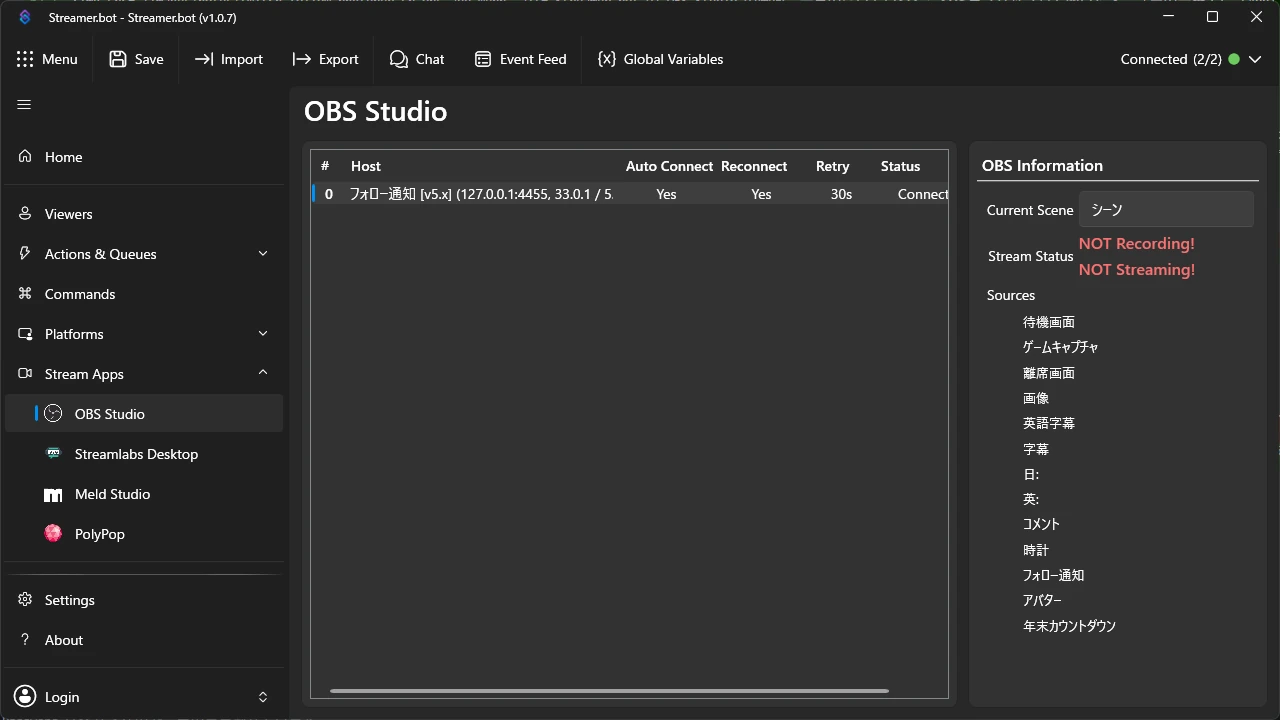
“Auto Connect on Startup” only takes effect from the next launch, so right after adding the connection you need to Connect manually. From then on, it connects automatically when you start Streamer.bot.
Connect Streamer.bot to Twitch
- In the left menu, open “Twitch” under “Platforms”, and press “Login” for “Broadcaster Account” under “Accounts”
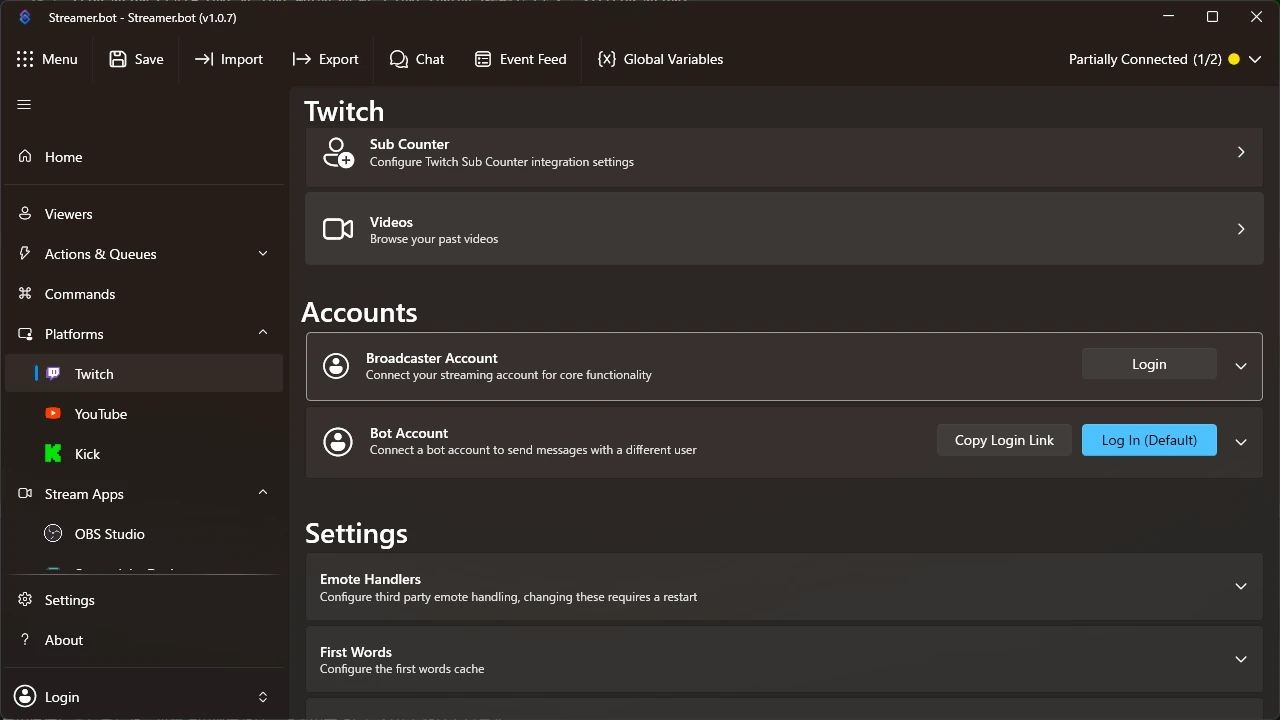
- When your browser opens, authorize the connection with the account you stream on
Create an action that switches the expression on a follow
- In the left menu, open “Actions” under “Actions & Queues”, right-click an empty part of the list, and choose “Add”
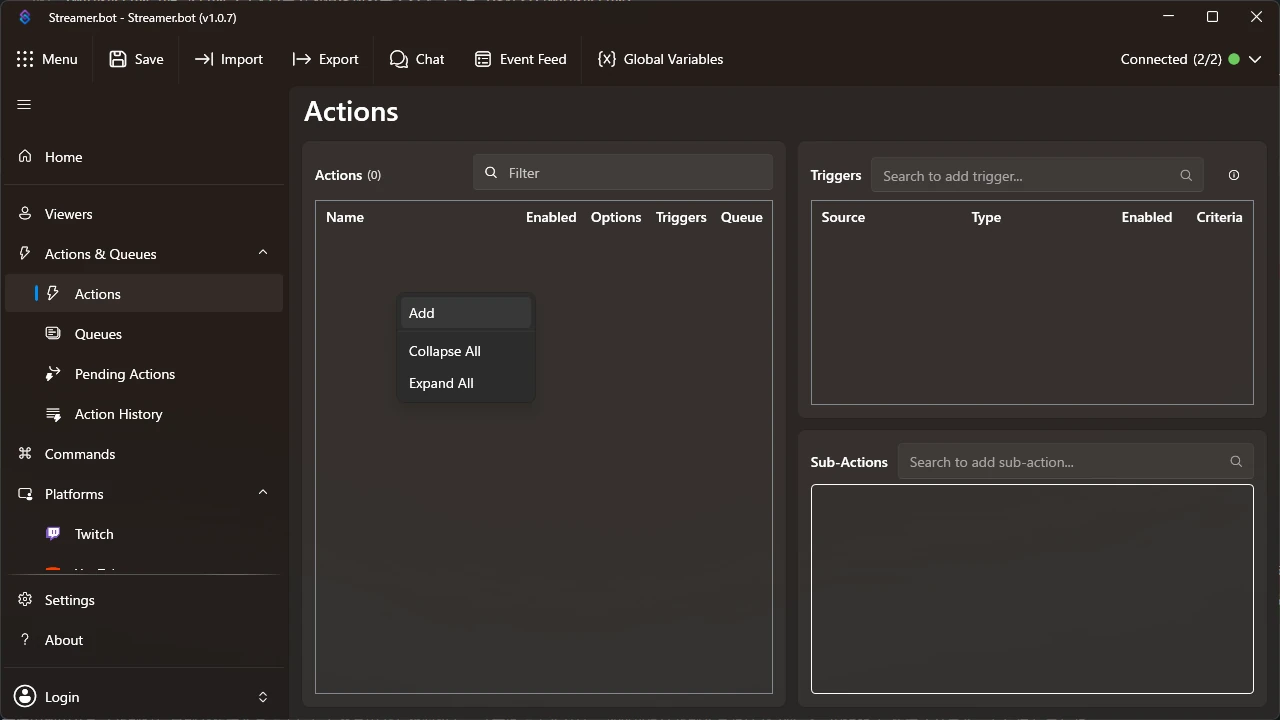
- Enter a name you’ll recognize in Name, then press “Ok”
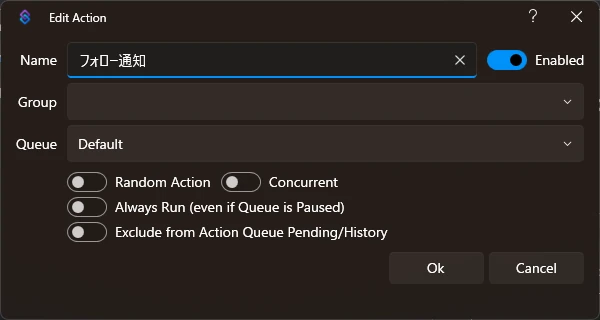
- Right-click an empty part of “Triggers” at the top right, and choose “Add → Twitch → Channel → Follow”
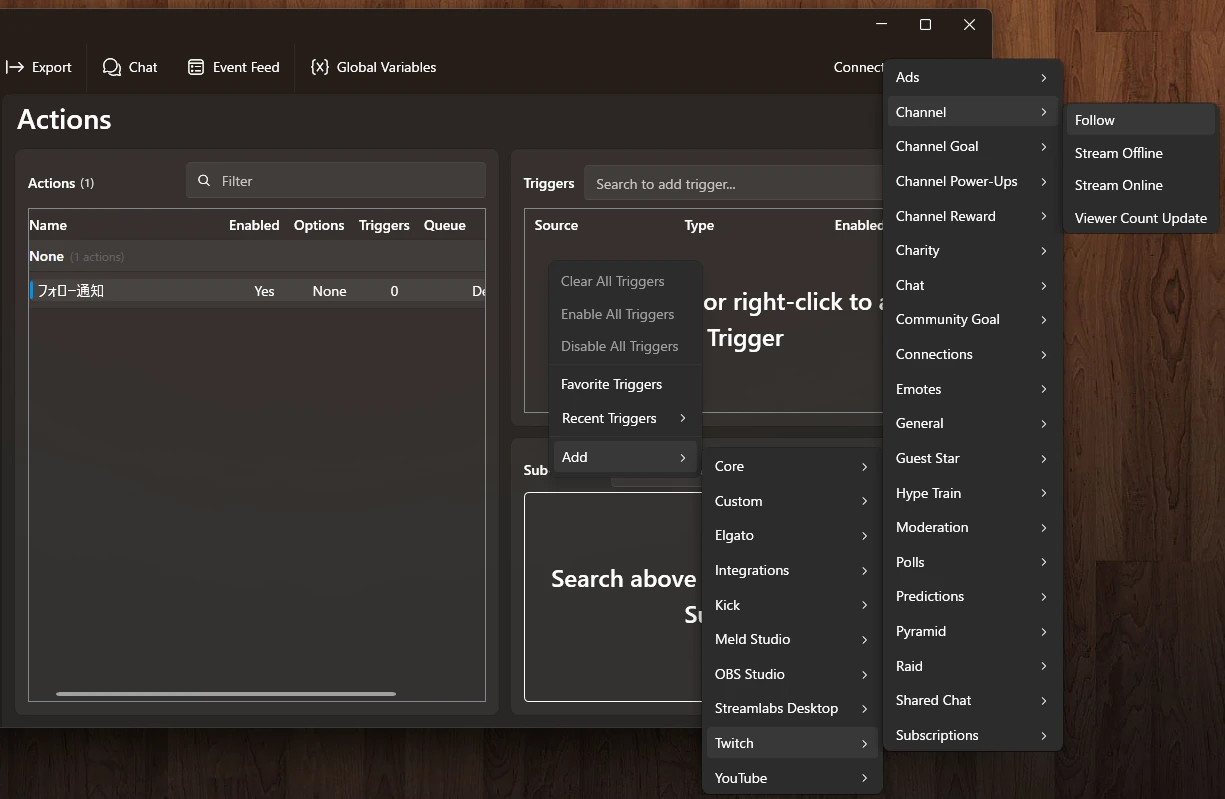
- Open the “Export” tab in Peraravatar+, and in the list below “Export OBS hotkey script”, press “Copy” for that expression
- Back in Streamer.bot, right-click an empty part of “Sub-Actions” at the bottom right, and choose “Add → OBS Studio → Raw”
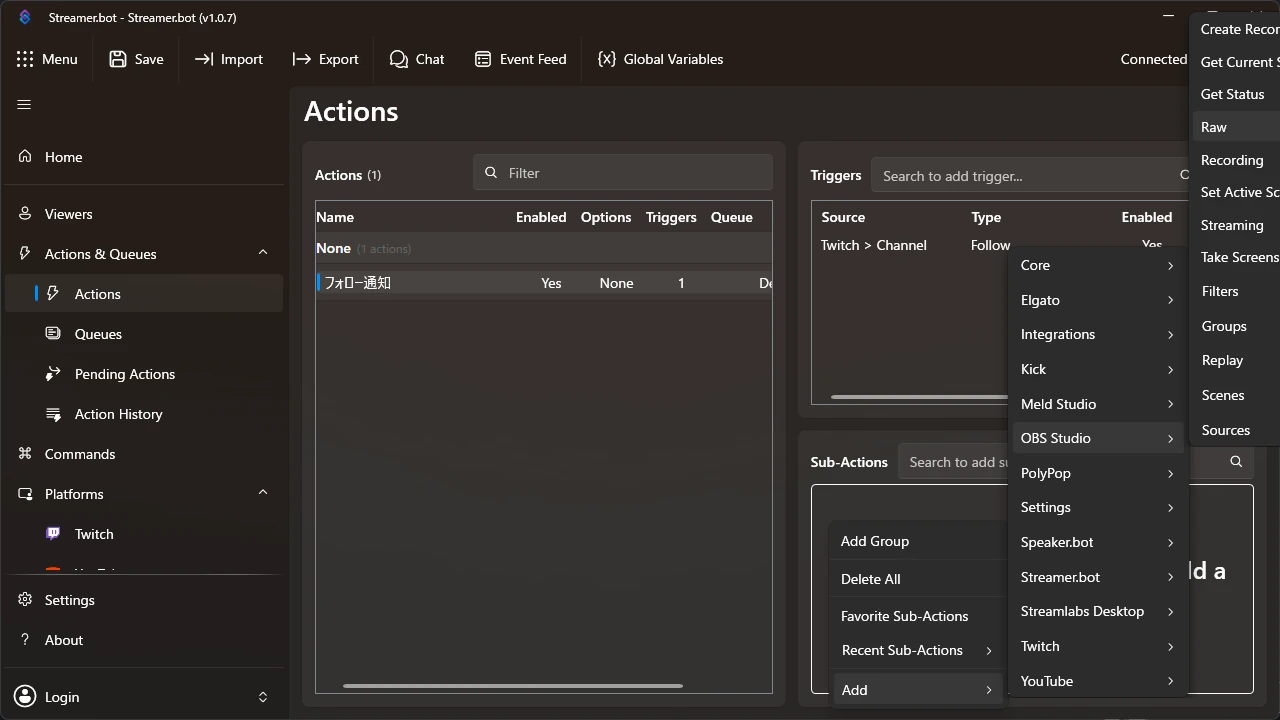
- Choose the connected OBS in Connection, and paste the following line into the “Raw” field
{"requestType":"TriggerHotkeyByName","requestData":{"hotkeyName":"PASTE_THE_COPIED_NAME_HERE"}} - Replace
PASTE_THE_COPIED_NAME_HEREwith the name you copied in step 4, then press “Ok”
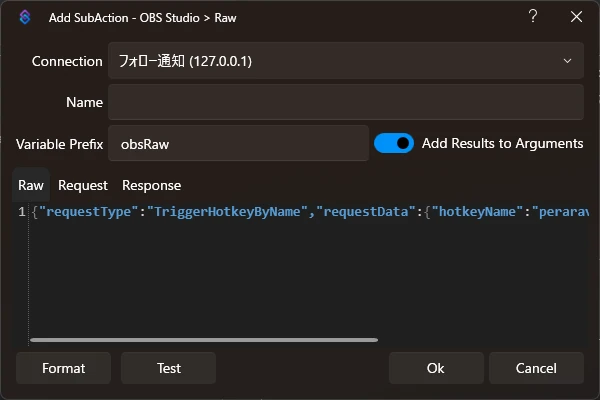
As it stands, the expression switches before the follow notification appears, so delay the switch.
- Right-click an empty part of “Sub-Actions”, and choose “Add → Core → Delay”
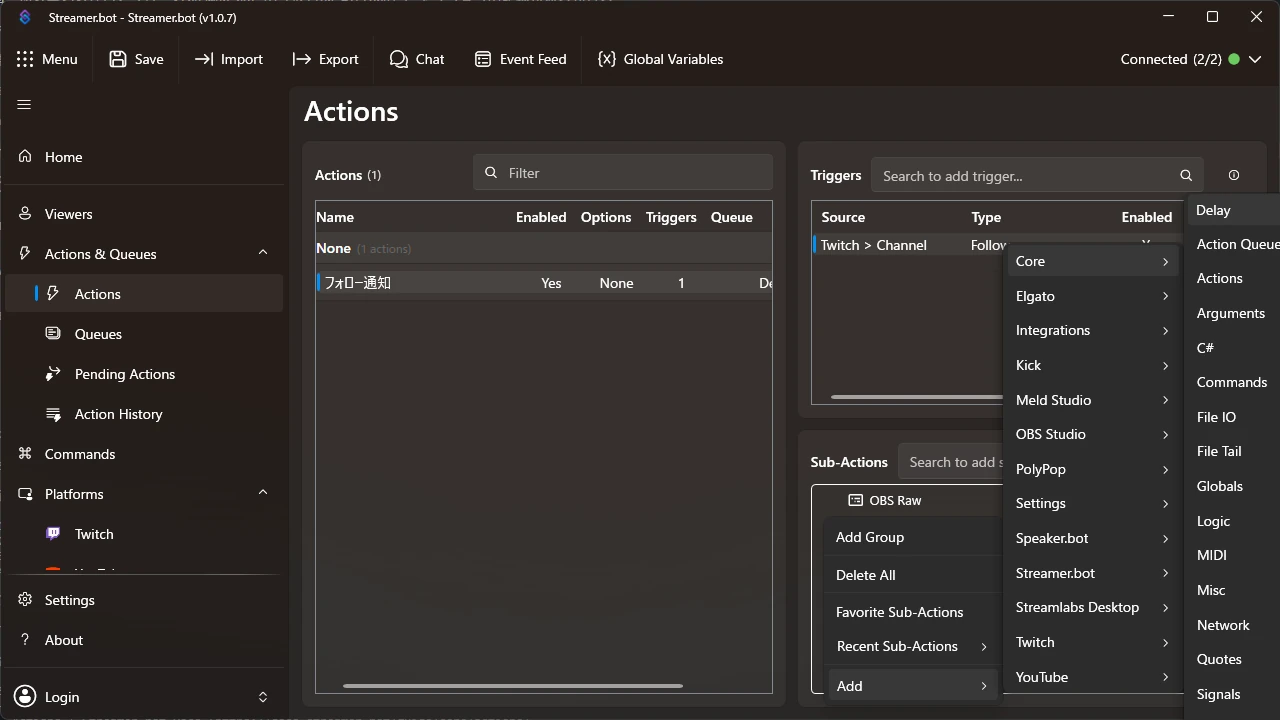
- Enter the wait time in milliseconds in Delay, then press “Ok”
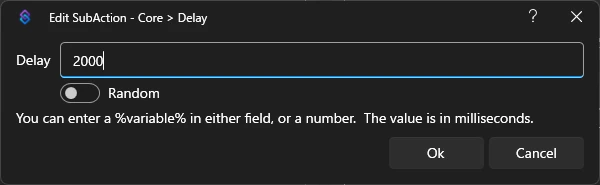
- Drag the “Delay” you added above “OBS Raw"
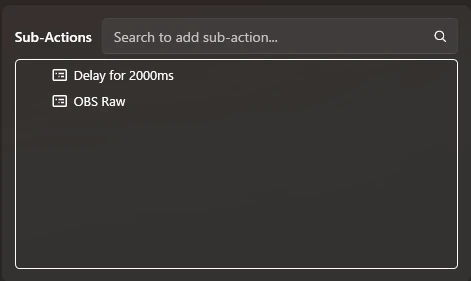
1000 and 2000 should work well. The gap also depends on your connection, so it seems hard to match it exactly. Test it
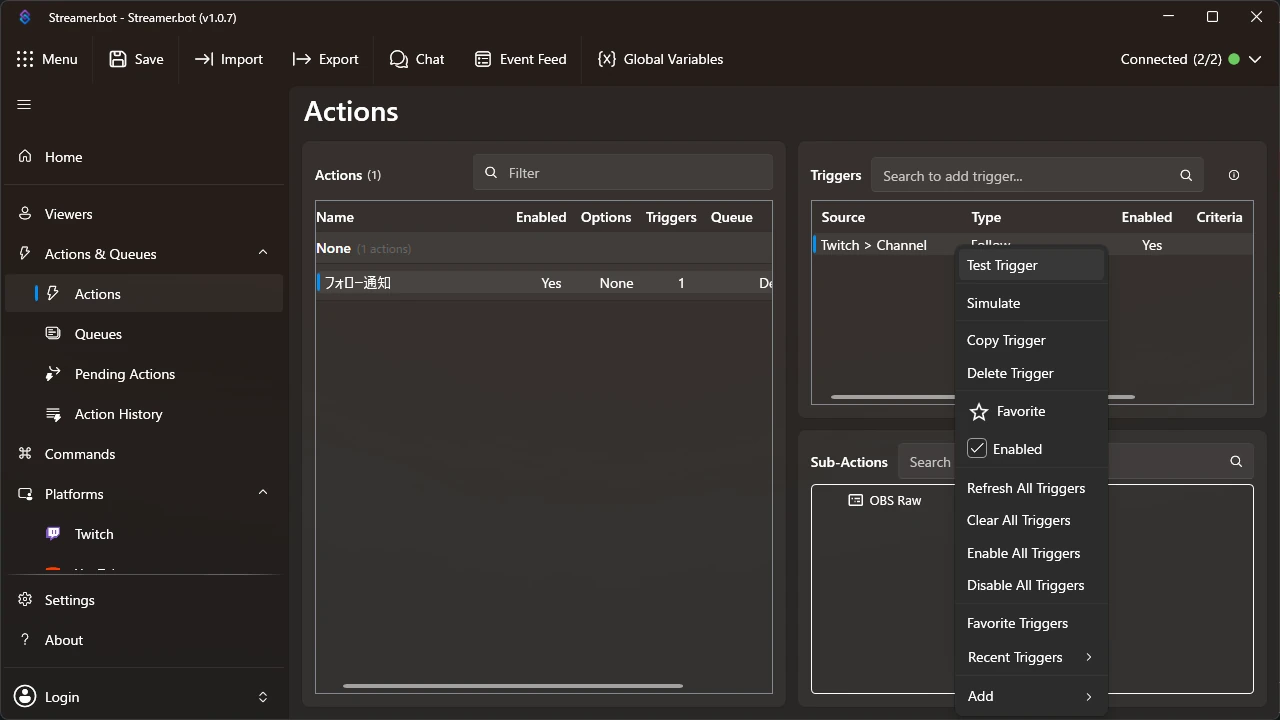
Right-click the “Follow” row you added and choose “Test Trigger”. If the avatar’s expression switches in OBS, it’s working.
Keep Streamer.bot running while you stream
Streamer.bot is what receives the follow notifications, so it needs to be running while you stream. If it’s closed, the expression won’t switch when someone follows you. Once it’s set up, it connects to OBS and Twitch as soon as you start it.
Summary
- Set the “Hold mode” of the expression for follow notifications to “For a set time”. We recommend matching the time to how long the follow notification is shown
- Enable the OBS WebSocket server before connecting Streamer.bot
- In a Streamer.bot action, combine the Follow trigger with OBS Studio’s Raw
- The expression switches before the follow notification appears, so add a “Delay”
- Test with “Test Trigger”. A Twitch test alert won’t switch the expression
- Keep Streamer.bot running while you stream
Contact
Bug reports & Feature requests
Use the form for "it doesn't work" or "I wish it could…". Easiest channel for me to triage.
Contact form ▶
Business & Other inquiries
For work requests and other inquiries, please email me.
Email ▶
Feedback & Cheers
An anonymous one-liner channel. Even just "I'm using it" makes me happy.
Marshmallow ▶