Making a streaming avatar with Peraravatar+
26 min read
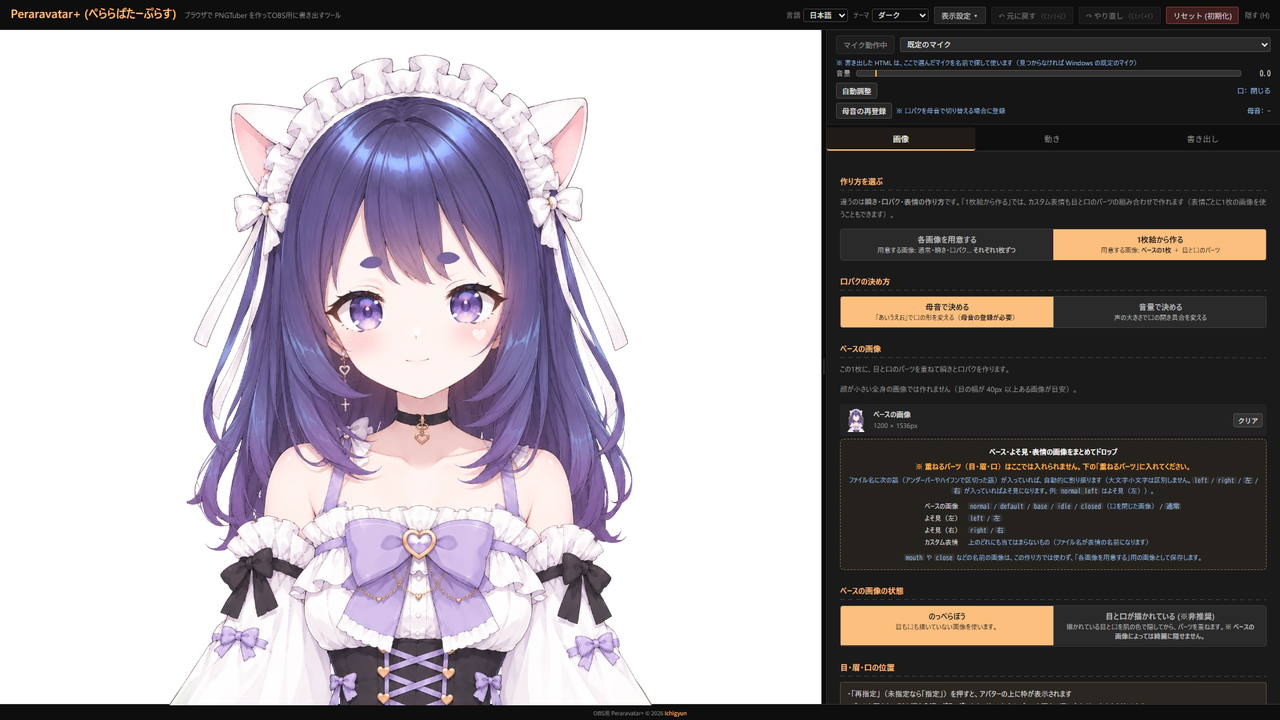
Using an AI-generated image, we will build a streaming avatar in Peraravatar+.
Have you played MECCHA CHAMELEON? To hide in that game, you pick up the colors around you with the eyedropper and paint them onto yourself. I bet plenty of you sharpened your “painting to blend in” skills there. Surely nobody just hid in a dark corner and painted themselves black, right? That exact skill is what you need to touch up an AI-generated image so the edits blend in naturally. Learn the bare basics of a drawing app, and you already have what it takes to build your own avatar with AI plus a little retouching. If you have not played the game, do not give up — give it a try anyway. Unrelated, but the game made me more observant, and I now miss fewer items in other games. Thank you, MECCHA CHAMELEON.
 MECCHA CHAMELEON Paint yourself to blend in! "Meccha Chameleon" is a new-sensation hide-and-seek game where you paint your white body to mimic the stage.
Now, on to the main topic.
Overview
Peraravatar+ has two ways to build an avatar.
| How to build | Images you need | Good for |
|---|---|---|
| Build from one image | One base image without eyes and mouth, plus eye and mouth parts | People who want to use few images. Decorations such as glasses or cat ears also work |
| Prepare each image | One image each for normal, blinking and every mouth shape | People who want to draw the whole face differently, not just the eyes and mouth |
This note covers “Build from one image”.
With “Build from one image”, eye and mouth parts are layered on the base image to create blinking and lip sync. For the base image, a “blank face” with no eyes or mouth drawn is recommended.
- Generate a character
- Make the background transparent
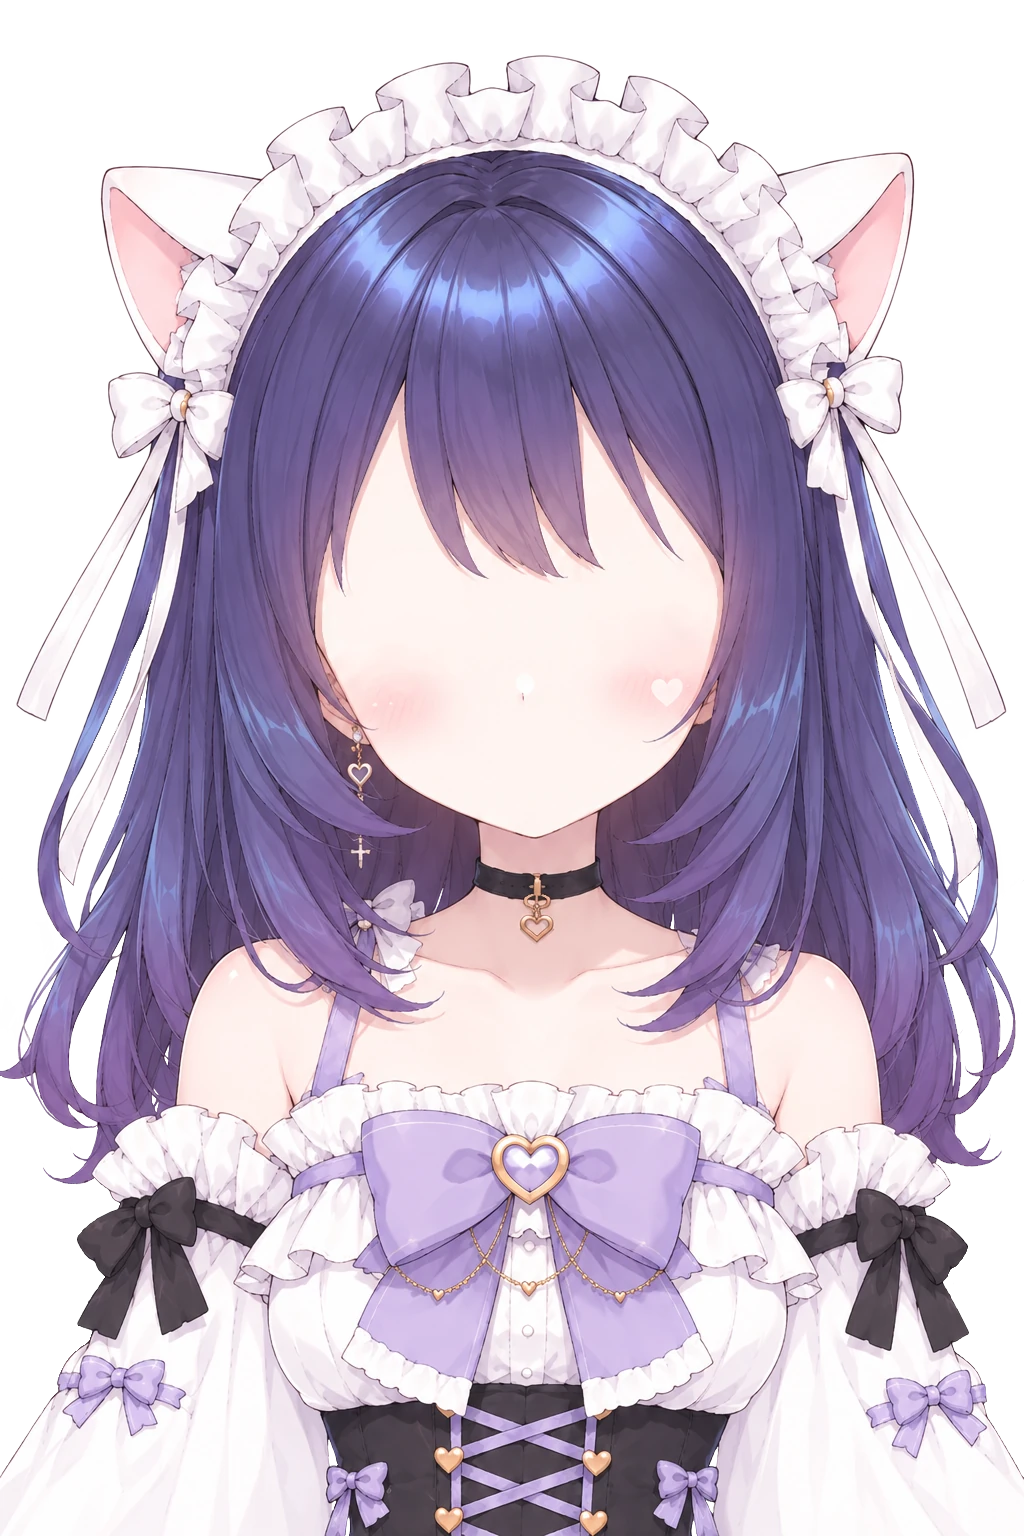
- Erase the eyes and mouth to make a blank face
- Load it into Peraravatar+ and get it moving
Everything up to the blank face is shared. After that, it splits three ways.
| What you do | Good for | |
|---|---|---|
| Basic | Choose the eyes and mouth from the presets | People who want to see it move first |
| Intermediate | Prepare your own eye and mouth parts | People who want eyes and a mouth that suit the character |
| Advanced | Make the chest and accessories bounce | People who want more motion |
I recommend getting it moving with Basic first, then swapping in your own eyes and mouth with Intermediate. The bouncing in Advanced can be added after either one.
What you need
- Something that generates images: ChatGPT, PixAI, SeaArt, ComfyUI on your own PC — anything works as long as it gives you an image
- A drawing app: CLIP STUDIO PAINT, FireAlpaca, ibisPaint, SAI — anything that handles layers and transparency and can open psd files
- Peraravatar+: just open it in your browser
How to generate on your own PC is covered here.
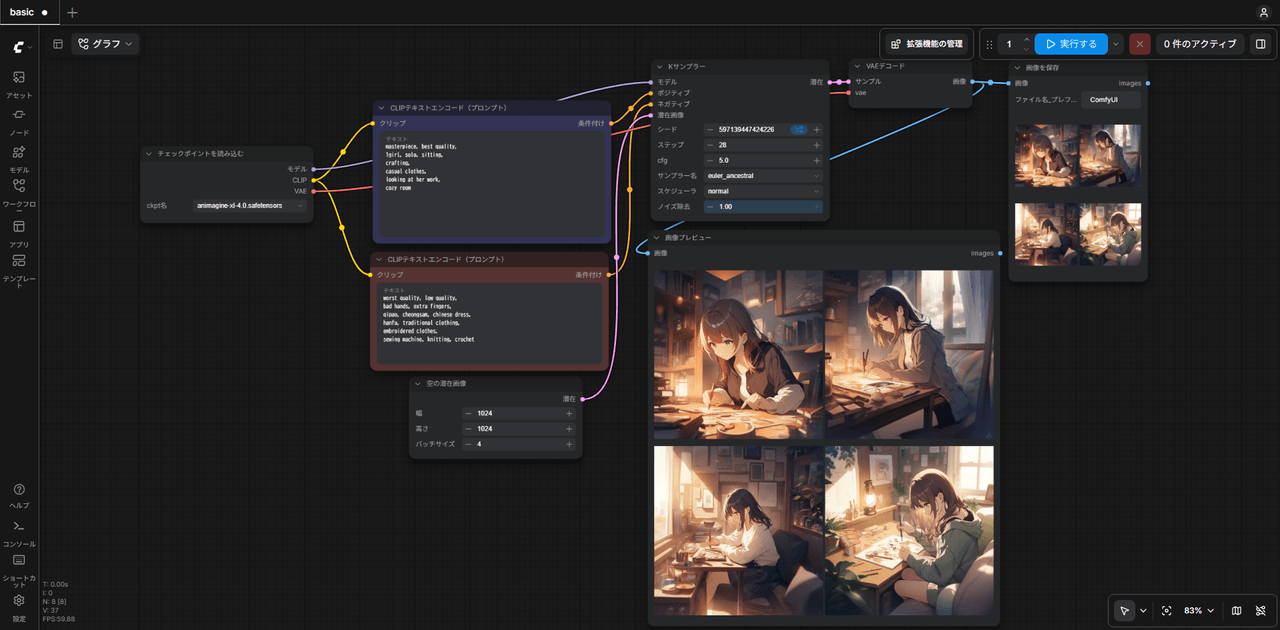 Setting up AI image generation on your own PC Getting ComfyUI running on Windows: two ways to install it, picking a model and checking its license, and how the nodes fit together.
The base image
| Item | Guideline |
|---|---|
| Orientation | Portrait (2:3) |
| Size | 600 × 900 to 1080 × 1620px |
| Format | PNG or WebP with a transparent background |
| Face size | The eyes should be at least 40px wide. In a full-body image the face is too small, so aim for chest up |
| Face | No eyes or mouth drawn (a blank face) is recommended |
These are only guidelines — a square or slightly landscape image can also become an avatar. Just keep in mind that it may not display as cleanly.
Generate a character
Since the eyes and mouth will be swapped later, make an image that is facing forward with the face straight. You can still build an avatar if the face is tilted or turned, but you will need to adjust the left and right eyes and brows separately, which means more work.
| What to ask for | As a sentence | As tags | Why |
|---|---|---|---|
| Chest up | Show the character from the chest up | upper body | Makes the face large |
| Facing forward | Facing forward and looking at the viewer | looking at viewer, facing viewer, straight-on | Makes the parts easier to layer |
| Mouth closed | With the mouth closed | closed mouth | The closed mouth can be used as is |
| Plain background | On a plain white background | simple background, white background | Makes the background easier to remove |
- For tools you ask in sentences, like ChatGPT, use the “As a sentence” column. For tools that take tags, like PixAI or SeaArt, use the “As tags” column
- If you want as little hand-drawn fixing as possible, an anime-style, flat-shaded look makes the fixes a little easier
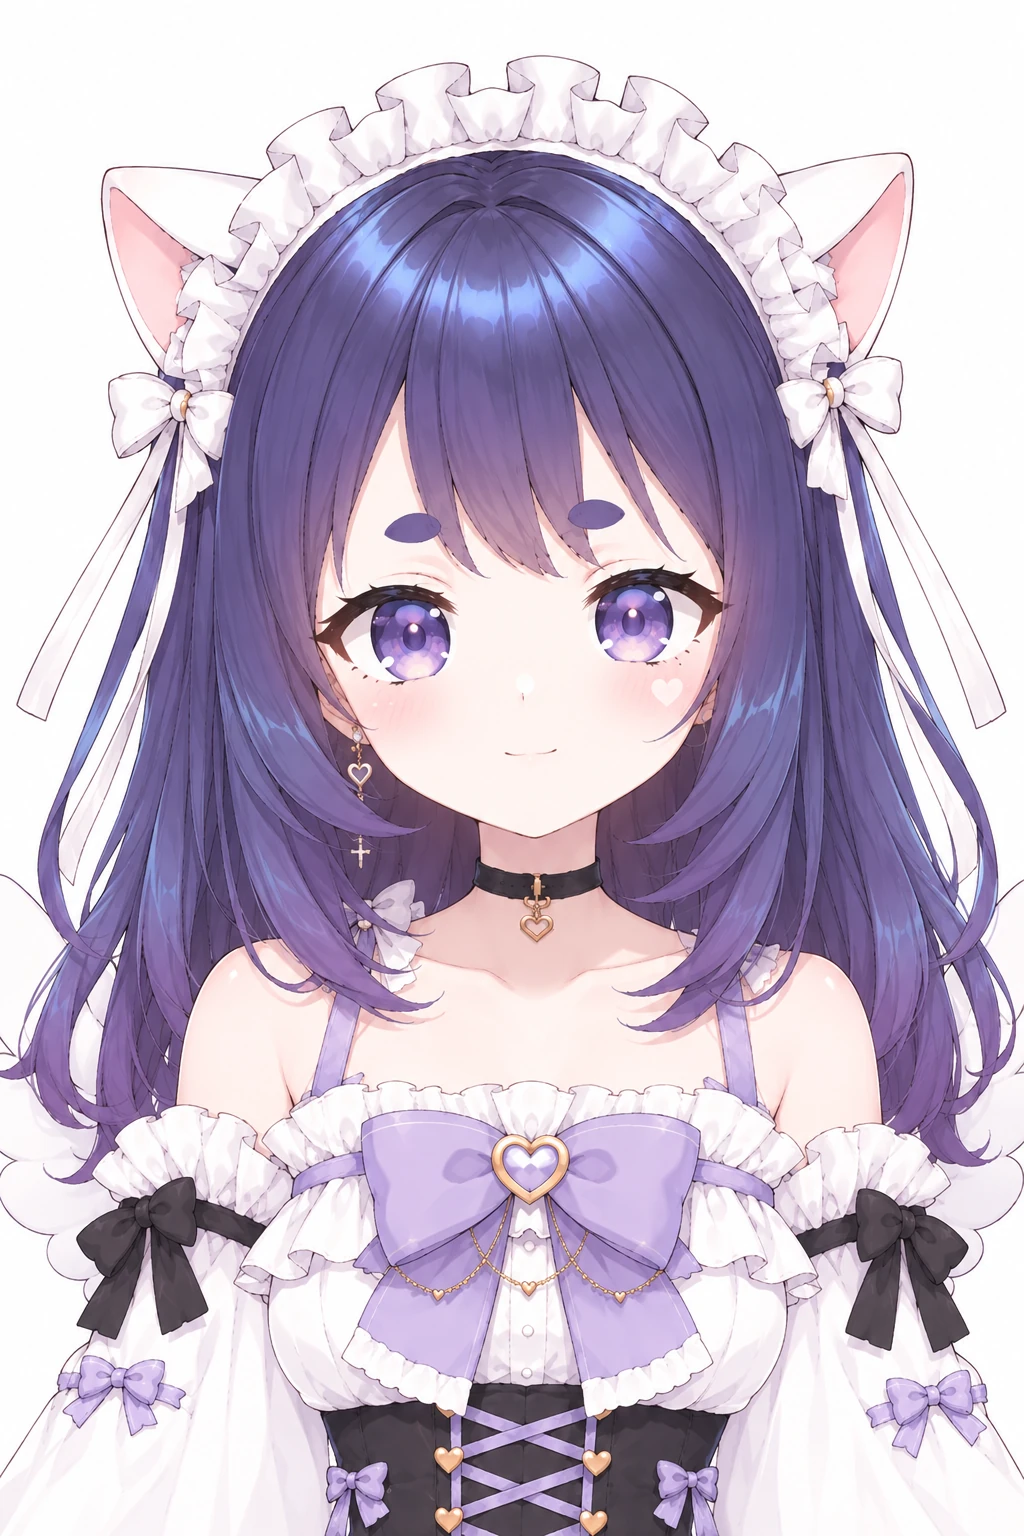
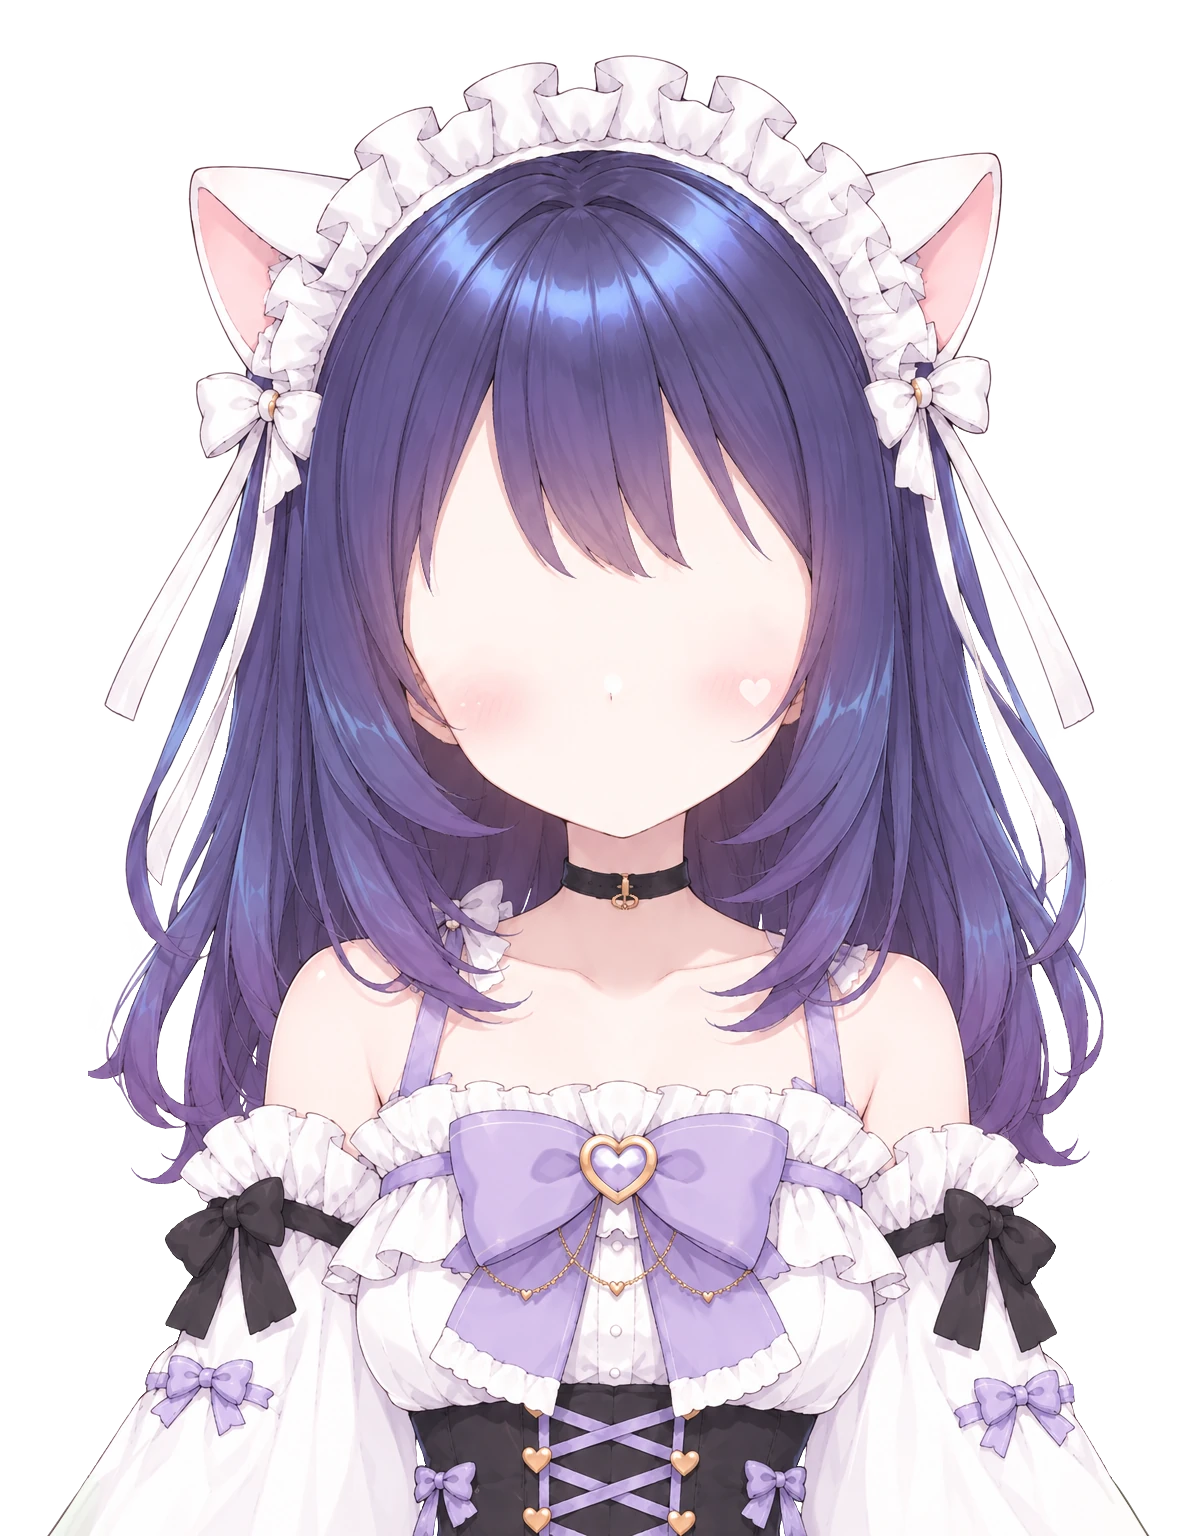
This note uses the following image, generated with ChatGPT, as the example.
Make the background transparent
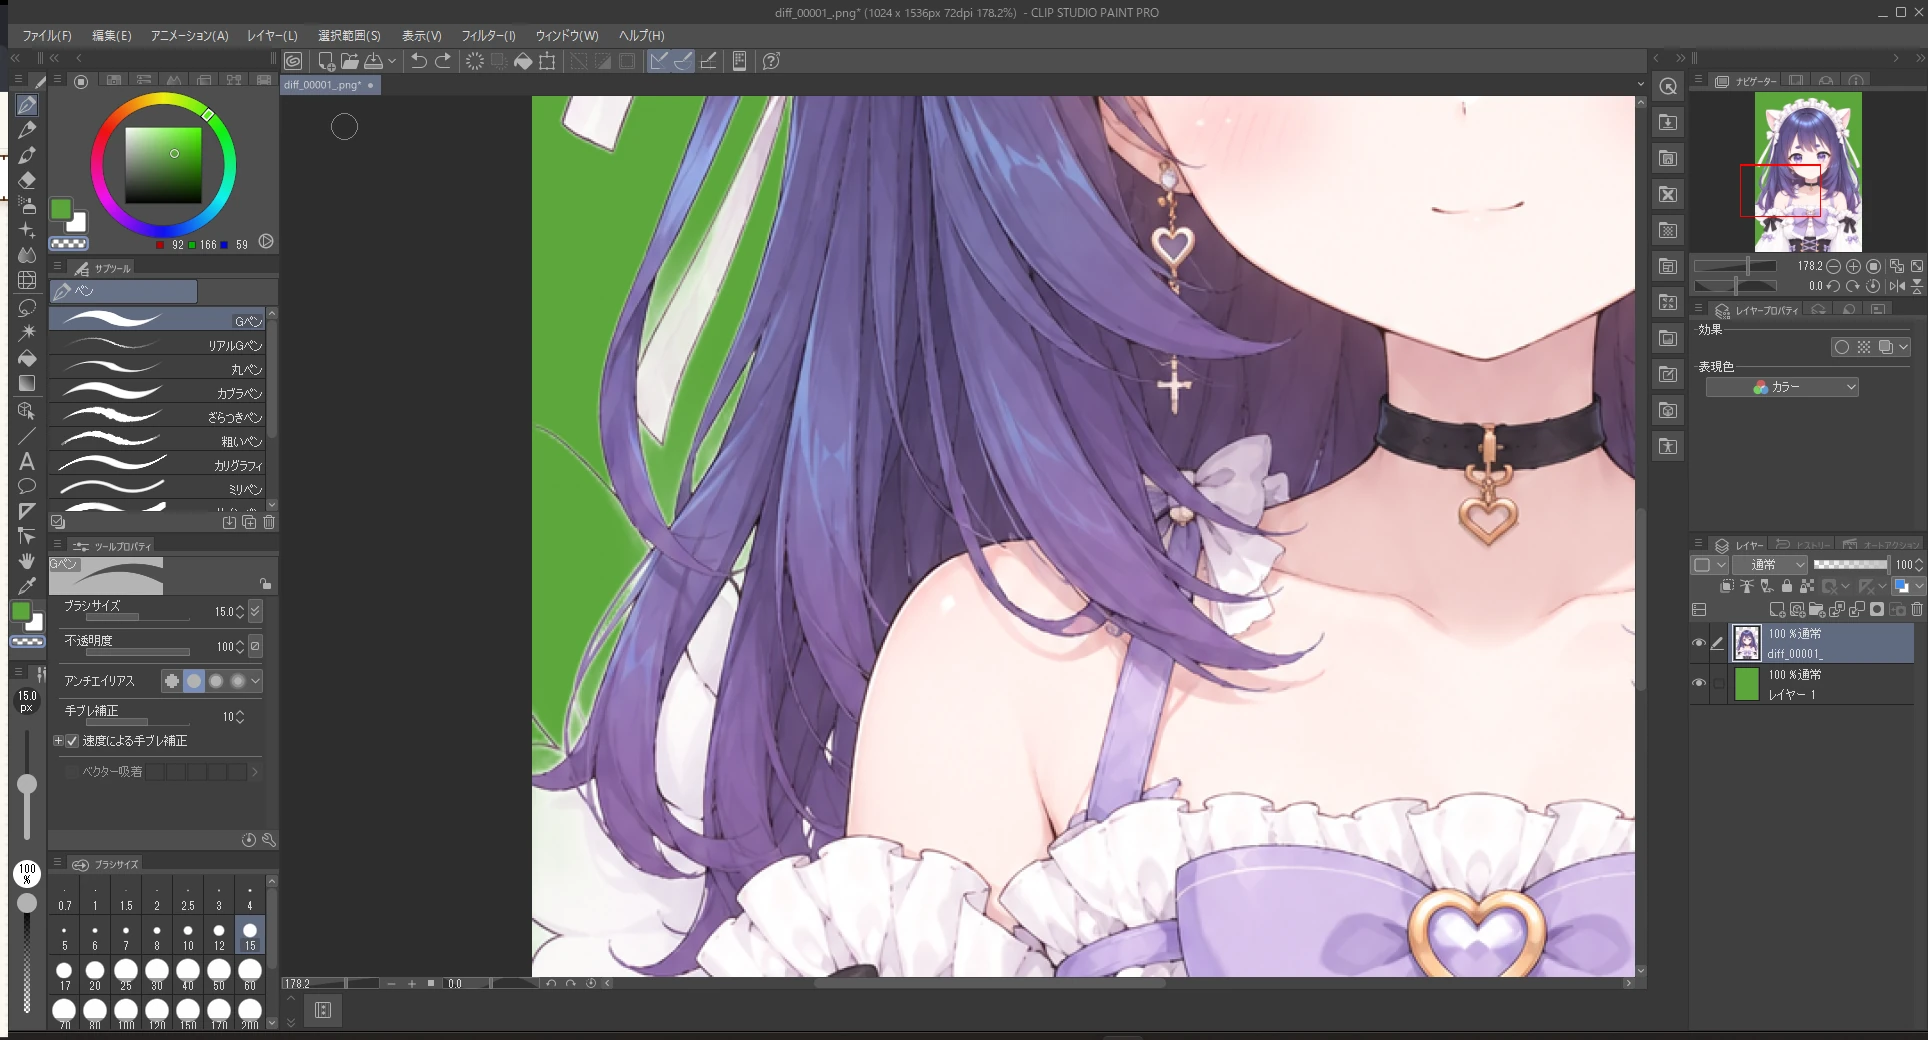
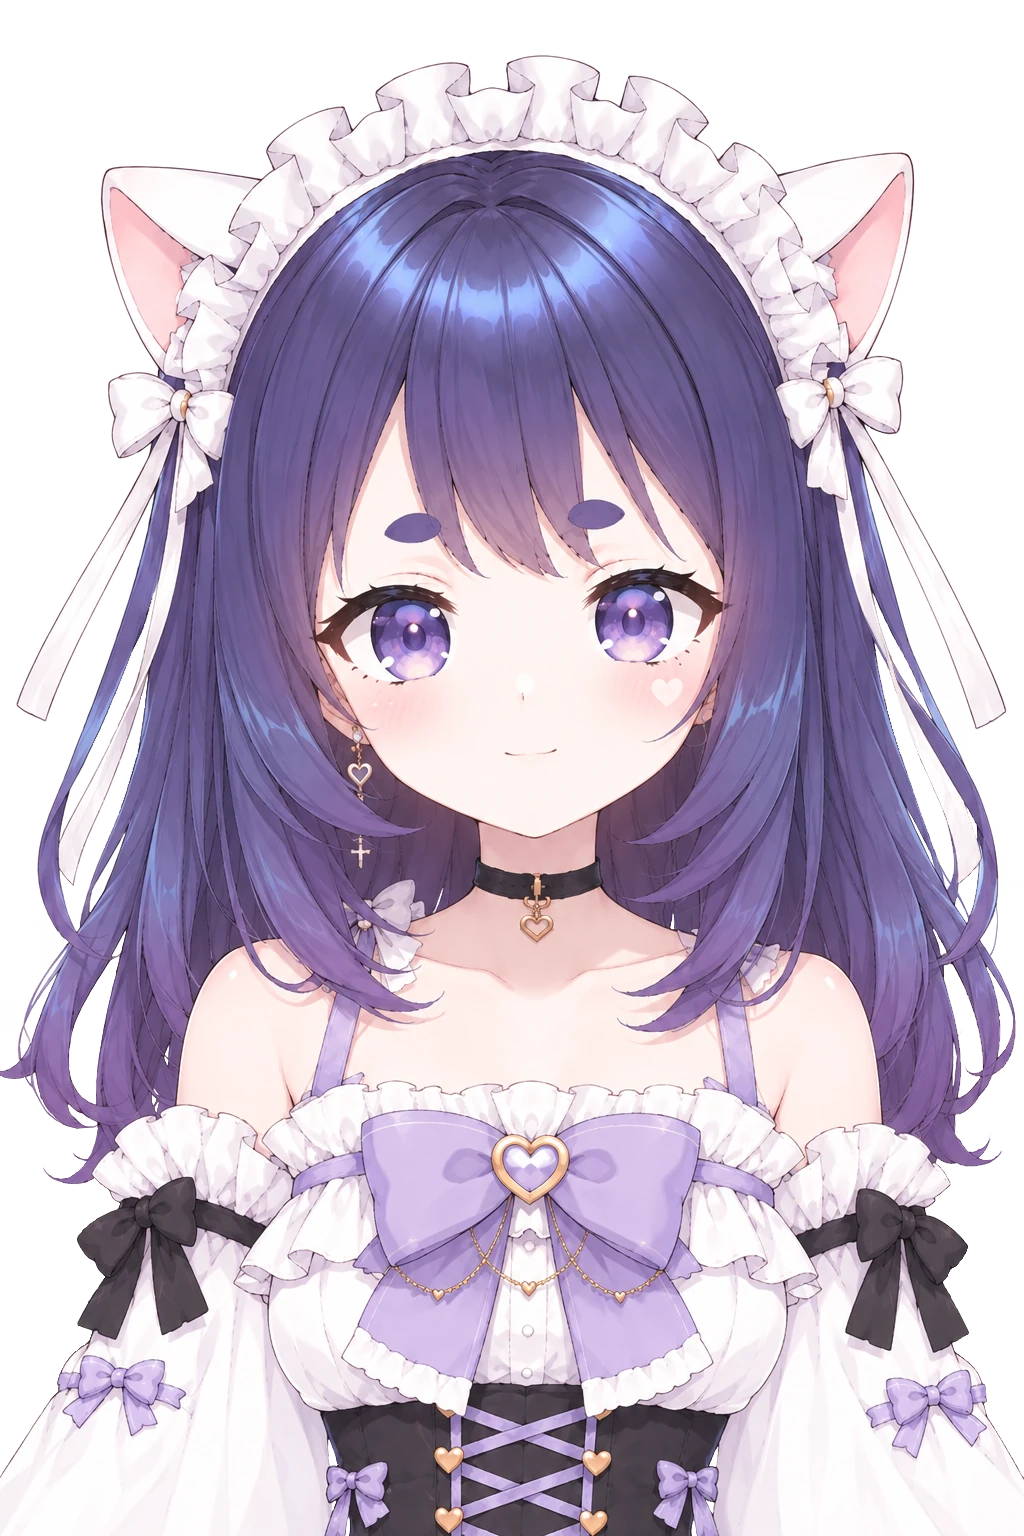
Remove the background of your image in a drawing app and export it as a PNG with a transparent background. A plain background makes this easier.
If you use ComfyUI, removing the background with BiRefNet saves a little work. Here is a workflow that removes the background. Drag the downloaded file onto the ComfyUI screen to open it.
Background removal workflow Loads an image, removes the background with BiRefNet and saves it as a transparent PNG. Drag it onto the ComfyUI screen to open it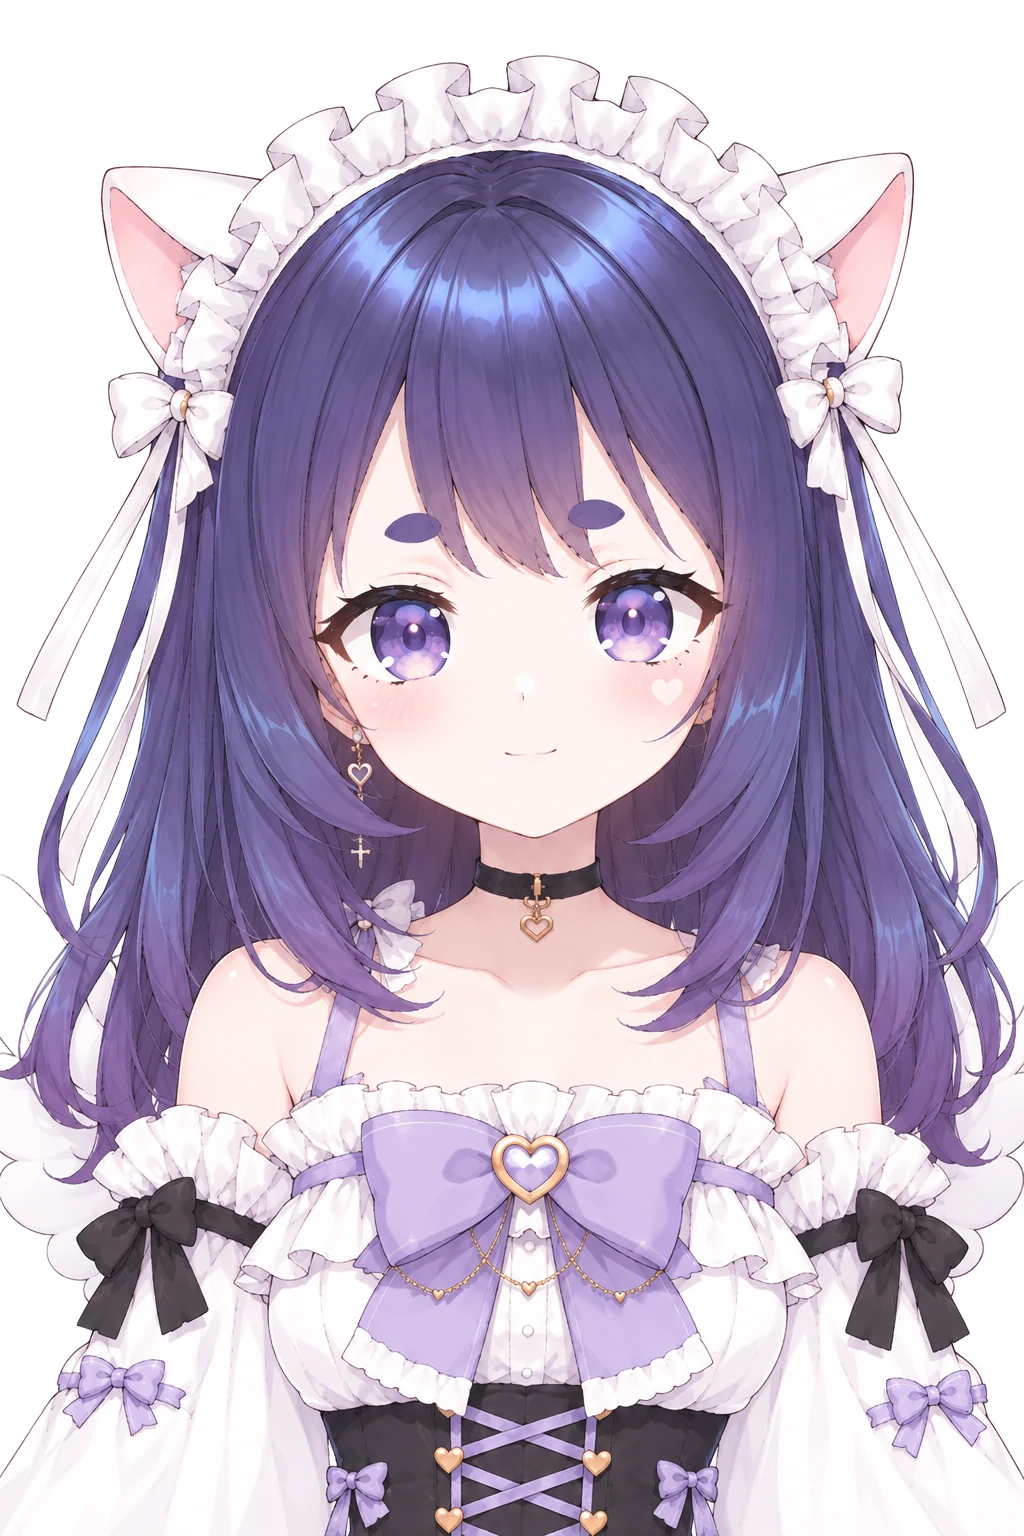
When fixing by hand, put a layer filled with a strong color whose hue is not used in the image underneath while you work. Spots you missed and spots you made too transparent become easy to see. Turning on anti-aliasing for the eraser makes the border between erased areas and lines look more natural.
Make a blank face
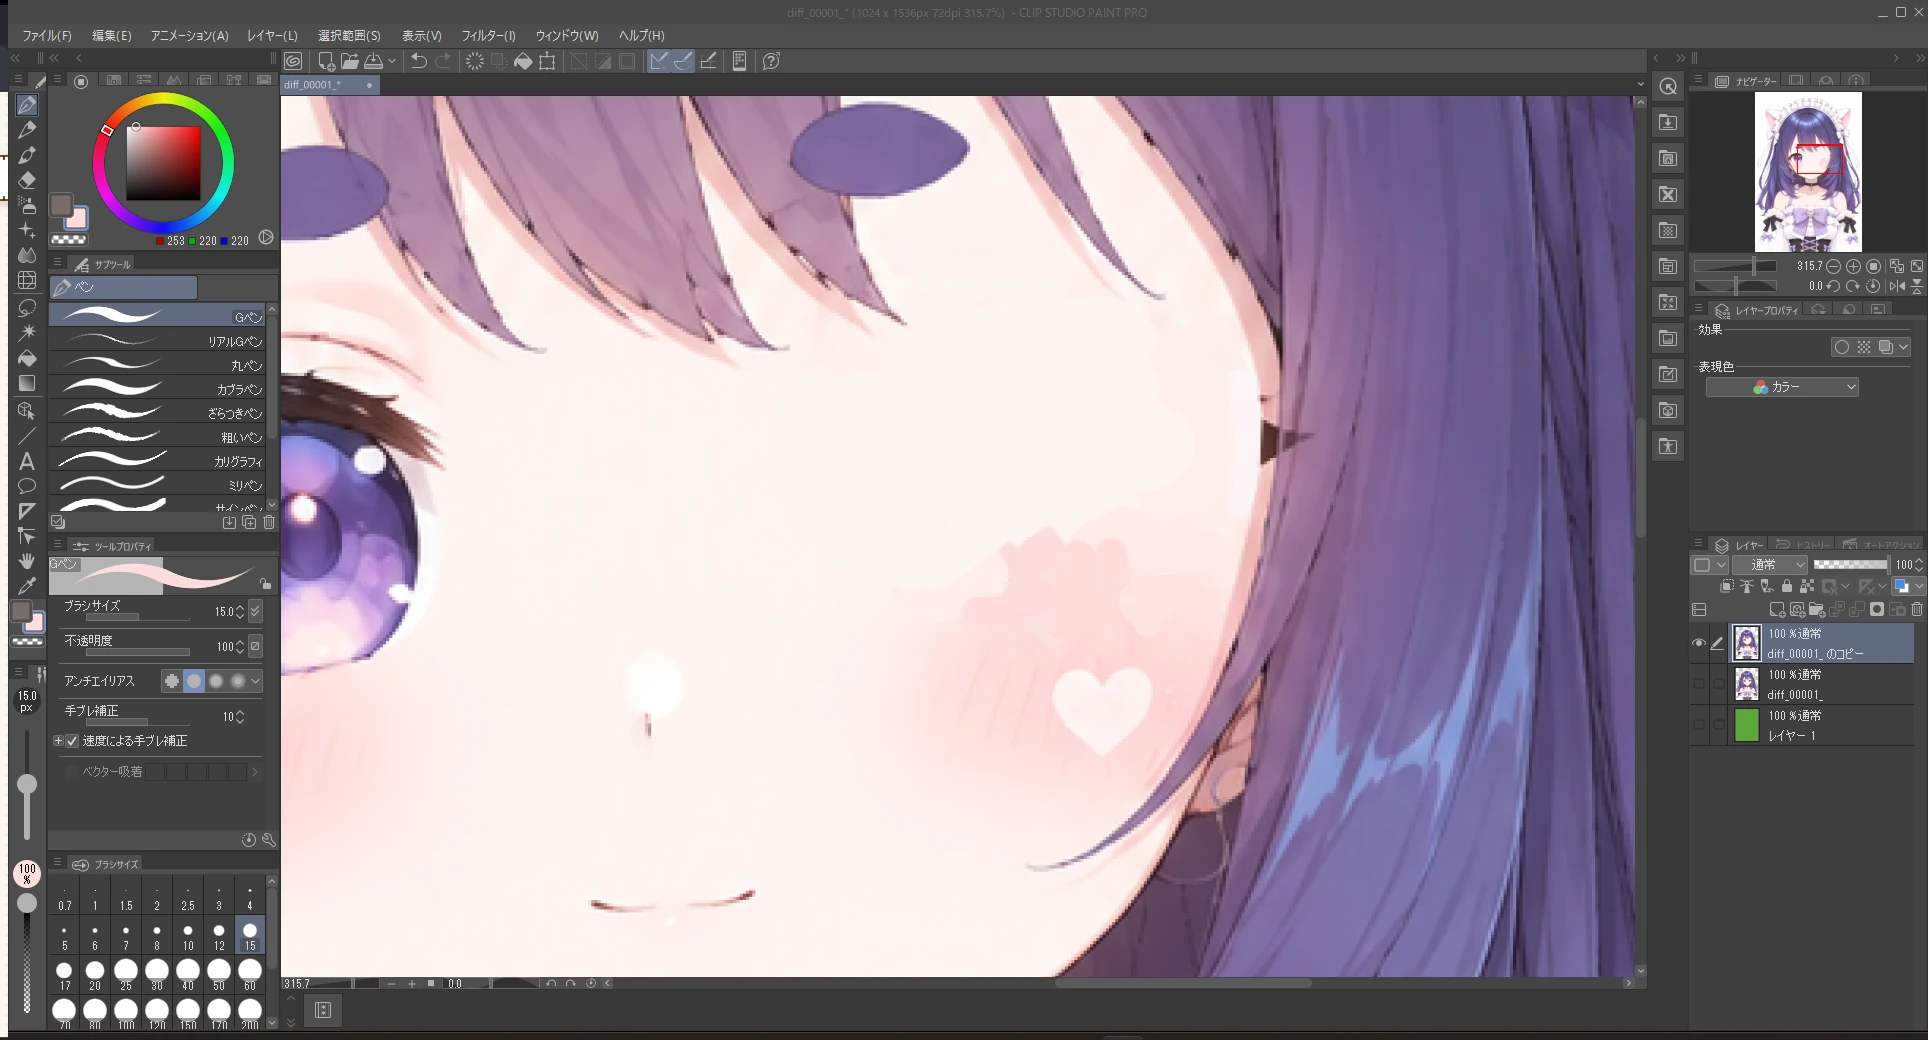
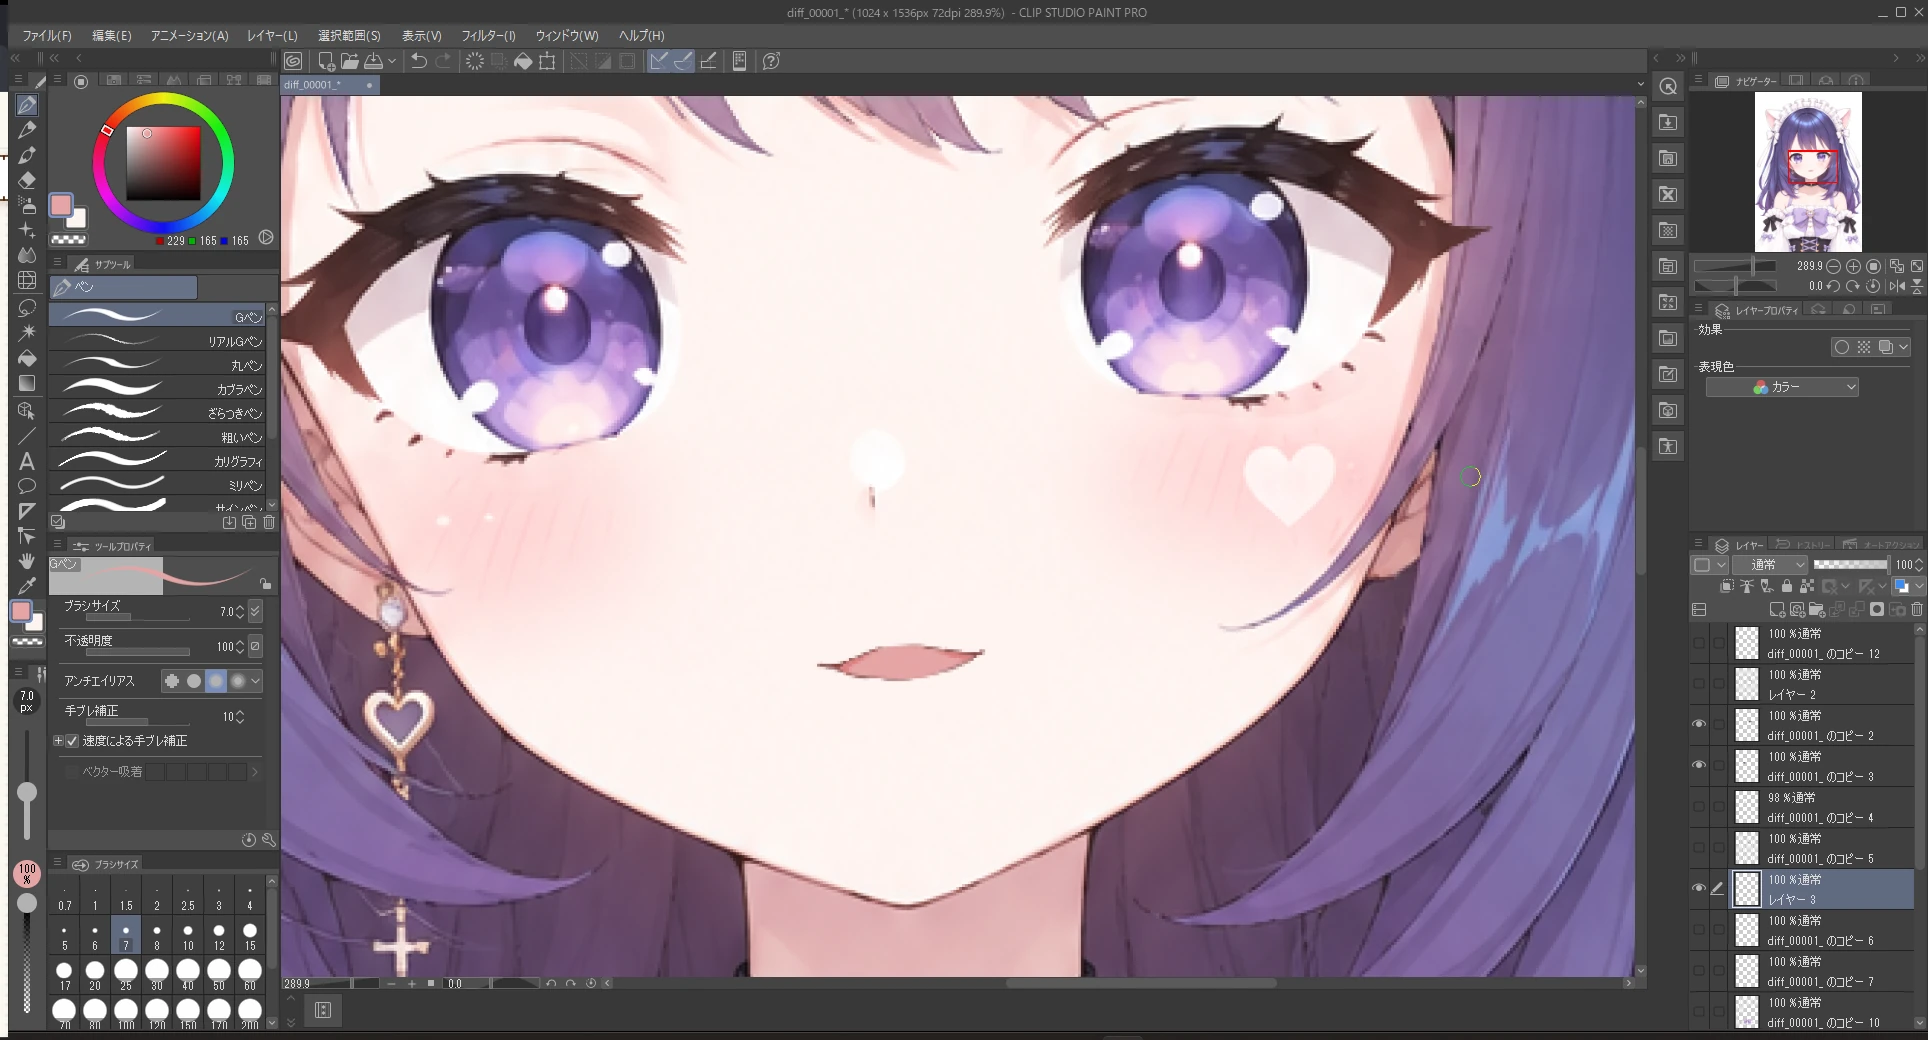
In your drawing app, paint over the eyes and mouth with the skin color. Keep the original image (Intermediate uses it to make the eye and mouth parts).
- Duplicate the original image and work on the copy
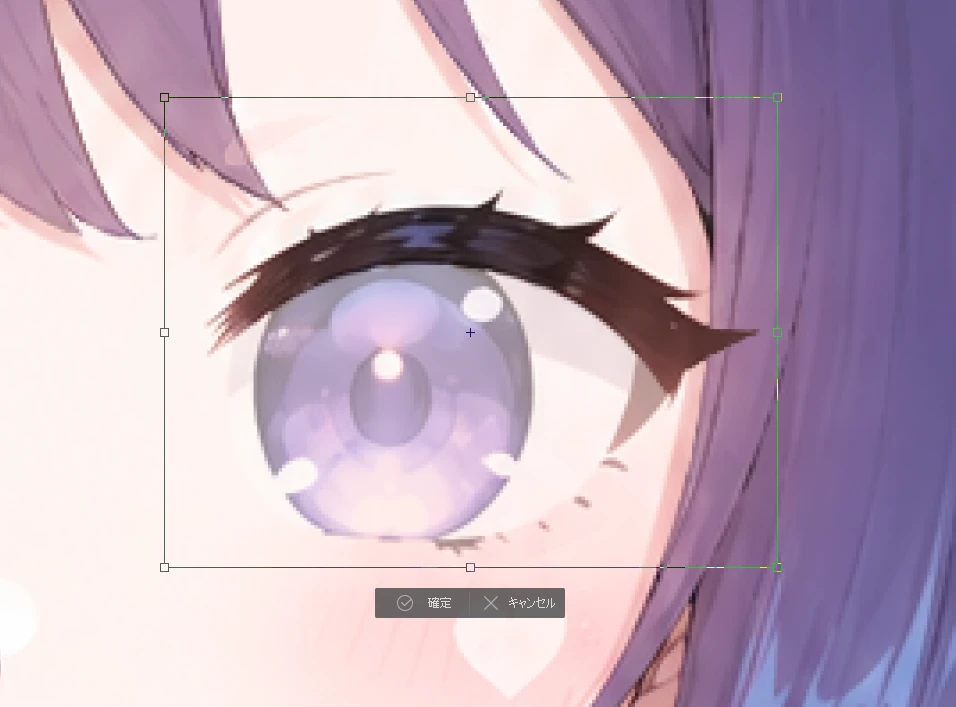
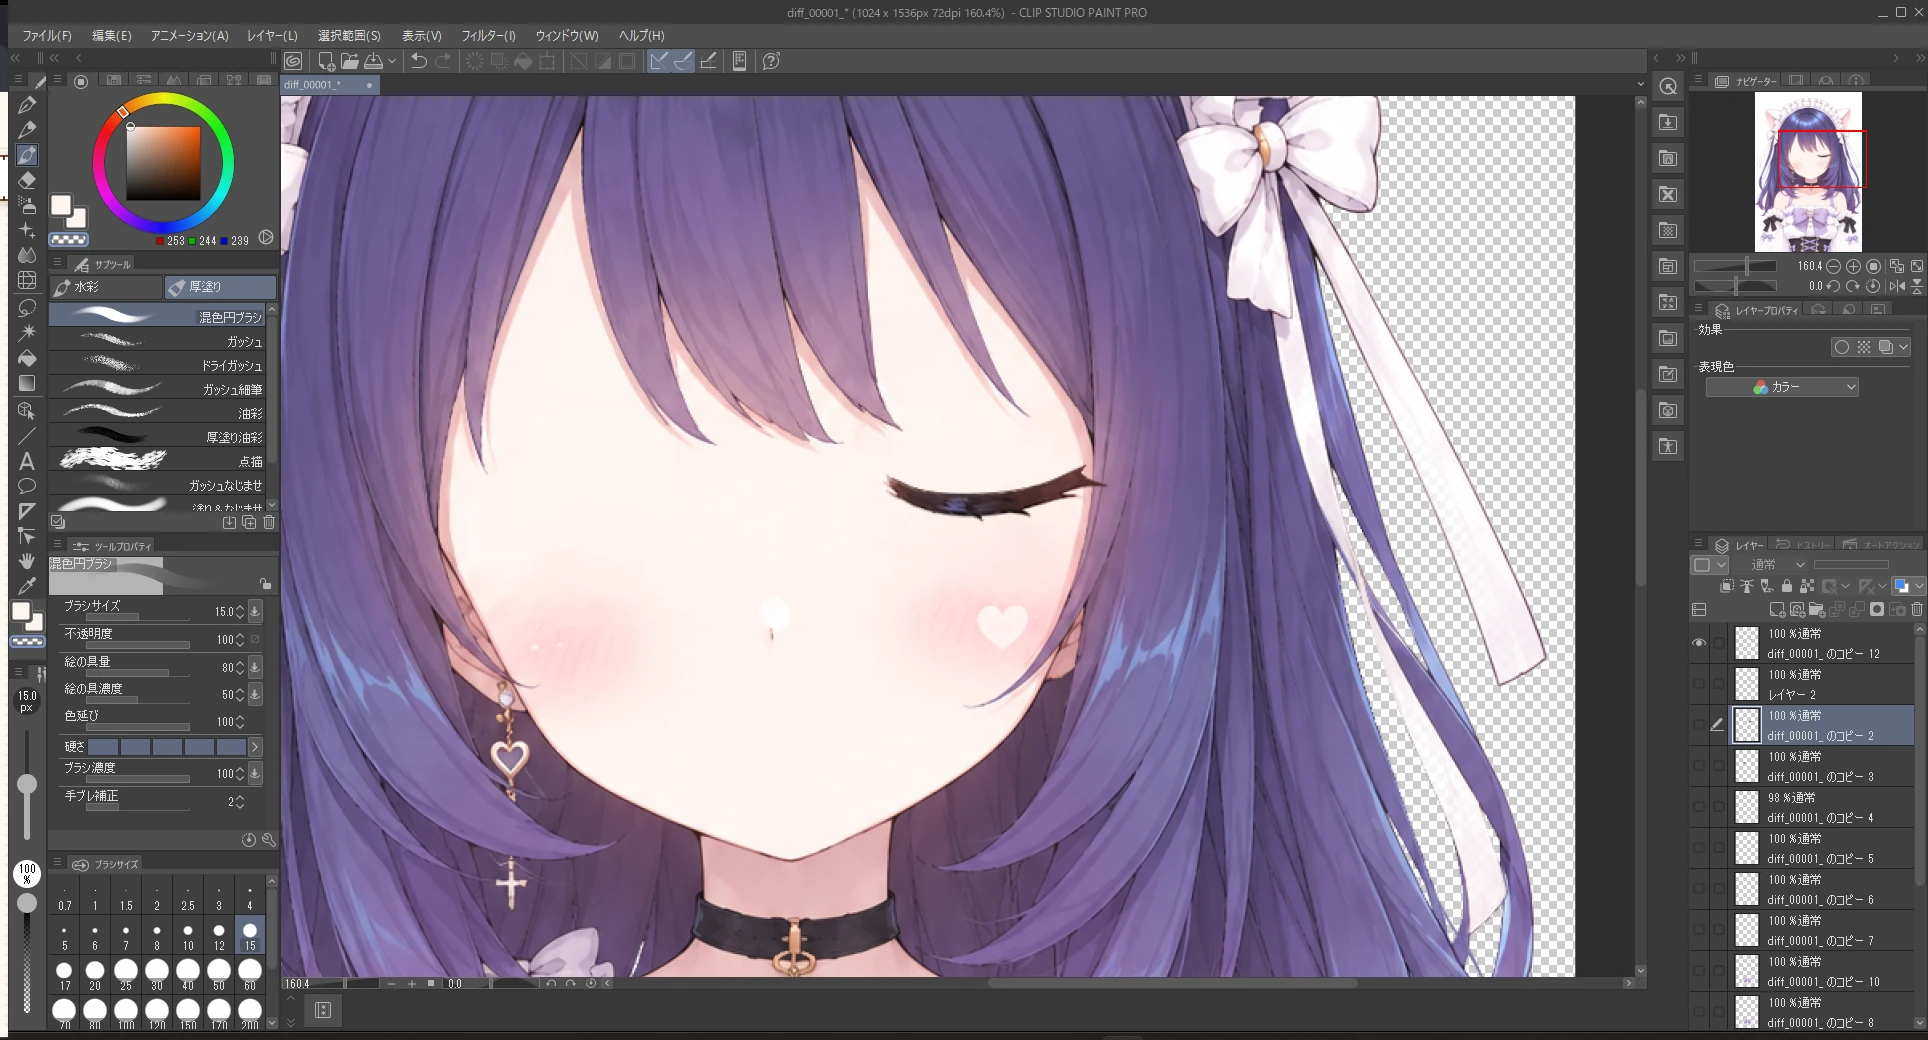
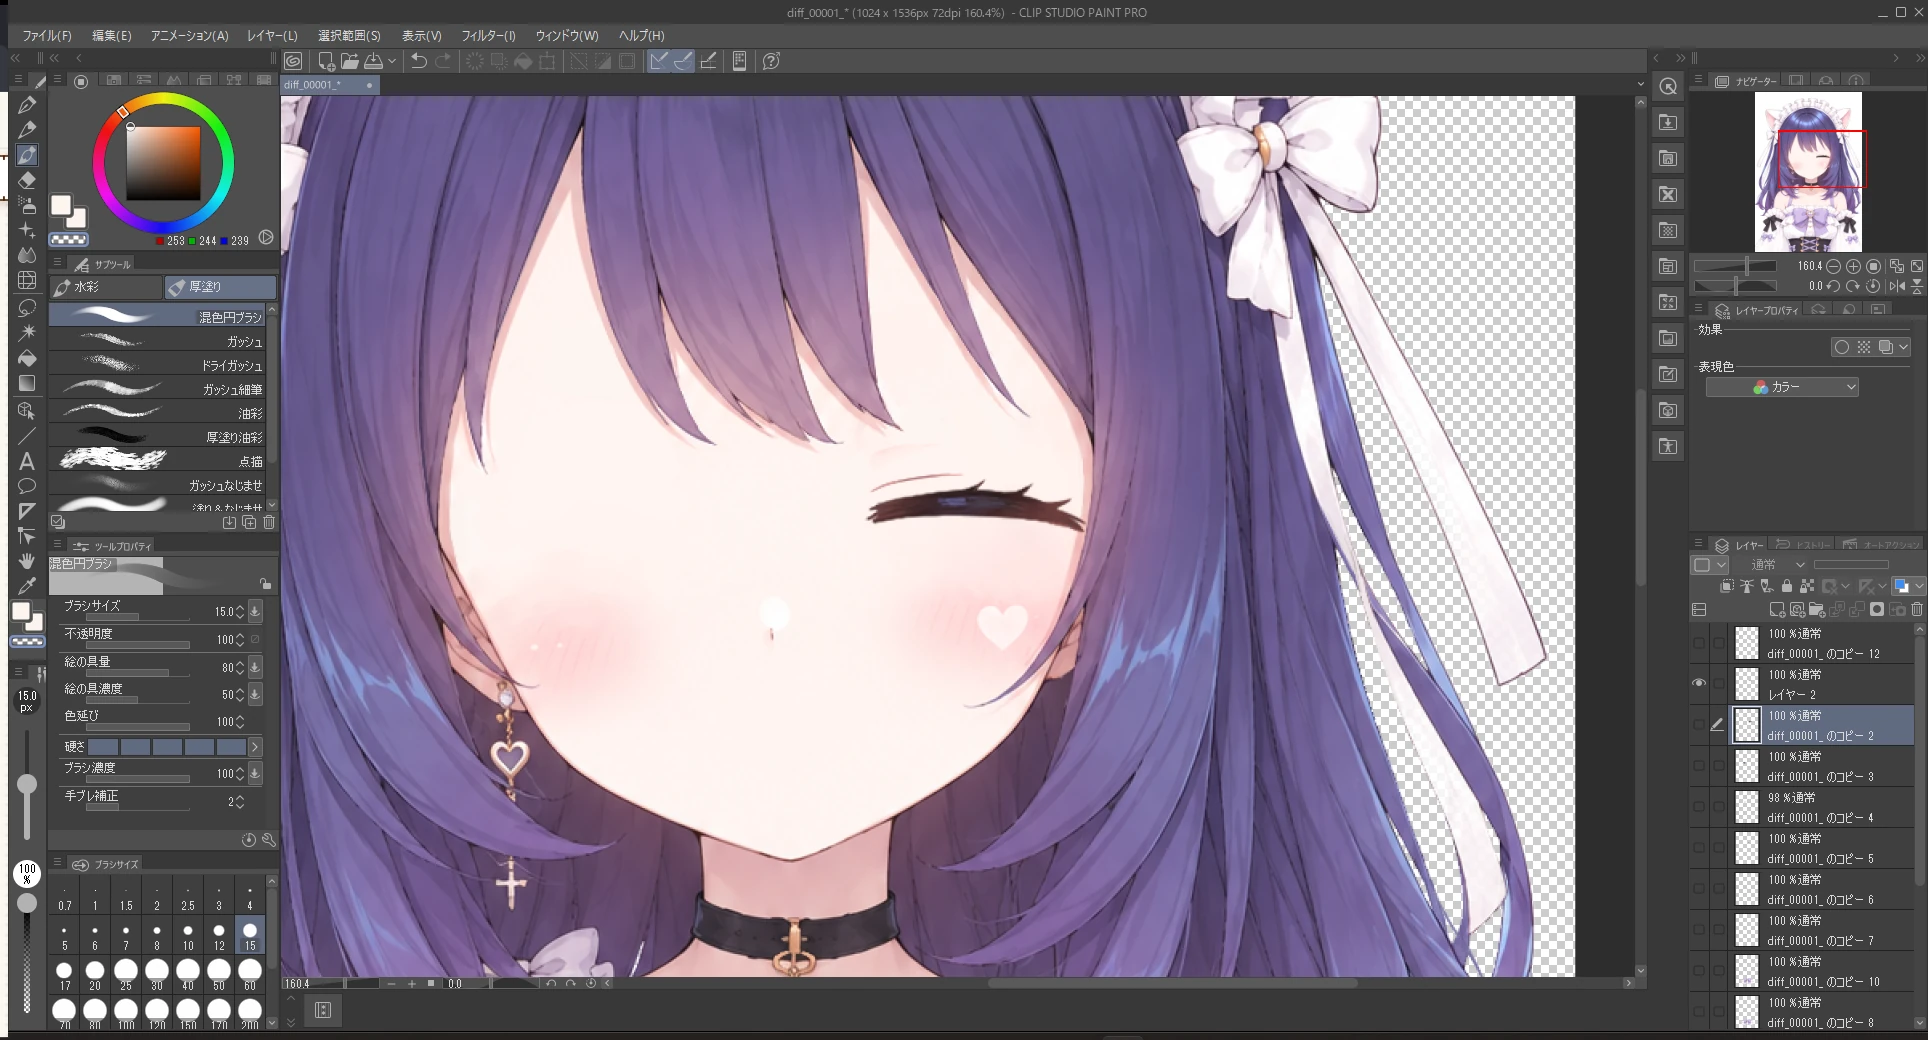
- Pick up the skin color around the eyes with the eyedropper and paint over the eyes and mouth
- Where hair falls over the eyes, pick up the hair color with the eyedropper and paint the same way
- Blur the painted areas so they blend in with their surroundings
- Export as PNG
Here is the process up to erasing one eye. Erase the other eye and the mouth the same way.
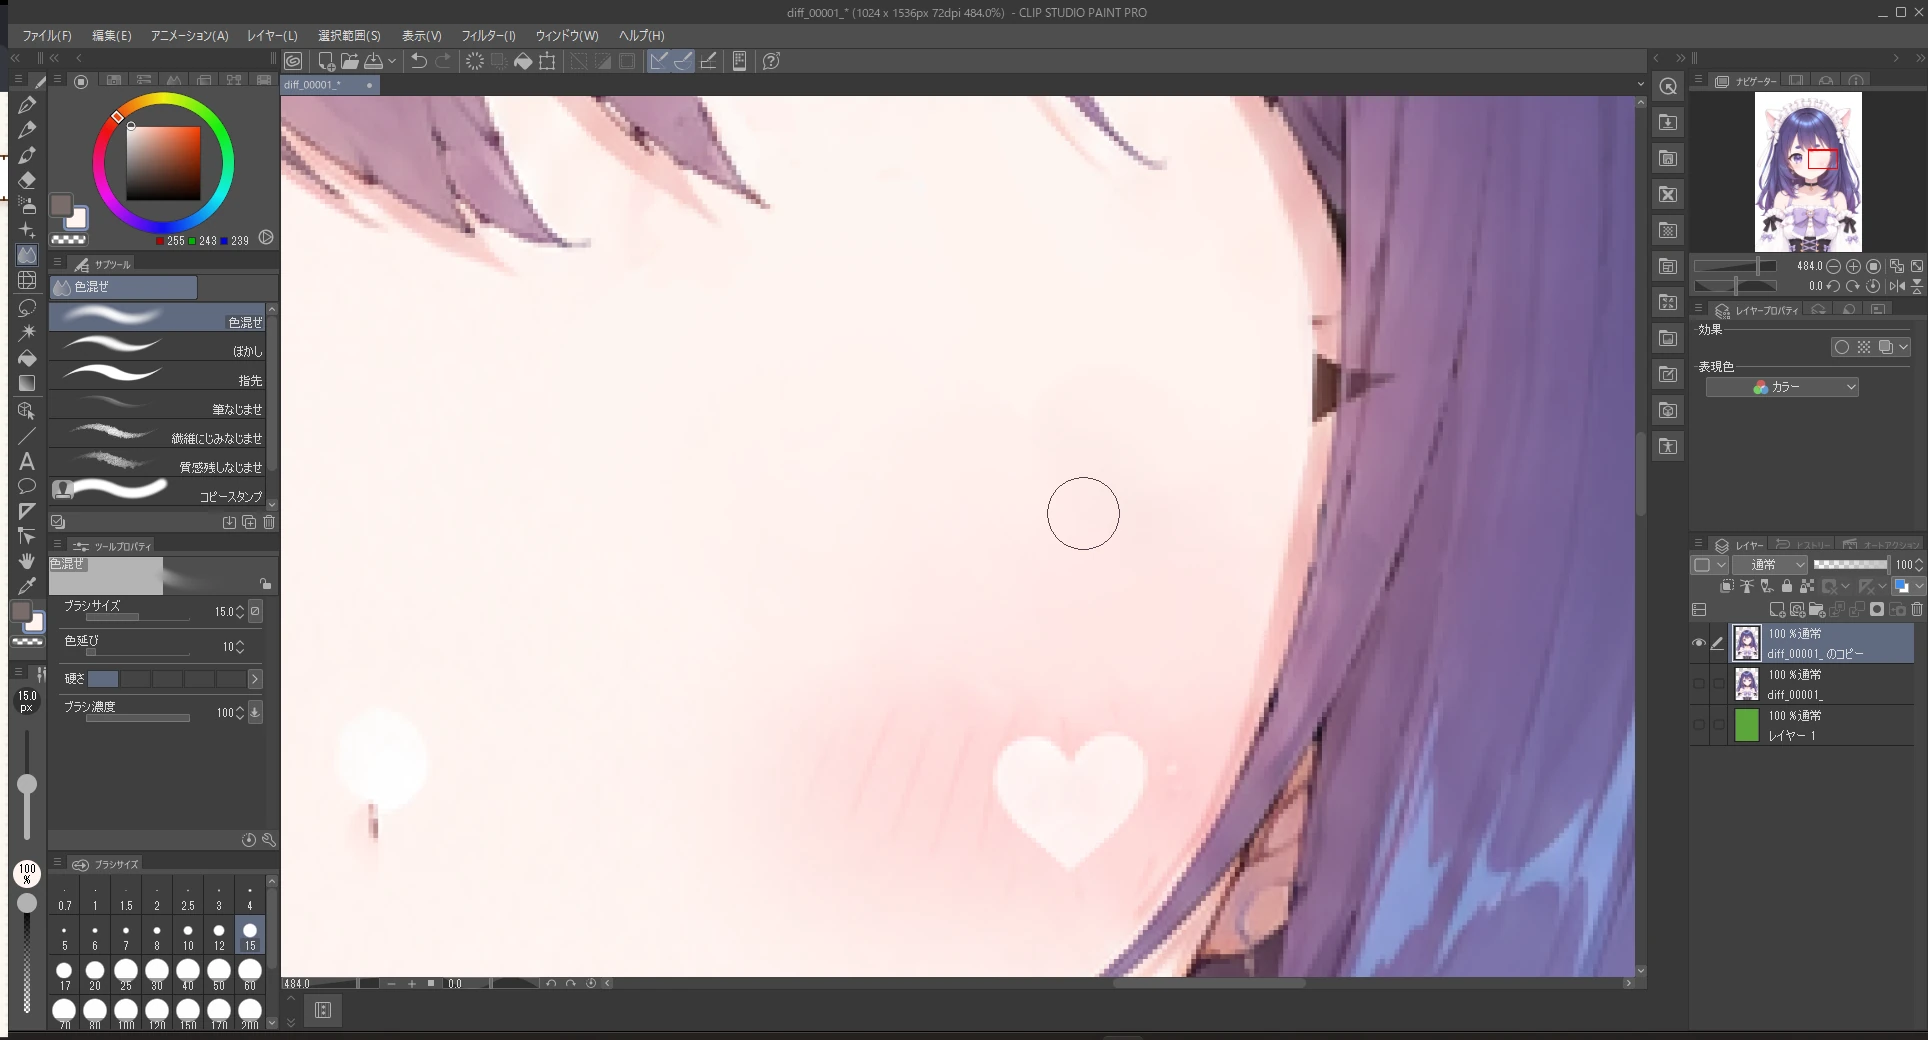
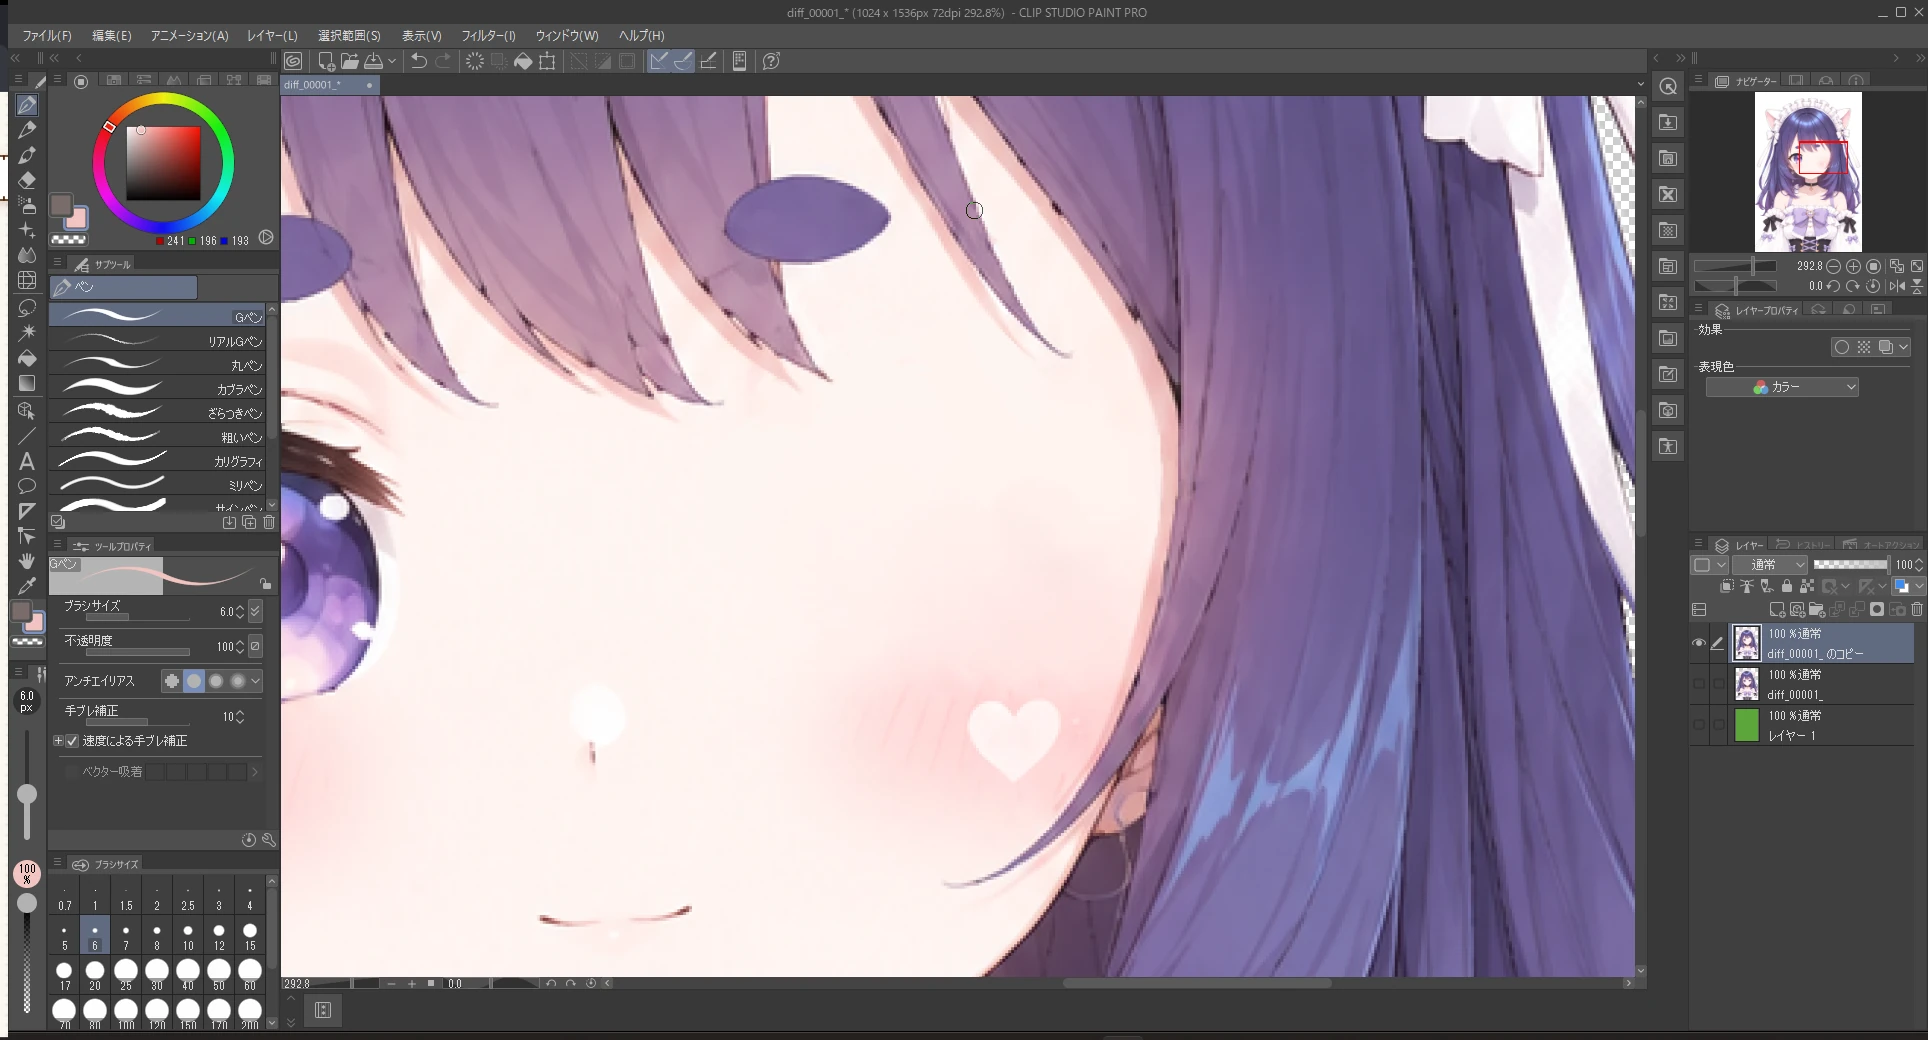
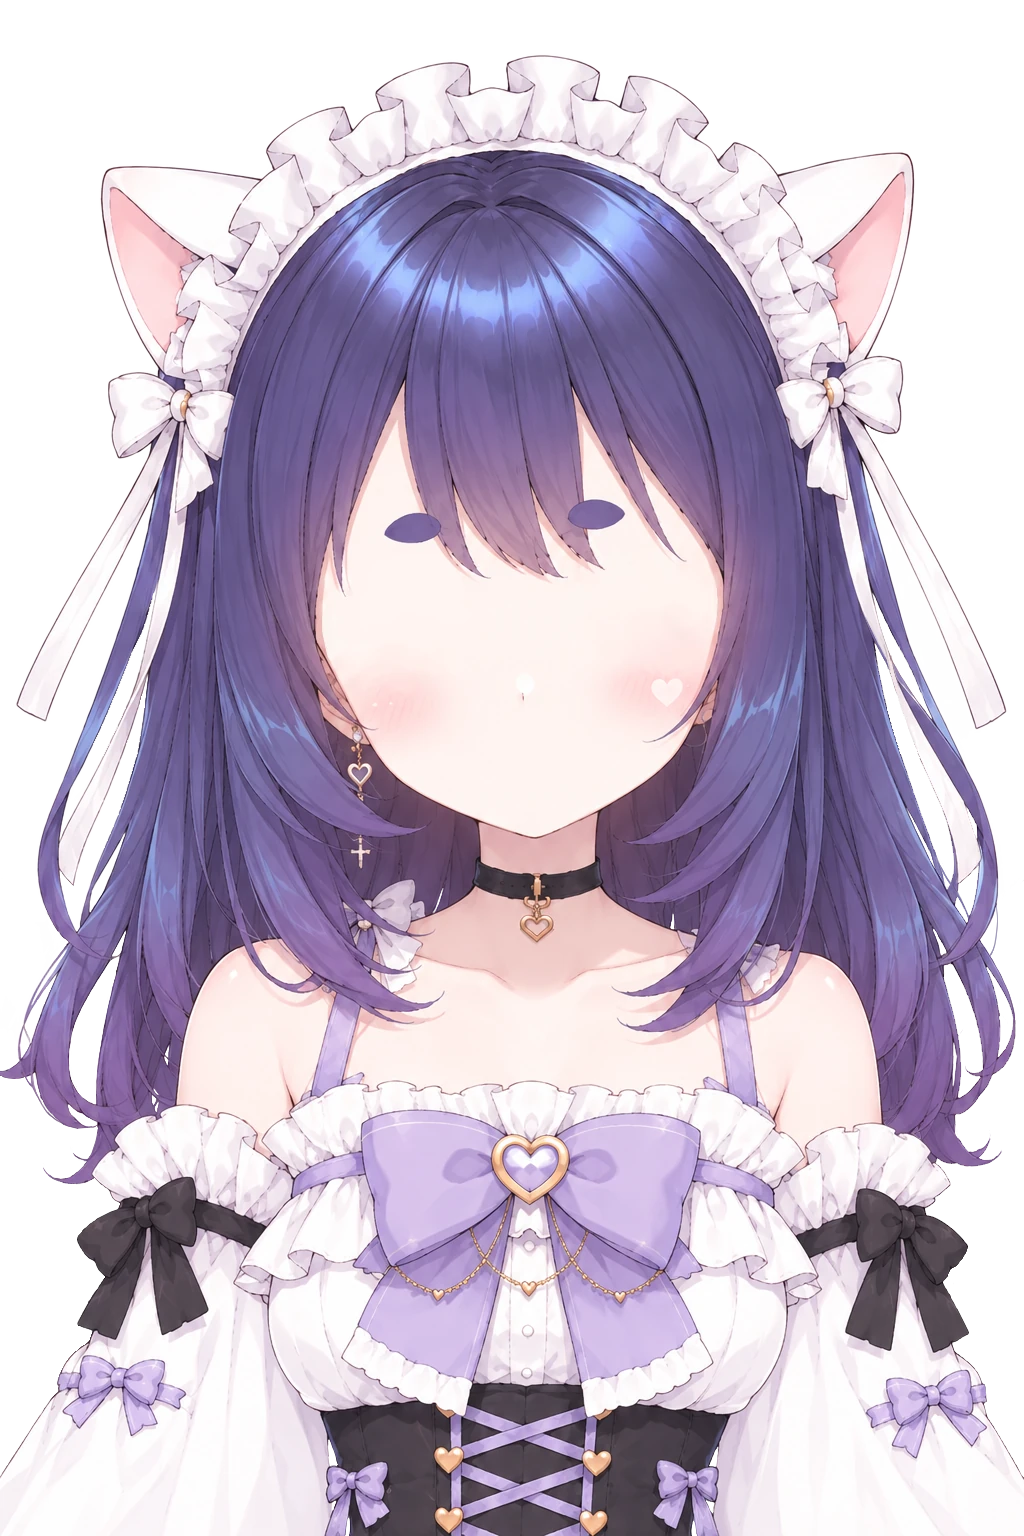
You now have a blank-face base image. From here, it splits into Basic, which uses the built-in presets, and Intermediate, where you prepare your own parts. If you want to go further, continue to Advanced after finishing either one.
Basic: Get it moving with presets
The eyes and mouth come with built-in presets. Just load the base image and set the eye and mouth positions, and it moves. The brows drawn on the base image are used as they are.
Allow the mic and register your voice
- Open Peraravatar+ and press “Allow mic” so the mic can be used
- Press “Auto calibrate” to measure your room noise and your usual streaming voice. If the result looks good, press “Apply”
- Use “Register vowels” below the meter to register a, i, u, e, o in your own voice
Load the base image
- In “Choose how to build” on the Images tab, choose “Build from one image”
- Drop the original image (before the blank face) onto the “Base image” box. You set the positions to match the eyes and mouth drawn on it, then swap in the blank-face image
- Leave “Base image type” at “Blank face”
Set the eye and mouth positions
- Uncheck “Move brows separately”. The heading becomes “Eye and mouth positions” and the brow frames go away
- Press “Set” for each part in “Eye and mouth positions”. The eye and mouth frames, already placed from the start, appear on the avatar
- Drag the frames onto the eyes and mouth drawn on the original image
- Match the size and tilt with the round handles. For an eye, make it as wide as from the inner corner to the outer corner
- Once both eyes are set, press “Make symmetric” to match their size and height
- Adjust the eye positions and tilt so they sit naturally with the brows. If the original picture is slightly tilted, tilt them to match the brows just enough to look right
- When finished, press “Done”
- Swap the “Base image” for the blank-face image. The positions you set stay as they are
“Left eye” and “Right eye” mean left and right as seen by you, looking at the screen, not from the character’s point of view.
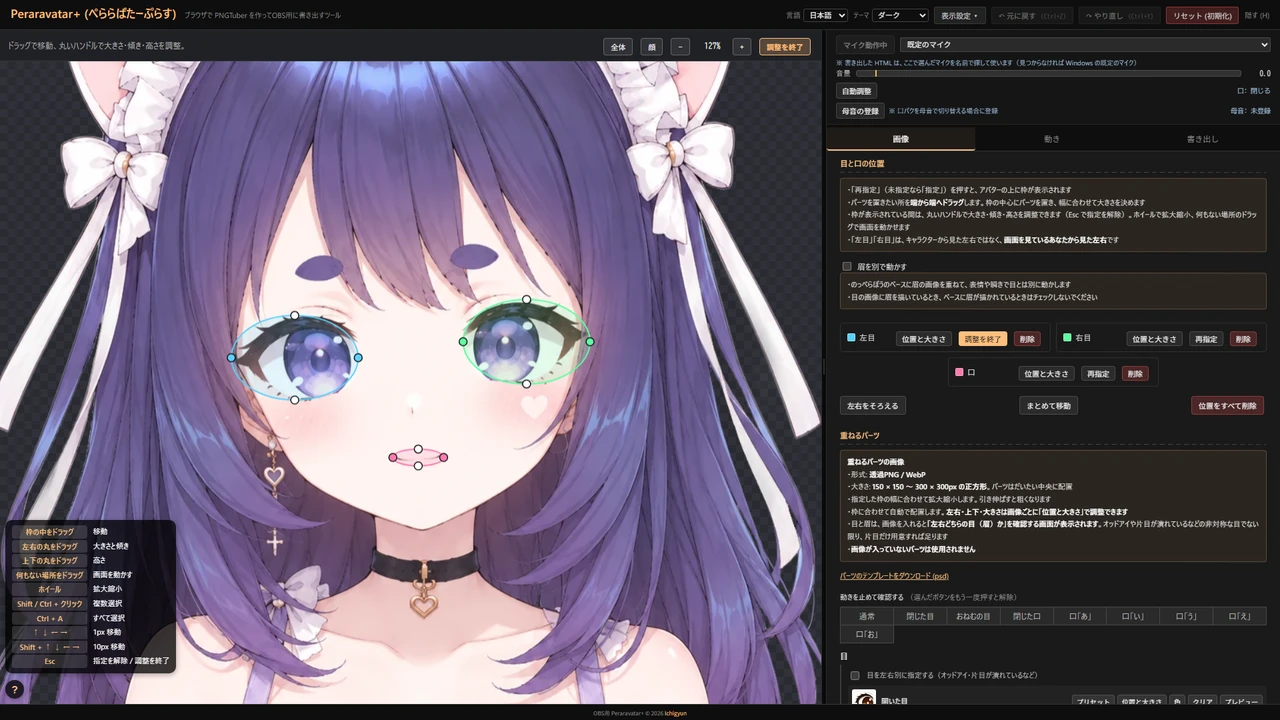
Choose presets
Press “Presets” on each part in “Layered parts” to see the eyes and mouths you can choose from.
| Part | Choices |
|---|---|
| Open eyes / Closed eyes | 5 each of open and closed eyes |
| Closed mouth / Mouth “A”–“O” | 16 |
- “Position & size” on each part lets you adjust its position, size and tilt
- “Stop motion to check” at the top of “Layered parts” freezes the blinking and mouth shapes so you can check them. While stopped, you can zoom in with “Face” or ”+” above the avatar
Match the eye color
Change the color of the preset eyes to match the character’s eyes.
- Press “Color” on “Open eyes” and choose “Set color separately”
- Move
Hue (°)to get close to the color - Adjust the depth and brightness with
Saturation (%)andBrightness (%)
- The other preset eyes (half-open, closed and so on) default to “Same as normal eyes”, so they automatically take the same color as the open eyes
- For odd eyes, check “Set the eyes separately” and set a color for each of the left and right open eyes
Export
- Talk into the mic and check that the mouth shape changes
- Save it with “Export avatar as HTML” on the Export tab
To add the exported HTML to OBS, see Adding to OBS in the documentation.
Intermediate: Prepare your own parts
The preset eyes and mouths do not give you many choices. You would rather swap in ones made just for your character, right? The brows become parts too, so they can move separately from the eyes, like raising them when surprised. You make the parts by cutting them out of the original image (before the blank face) and drawing on top of it.
Erase the brows too
Starting from the blank-face base image, paint over the brows the same way you did the eyes and mouth.
Parts to prepare
| Part | Required | How to make it |
|---|---|---|
| Open eyes | ✓ | Cut out of the original image |
| Closed eyes | ✓ | Draw over the open eyes |
| Closed mouth | ✓ | Cut out of the original image (if you generated it with the mouth closed) |
| Mouth “A”–“O” | ✓ | Draw over the closed mouth |
| Brows | ✓ | Cut out of the original image |
| Half-open eyes | For smoother blinking. Draw over the open eyes | |
| Look-away eyes | For look away. Move only the pupils of the open eyes left or right | |
| Sleepy eyes | For eyes other than the blink in sleepy mode. Draw over the closed eyes | |
| Sleepy mouth | For a mouth other than the closed mouth in sleepy mode. Draw over the closed mouth |
- If both eyes are drawn on the original image, cut out each one and use them separately. It looks more balanced than flipping one eye. The same goes for the brows
- If you draw the eyes yourself from scratch, one eye is fine. The other one is flipped left to right
- If you use look away without the preset eyes, prepare look-away eyes too. You need left-eye and right-eye images for each of Look away (left) and Look away (right)
- If preparing everything is too much, you can also pick the closed eyes or some of the mouths from the presets
Two ways to make them
There are two ways to make the parts: cut them out of the original image, or draw them on the template.
| How | When to use it |
|---|---|
| Cut out of the original image | When you have the original image (recommended). Draw the closed eyes and mouth “A”–“O” on the original image too, then cut them out |
| Draw on the template | When you have no original image, or when you draw the parts yourself from scratch |
Cut out of the original image
You work on top of the original image. The template is not used. The open eyes, closed mouth and brows drawn on the original image are used as they are, and the closed eyes and mouth “A”–“O” are drawn on separate layers over the original image. Since you can see the face while drawing, it is easier to match the position and size. There is no need to enlarge to 300 × 300; any square from 150 × 150 to 300 × 300 that fits the part is fine.
- On the original image layer, roughly select just the area around the left eye, copy and paste. It is pasted as a separate layer in the same position as the original
- Do the same for the right eye, mouth and brows, giving each part its own layer. Separate the left and right brows too
- If needed, erase the skin and hair around the part with an anti-aliased eraser (or a brush painting with the transparent color)
- Draw the missing parts (closed eyes and mouth “A”–“O”) on added layers
- Open a new canvas (a square from 150 × 150 to 300 × 300), copy and paste the parts one at a time, and save each as a transparent PNG
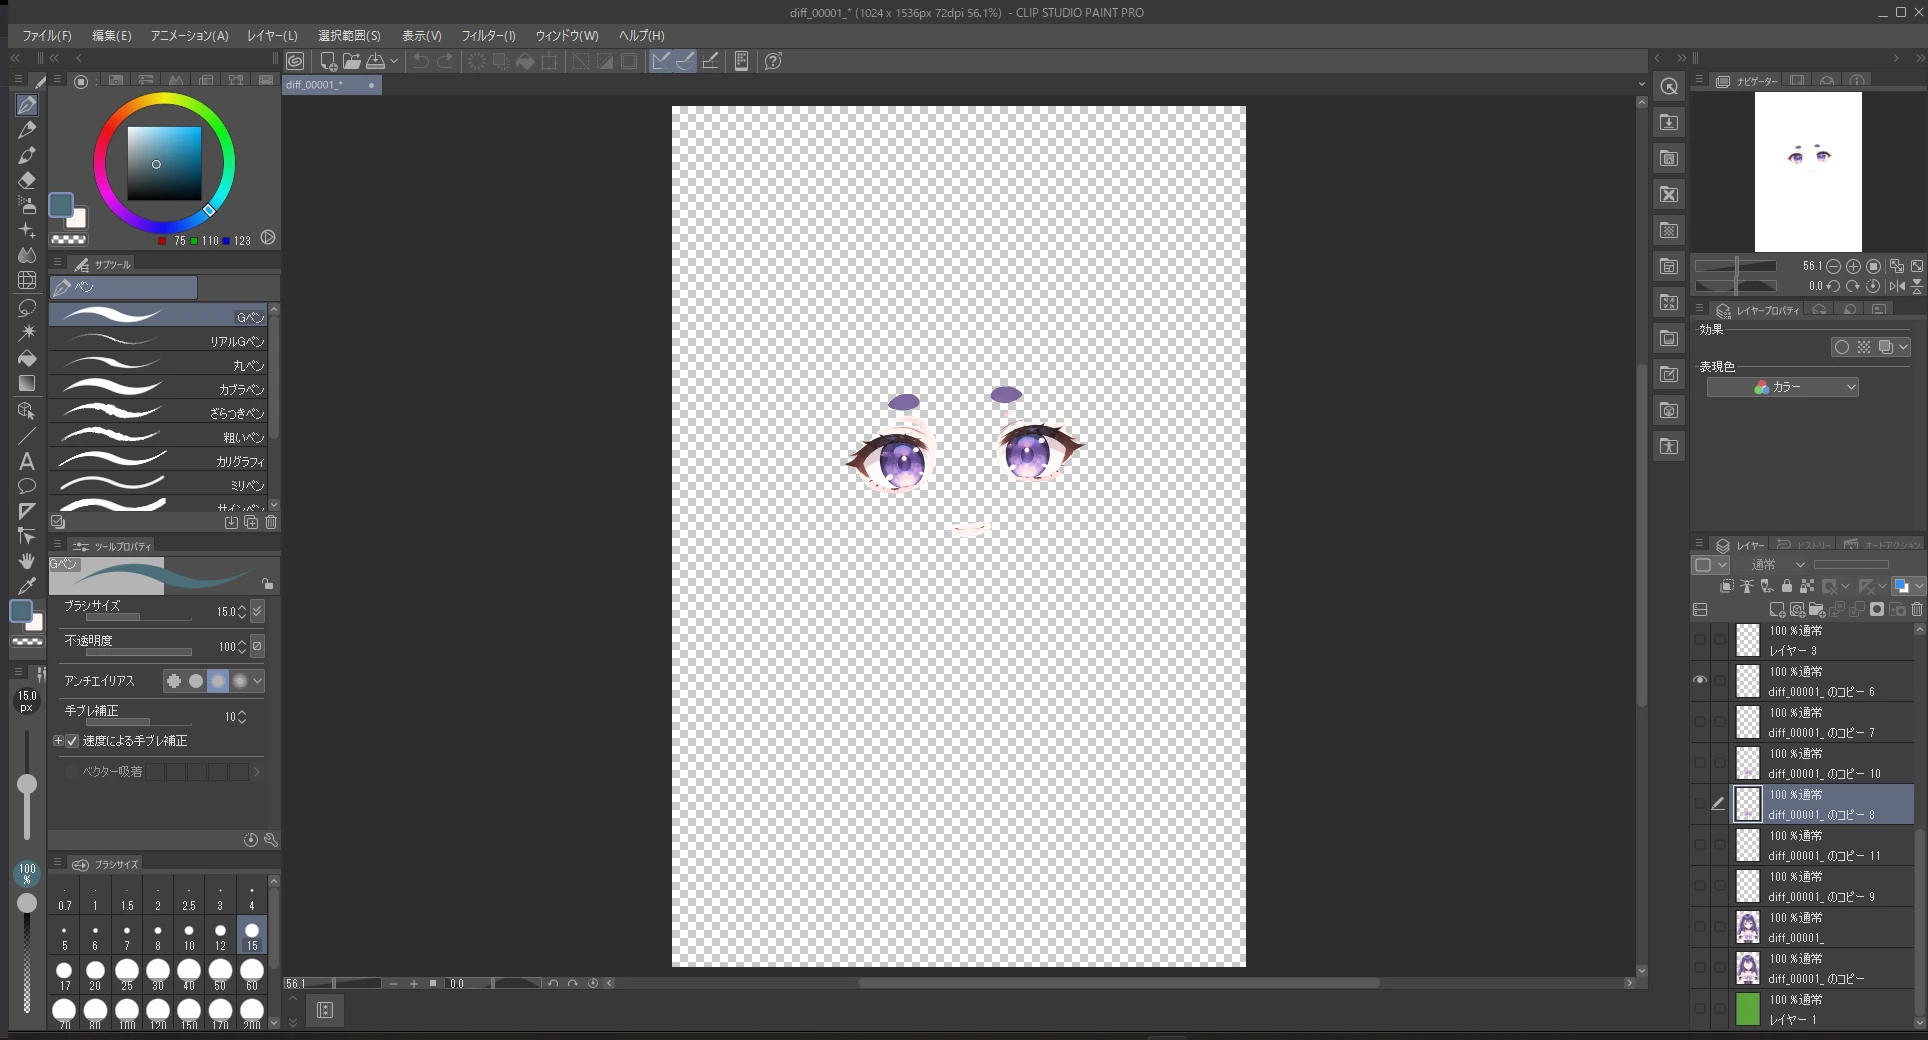
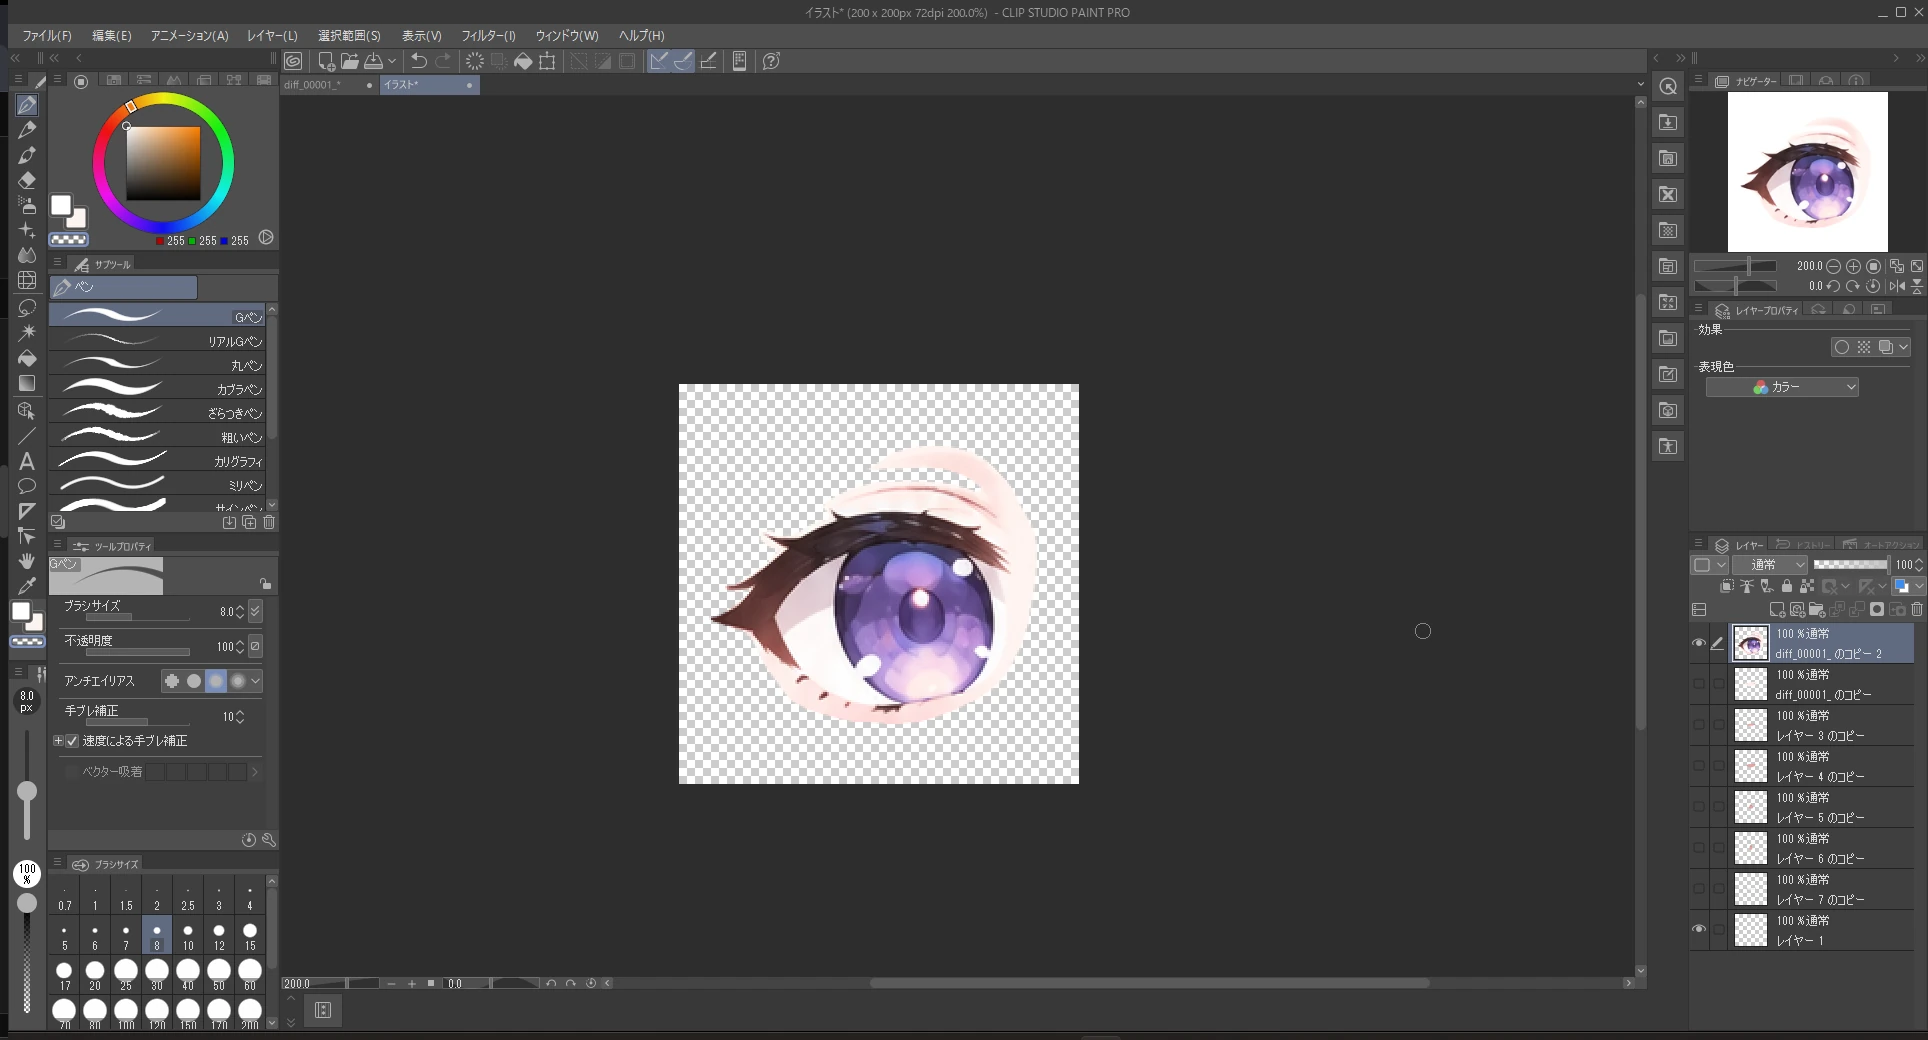
If you cut out parts for the same feature with the same selection, their image size and position match. Even if they are a little off, you can adjust them later with “Position & size”, so they do not need to match exactly.
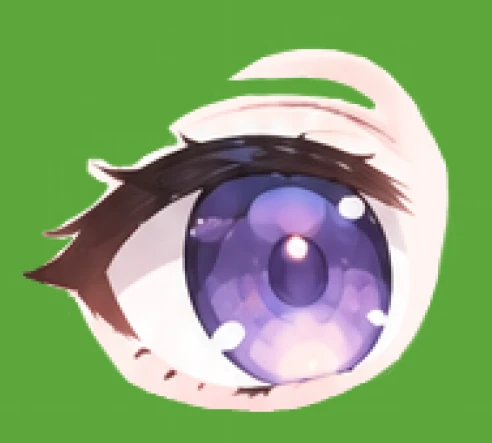
If you do not plan to change the color, the cut-out of an eye that was already drawn does not need the surrounding skin cleanly erased. Line it up with the original eye position using “Position & size”, and the leftover skin blends into the base image below.
Draw on the template
As a rule of thumb, place the part in the center of a 300 × 300 square in the part image. If you follow the template, Peraravatar+ fits the part to the size of the eye or mouth frame.
- If needed, download the template with “Download parts template (psd)” below the description of the layered parts images
- Open the template in your drawing app and draw the part in its center
- Export as a transparent PNG
Make parts for the same feature as close in size and position as you can. If the open and closed eyes differ in size, the eyes look like they move every time they blink. Peraravatar+ can adjust the size, but if the original sizes are very different, the images look differently rough, which may bother you. Keeping each feature on its own layer in one file and checking the sizes as you draw gets them about right.
Draw the closed eyes, the a-i-u-e-o mouths and the look-away eyes
Add a new layer on top of the original image or the template and draw on it. Use the open eyes or closed mouth as a guide underneath.
Closed eyes
Match the position and length of the lashes of the open eye, and draw the closed eye while picking up colors from the original eye with the eyedropper. You can also erase everything but the eyelid of the original eye and use free transform. Place it at the vertical center of the original eye. You can draw just one eye or both. With just one, the other is flipped left to right.
Mouth “A”–“O”
Using the position of the closed mouth as the base, draw each with a different opening. “A” is wide open, “I” is stretched sideways, “U” is small and pursed, “E” is a little more open than “I”, and “O” is round and tall. If the bare minimum is fine, using the same mouth for “A” and “E”, and for “U” and “O”, does not look that odd. When drawing the mouth, keeping the eye layers visible makes it easier to adjust.
Look-away eyes
Put the pupil and the rest of the eye on separate layers, and move the pupil left or right. Draw in any missing parts, such as the white of the eye.
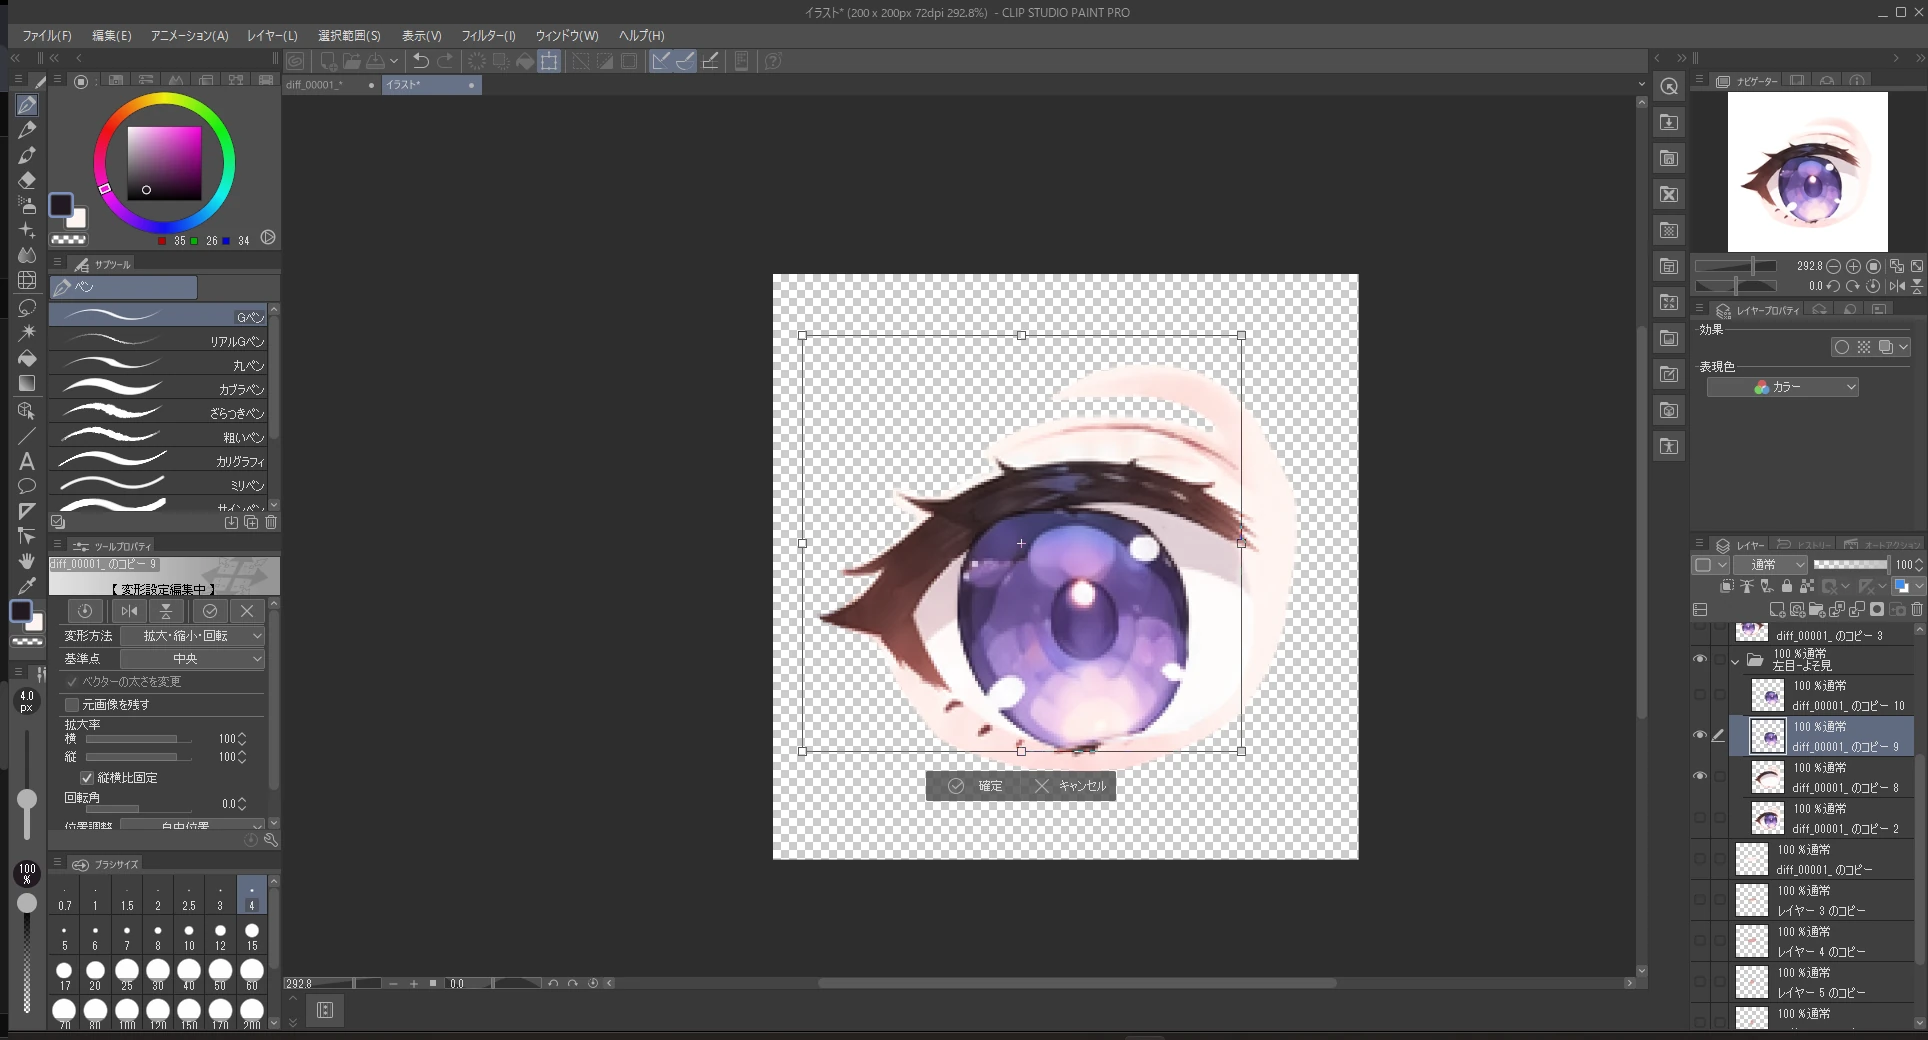
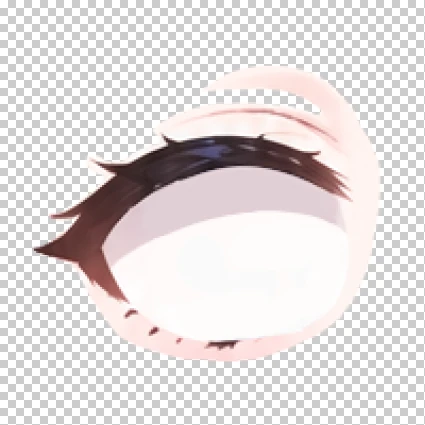
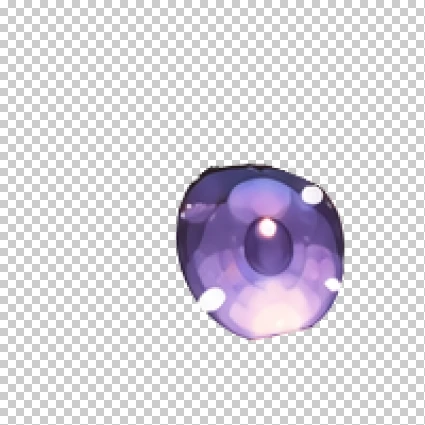
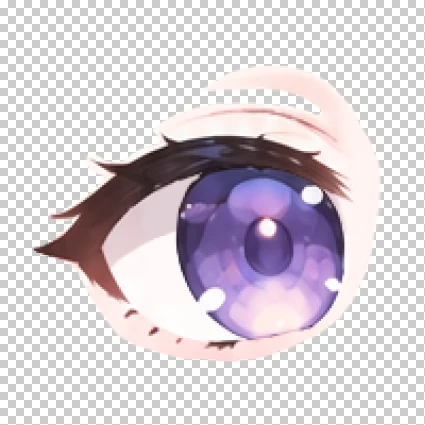
When you are done drawing, hide the other layers and export each part as a PNG.
Load them into Peraravatar+
- Set the “Base image” back to the original image (before the blank face)
- In “Eye and mouth positions”, check “Move brows separately”. The heading becomes “Eye, brow and mouth positions”
- Press “Set” for the left and right brows and fit the frames to the brows drawn on the original image
- Swap the “Base image” for the blank face with the brows erased
- Check “Set the eyes separately” in “Layered parts”
- Put the parts you made into each part’s box in “Layered parts”
- For the eyes and brows, you are asked which side it is for when you add it, so answer
- Fix any offset with “Position & size” on each part
Advanced: Make the chest and accessories bounce
The chest bounces the base image itself with “Chest bounce”. Accessories such as earrings and the charm on a choker are made into decorations and swing.
Erase the accessories that will swing
Accessories you swing as decorations are erased from the base image too. If you layer them on without erasing, the original accessory shows from underneath when they swing.
The same way you made the blank face, paint over and erase the accessories you want to swing from the blank-face base image. Once erased, swap the “Base image”. This time the sleeves were cut off at the original image size, so I enlarged the image and drew in the sleeves too.
When the size of the base image changes, a confirmation appears. In this example, drawing in the sleeves widened the image from 1024px to 1200px and shifted the picture 88px to the right, so the eye, brow and mouth positions are moved to match.
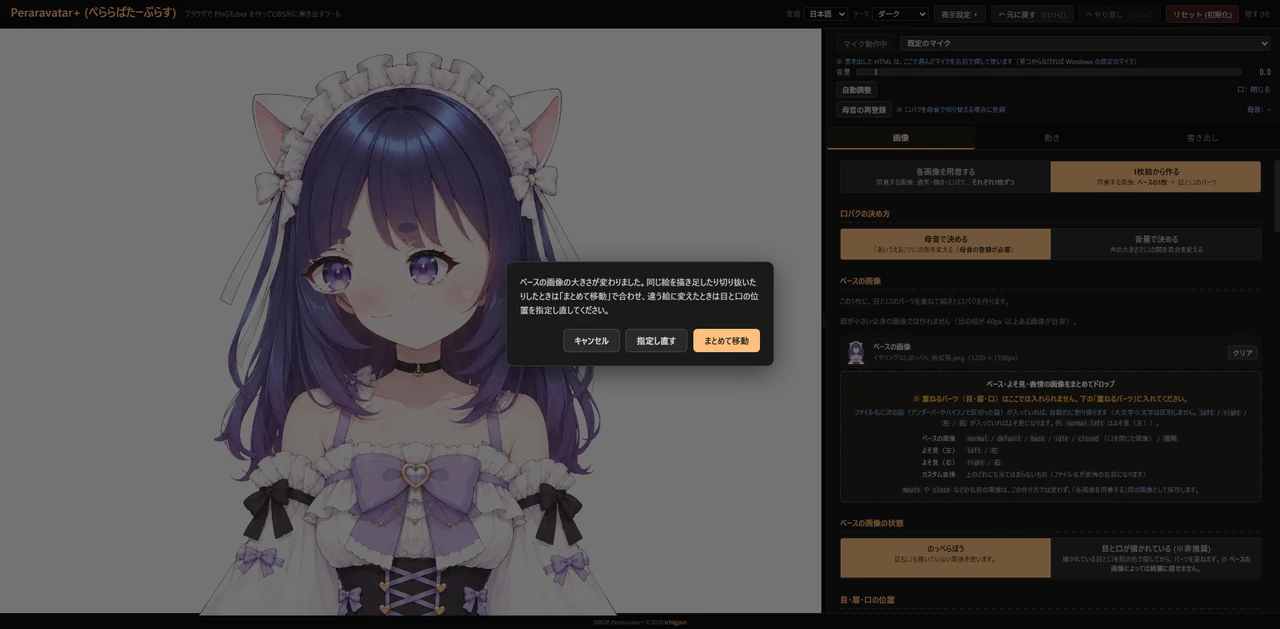
- Press “Move all” in the confirmation. The eye, brow and mouth parts are shown on the base image, with a box around everything
- The height did not change this time, so use the
→key to move them right until the eye, brow and mouth parts line up with the face (holdShiftfor 10px at a time). If you know how many pixels it shifted, typing the position into the fields shown under “Move all” is faster - When finished, press “Done”
Bounce the chest
Chest bounce warps the base image inside the frame to make it bounce. You do not need a separate chest image, but if you want to go further, you can make the chest a separate part and draw the clothing that peeks in and out as it bounces.
- In “Chest bounce” on the Images tab, press “Set” for “Left chest”
- Drag from one edge of the chest to the other to enclose it (the same as the eye and mouth positions). If “Mirror left and right” is checked, the right chest frame is made in the mirrored position. The center line is not always at the middle of the chest, so in some cases adjust the left and right separately
- A dotted line appears around the frame. Inside the frame keeps its shape as it moves, and the area out to the dotted line stretches and squashes. Size the frame so hair or arms you do not want to bounce stay off the dotted line
- When finished, press “Done”
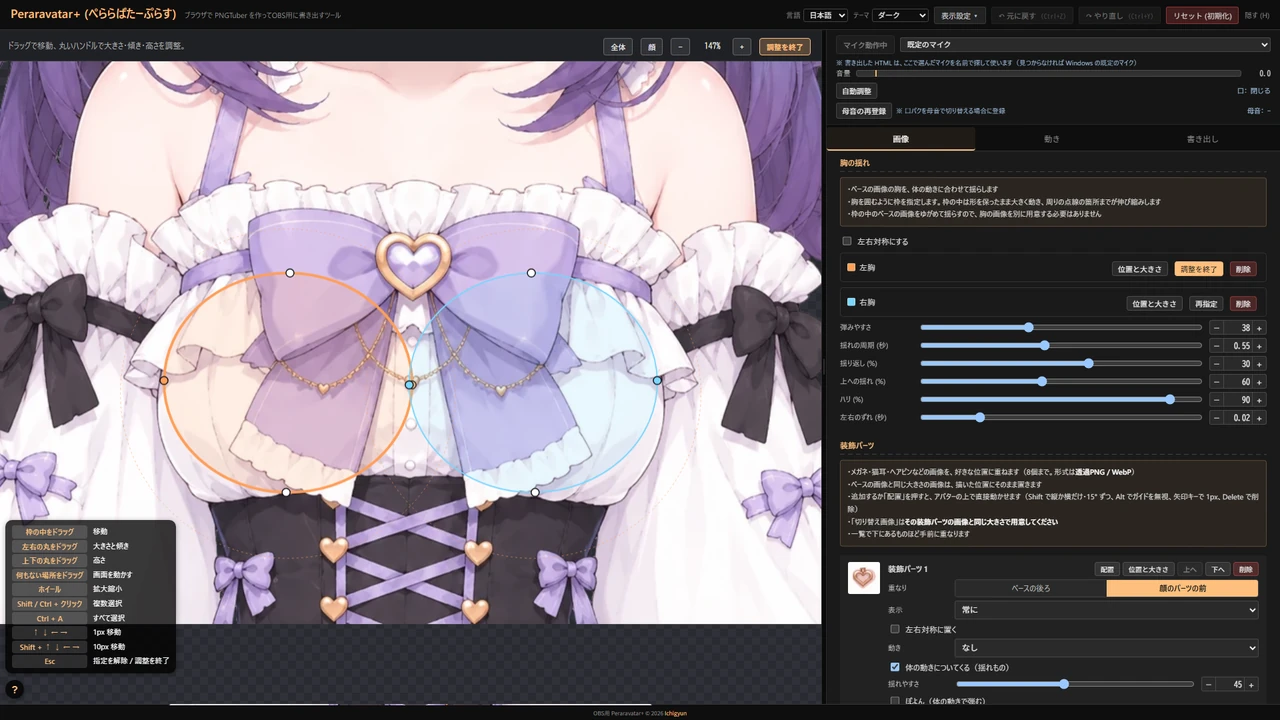
How it bounces is set with these six.
| Item | Description | This time |
|---|---|---|
| Bounciness | The higher, the bigger the bounce | 38 |
| Bounce period (s) | The time one bounce takes | 0.55 |
| Rebound (%) | After the first bounce, how far it swings back the other way | 30 |
| Upward bounce (%) | How far it moves going up, as a share of going down | 60 |
| Firmness (%) | Higher keeps the chest’s shape as it moves; lower makes the chest itself stretch and squash | 90 |
| Left-right delay (s) | The timing gap between the left and right chest. Which side goes first changes with every bounce | 0.02 |
The bigger the chest, the more a longer bounce period and a smaller upward bounce make it sway slowly and heavily.
Make the accessories swing
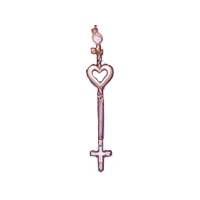
The same way as “Cut out of the original image” in Intermediate, cut out the accessories you want to swing and put them into decorations.
- On the original image layer, select the area you want to swing (an earring, the charm on the choker and so on), copy and paste. Give each part its own layer
- If hair falls in front of the earring, cut that hair out as a separate part too. Draw in the part of the earring that was hidden by the hair to make one complete earring
- Open a new canvas the part fits in, copy and paste the parts one at a time, and save each as a transparent PNG. Decorations are basically not scaled, so save them as cut out. This time they all fit in the same 200 × 200 as in Intermediate
- Press ”+ Add decoration” in “Decorations” on the Images tab and add the saved image. Leave “Layer” at “In front of face parts”
- Add the hair part after the earring so it sits in front of the earring (the lower in the list, the further in front). Do not give the hair part any motion
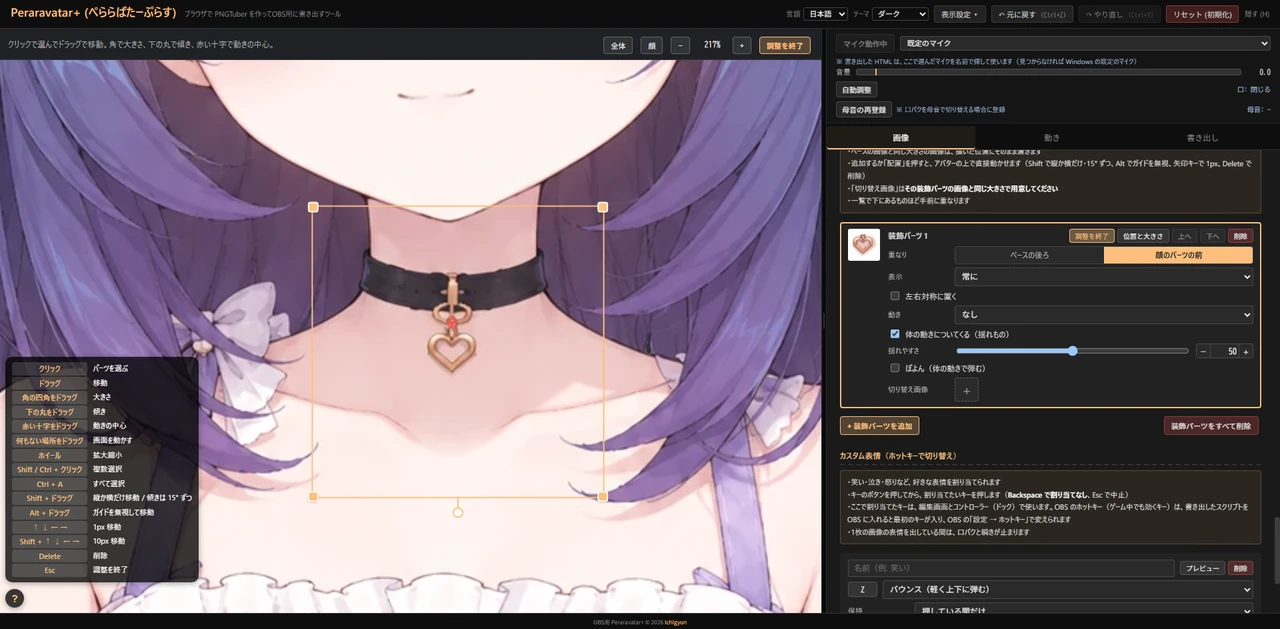
- An added part is placed around the middle between the eyes, and you can move it on the avatar right away. Drag it to where the original accessory was, and move the red cross (the center of motion) to the root of the swing. To move it later, press “Place”
- When finished, press “Done”
- For the earring and the choker charm, check “Follow body motion (physics)”. When the body moves, they swing behind it
There are three ways to make them swing, and they can be combined.
- “Follow body motion (physics)”: swings behind the body’s movement. “Swing sensitivity” sets how big the swing is
- “Squish (bounces with body motion)”: bounces with the body’s movement
- “Motion”: swings regardless of the body’s movement. “Wobble” sways left and right, and “Wiggle (bends as it sways)” bends more toward the tip
This time I set them like this.
| Part | Physics | Squish | Motion |
|---|---|---|---|
| Earring | Swing sensitivity 15 | Bounciness 20, Softness 0, Squash 0 | Wobble (Swing 2°, Period 2 s, Random period) |
| Choker charm | Swing sensitivity 45 | None | None |
| Hair in front | None | None | None |
The motion types and values are listed under Decorations in the documentation.
Put the center of motion at the root of the swing
Decorations swing around the red cross, the “center of motion”. Physics and Wobble rotate around the center of motion, Wiggle bends from the center of motion as its root, and when Squish stretches and squashes, the center of motion is the reference point too.
A newly added part has its center of motion at the bottom middle of the image. If you leave it there on something that hangs from the top, like an earring, it swings around its bottom end and the part hooked on the ear moves away from the ear.
Drag the red cross to the root of the swing.
- Earring: where it hooks on the ear
- Choker charm: where it joins the choker
- Hair in front: it has no motion, so leave it as is
Going further
- Custom expressions: add surprised eyes or a laughing mouth and switch to them with a key. Eyes can also be chosen from the layered part eyes, so making just one eye closed gives you a wink
- Look away: add eyes that glance to the side now and then
- Sleepy mode: add drowsy eyes and a mouth for when you stay quiet for a while
- Decorations: besides things that swing, you can layer glasses or cat ears, or add a ”!” or ”?” only for certain expressions
See the documentation for details.
Summary
- Prep: generate a character, remove the background, and paint over the eyes and mouth to make a blank face. This part is the same for every level
- Basic: just set the eye and mouth positions and choose presets, and you have an avatar that blinks and lip syncs
- Intermediate: cut the eyes, brows and mouth out of the original image, draw the closed eyes and the a-i-u-e-o mouths, and give it a face that suits the character
- Advanced: bounce the chest with chest bounce and swing accessories with decorations. Erase anything you make into a decoration from the base image, and put the center of motion at the root
- Do not use the Windows “Photos” app on images with a transparent background. The edges turn dark
It runs right in your browser, so you can start building right away.
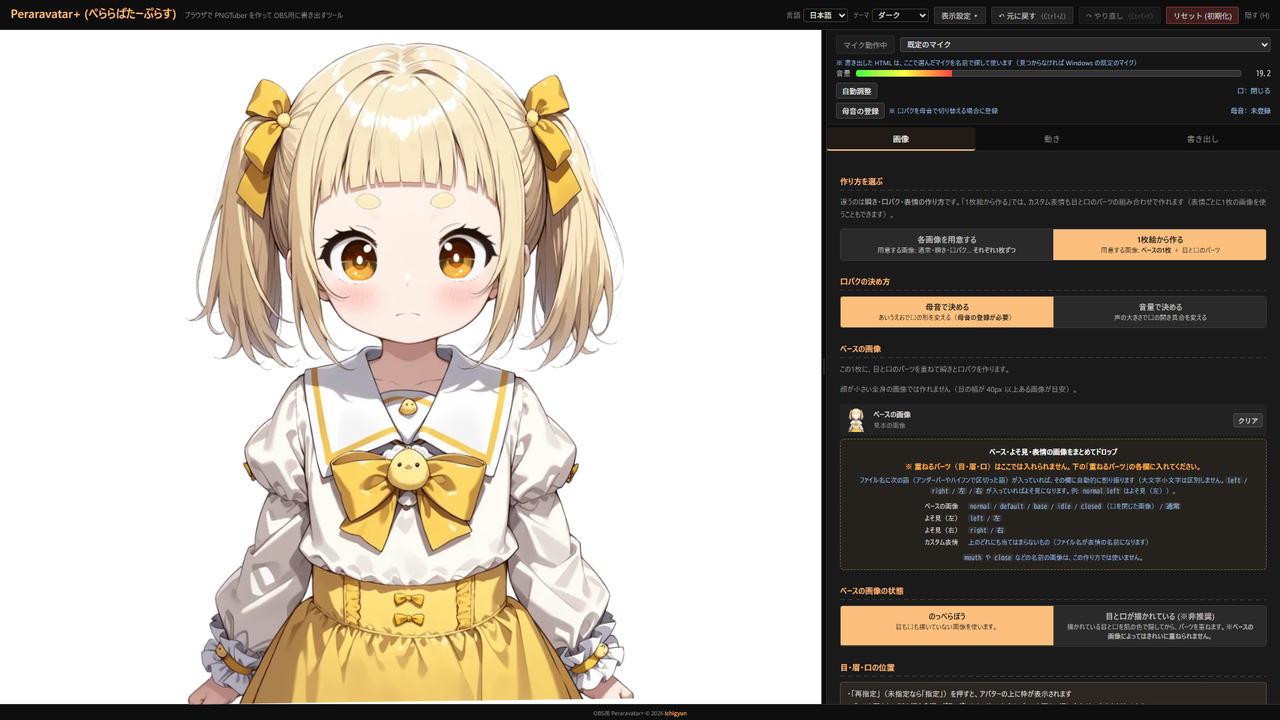 Peraravatar+ A free PNGTuber that builds blinking and lip sync from a single image. Supports vowel-based lip sync, decorations and custom expressions. Just put the exported HTML into an OBS browser source.
I hope you make the most of it. If there is a feature you would like added, feel free to send it through the contact form.
Contact
Bug reports & Feature requests
Use the form for "it doesn't work" or "I wish it could…". Easiest channel for me to triage.
Contact form ▶
Business & Other inquiries
For work requests and other inquiries, please email me.
Email ▶
Feedback & Cheers
An anonymous one-liner channel. Even just "I'm using it" makes me happy.
Marshmallow ▶