Editing artwork in FireAlpaca with just a mouse
12 min read
If you know the features of a painting app, you can edit artwork with just a mouse.
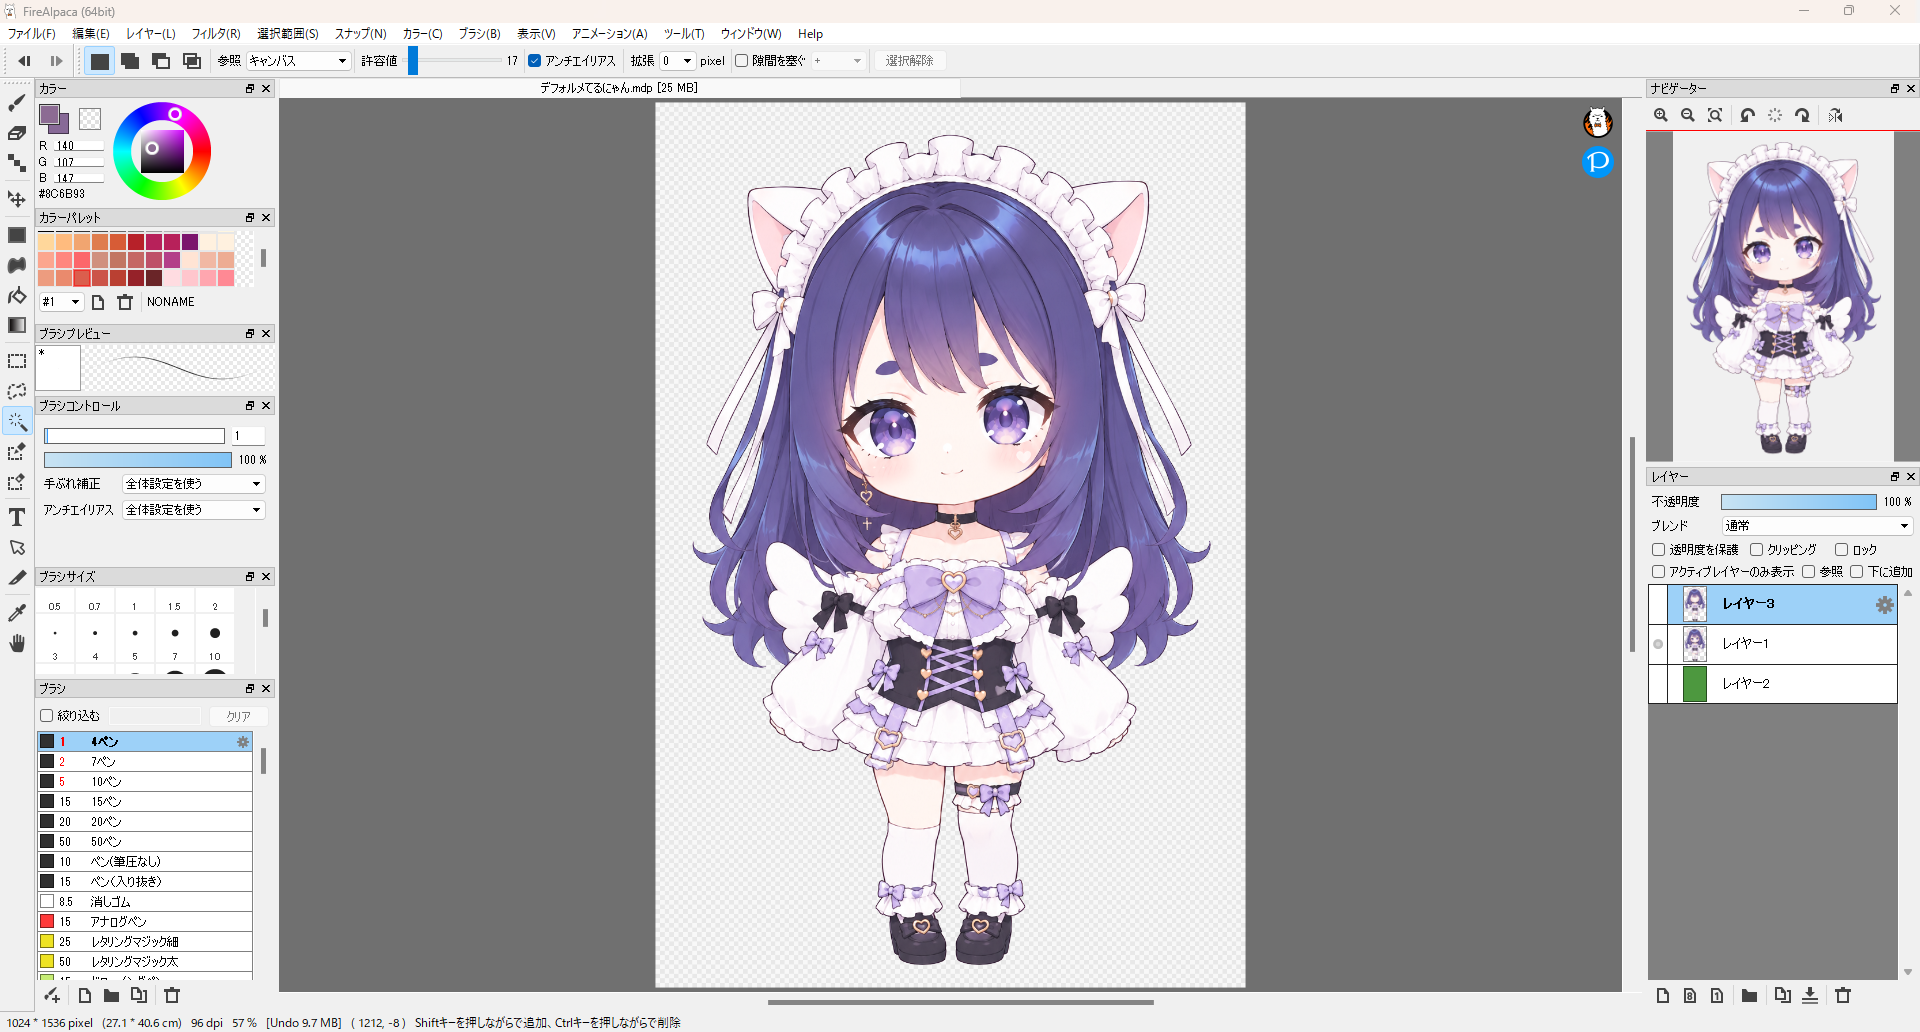
In the previous article, I wrote about touching up an AI-generated image to make a streaming avatar, but I skipped how to use a painting app. It seems quite a few people who want an avatar for PNGTubing have never used a painting app, so this time the focus is on “drawing with a mouse”. I will use an avatar for Peraravatar+ as the example, but this is basically a guide to FireAlpaca. Most other painting apps have the same basic features, so you can apply it there too.
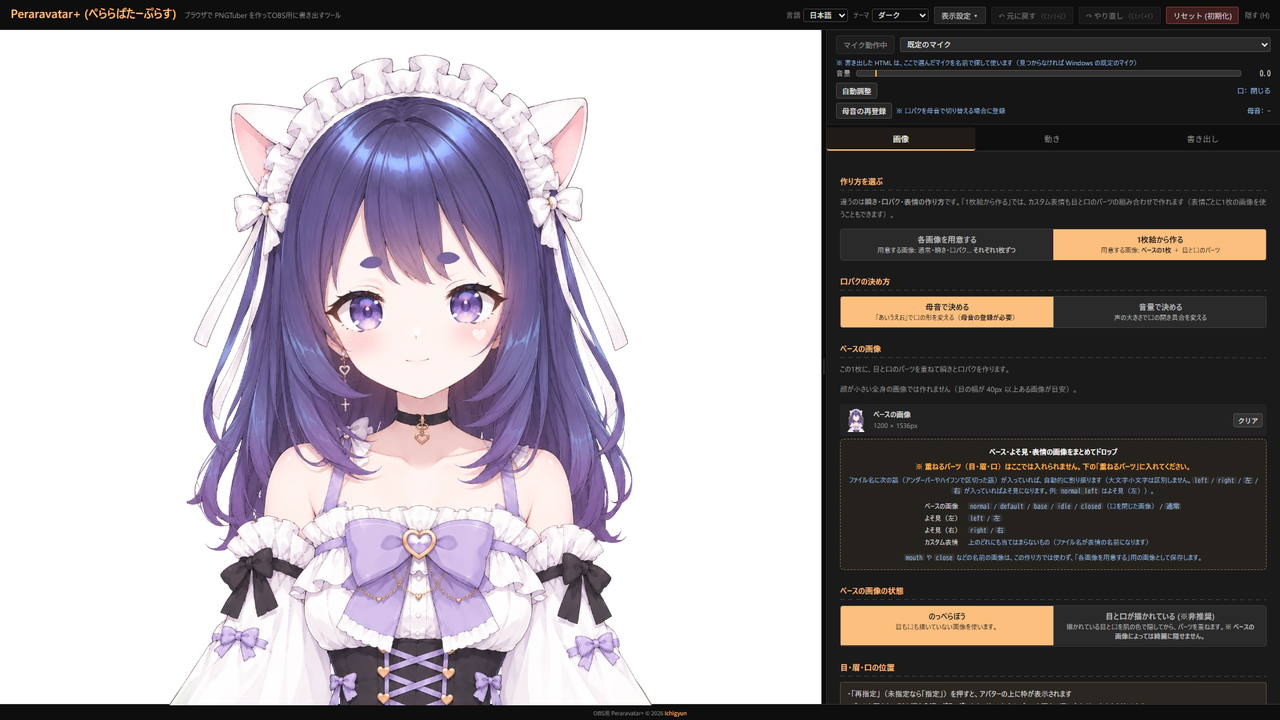 Making a streaming avatar with Peraravatar+ Making a streaming avatar with the Peraravatar+ PNGTuber: a blank-face base from one AI image, presets for a quick start, your own eye and mouth parts, and a bouncing chest and swinging accessories.
This time, I will show how to prepare an avatar for Peraravatar+ with just a mouse. There are people who draw with a mouse, so-called “mousers”, so once you get the hang of it, you can do most things without a pen tablet. I used to be a mouser myself. Do not give up — give it a try. If you use ibisPaint on a tablet, that app can handle all of this, so you are on your own there.
Installing
FireAlpaca is free, for both personal and commercial use.
- Open the FireAlpaca download page
- Download the Windows version (Windows 10 or later) or the Mac version (macOS 12 or later)
- Open the downloaded file and follow the on-screen instructions to install it
The screen
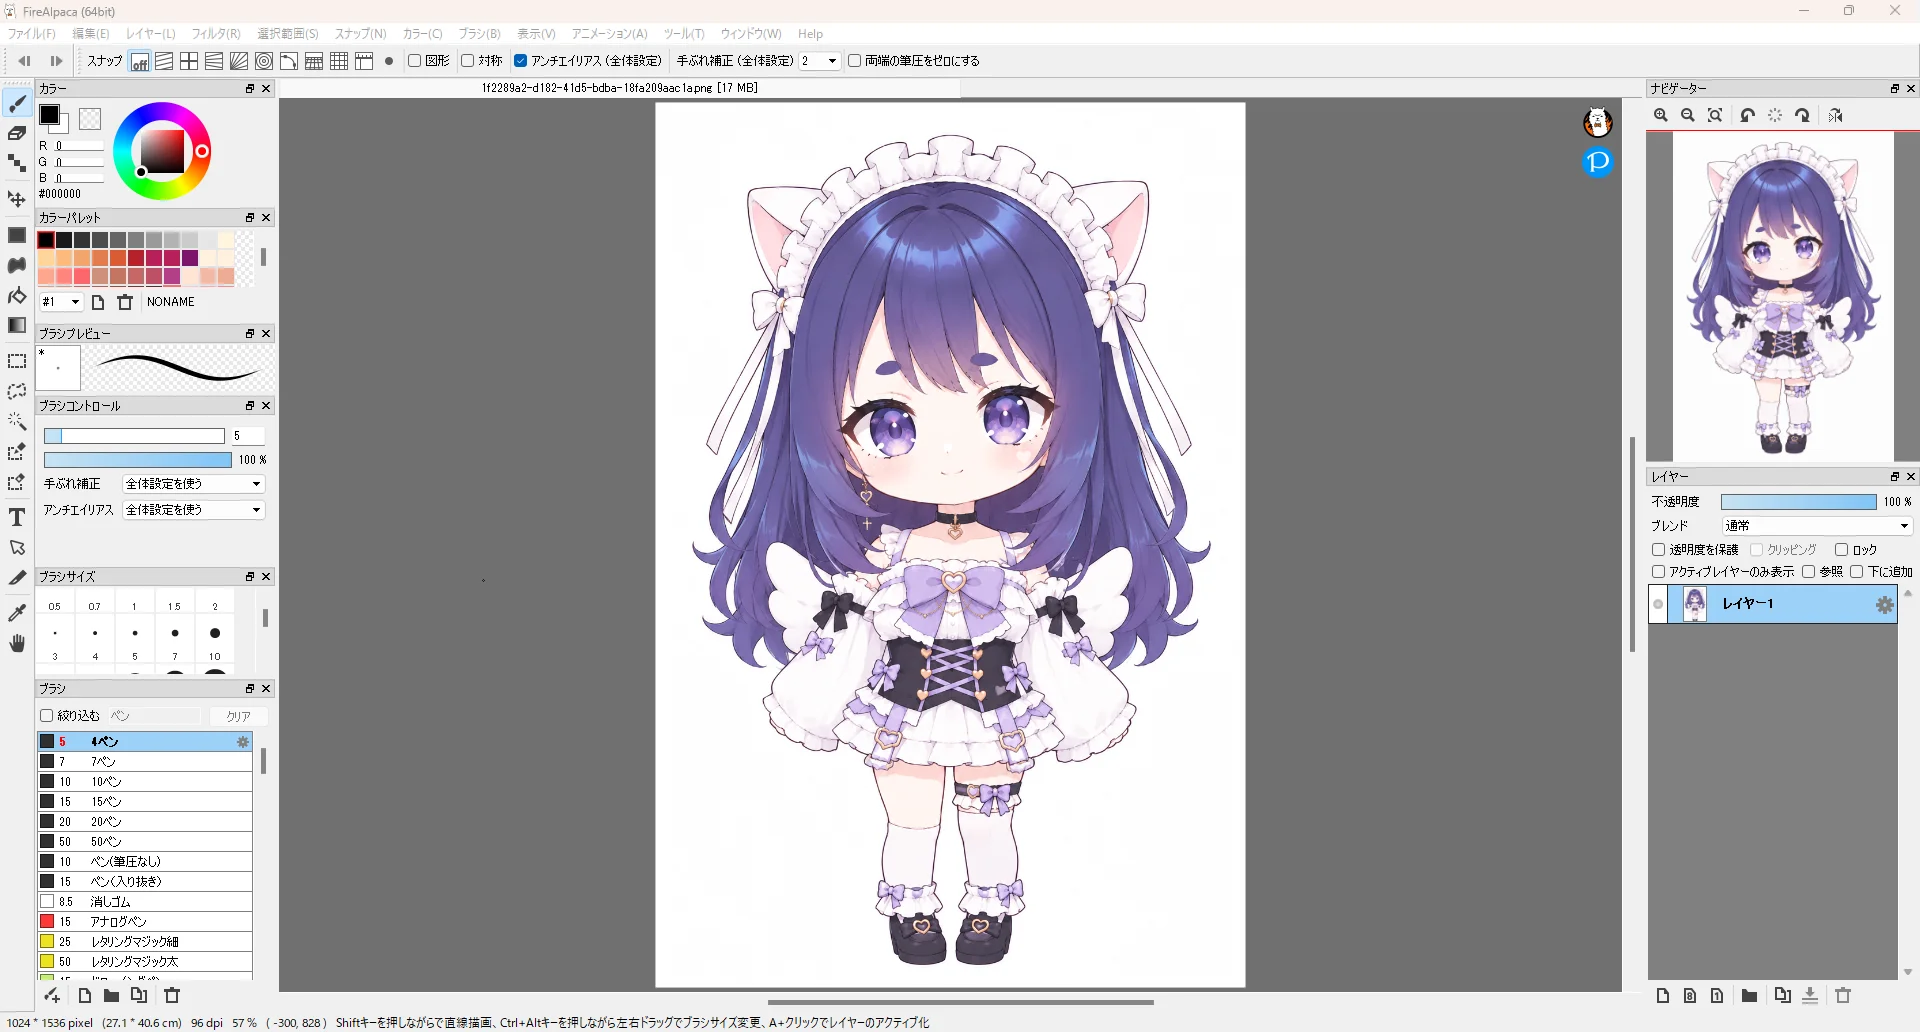
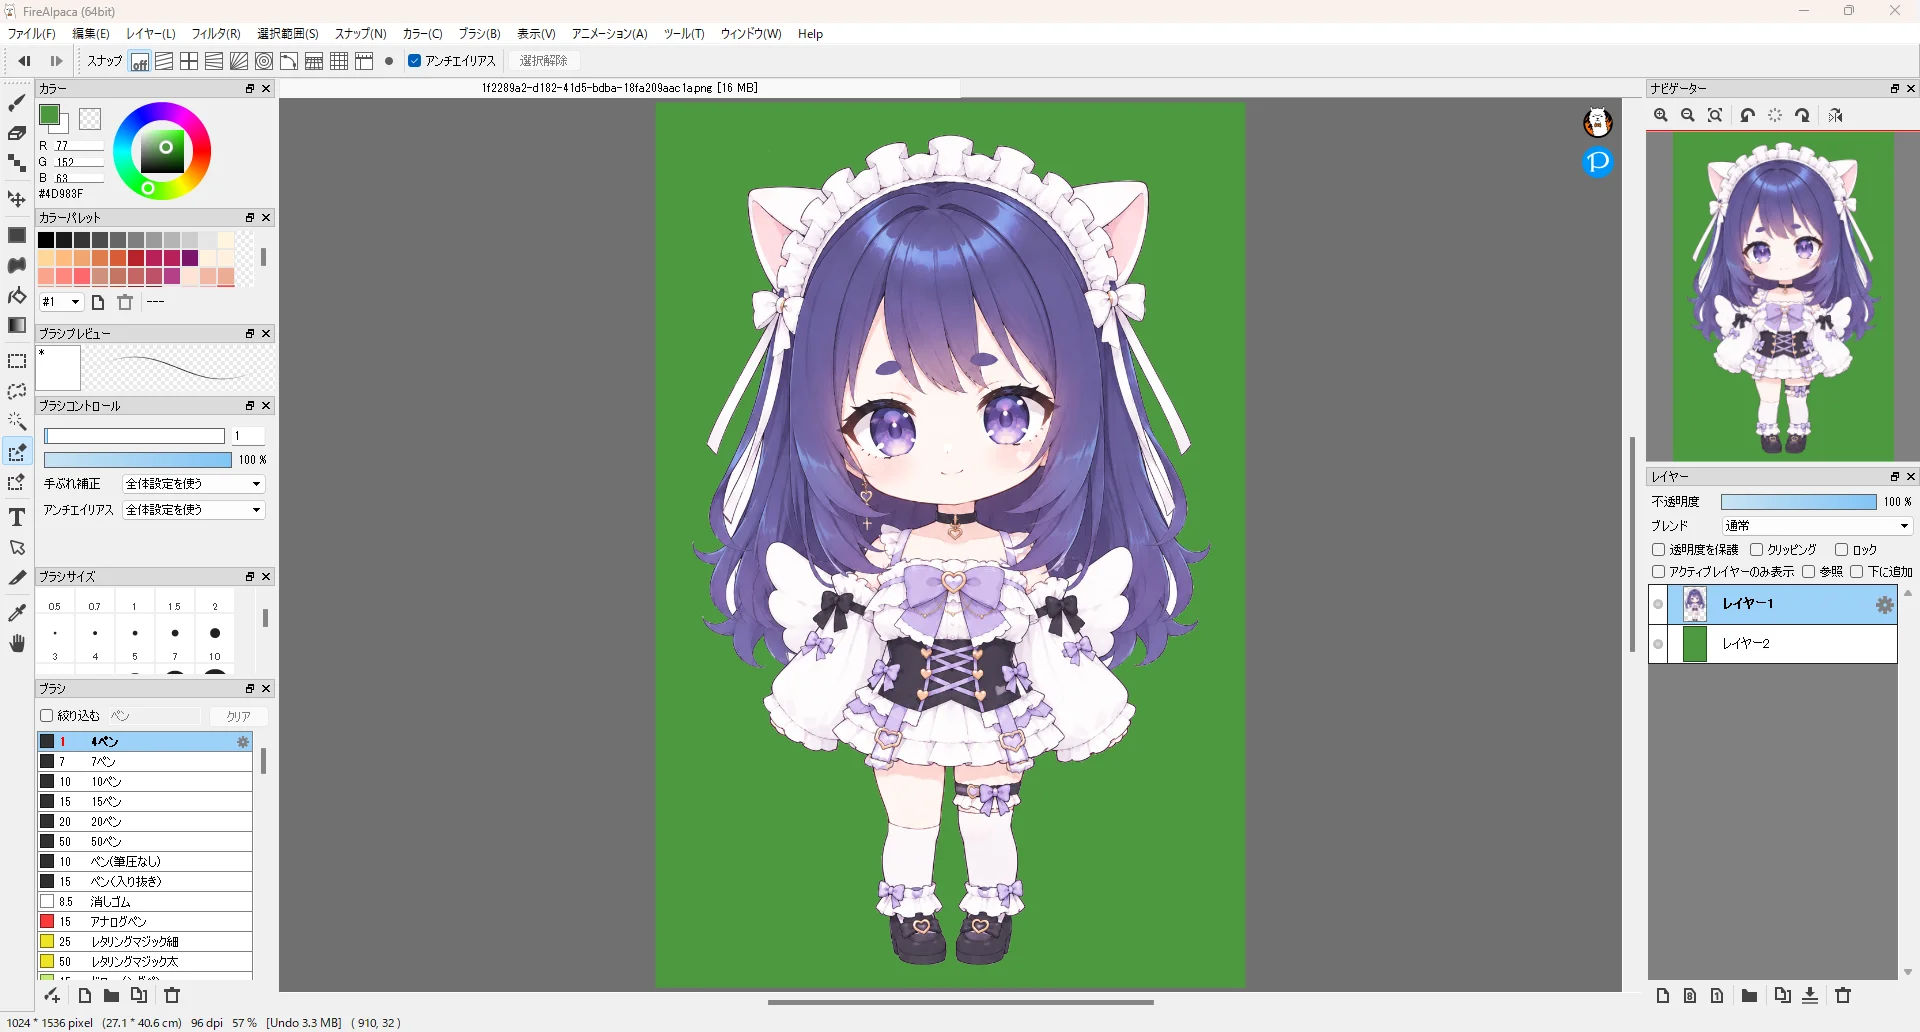
When you start FireAlpaca, a screen like this appears. The screenshots in this article show the Japanese interface.
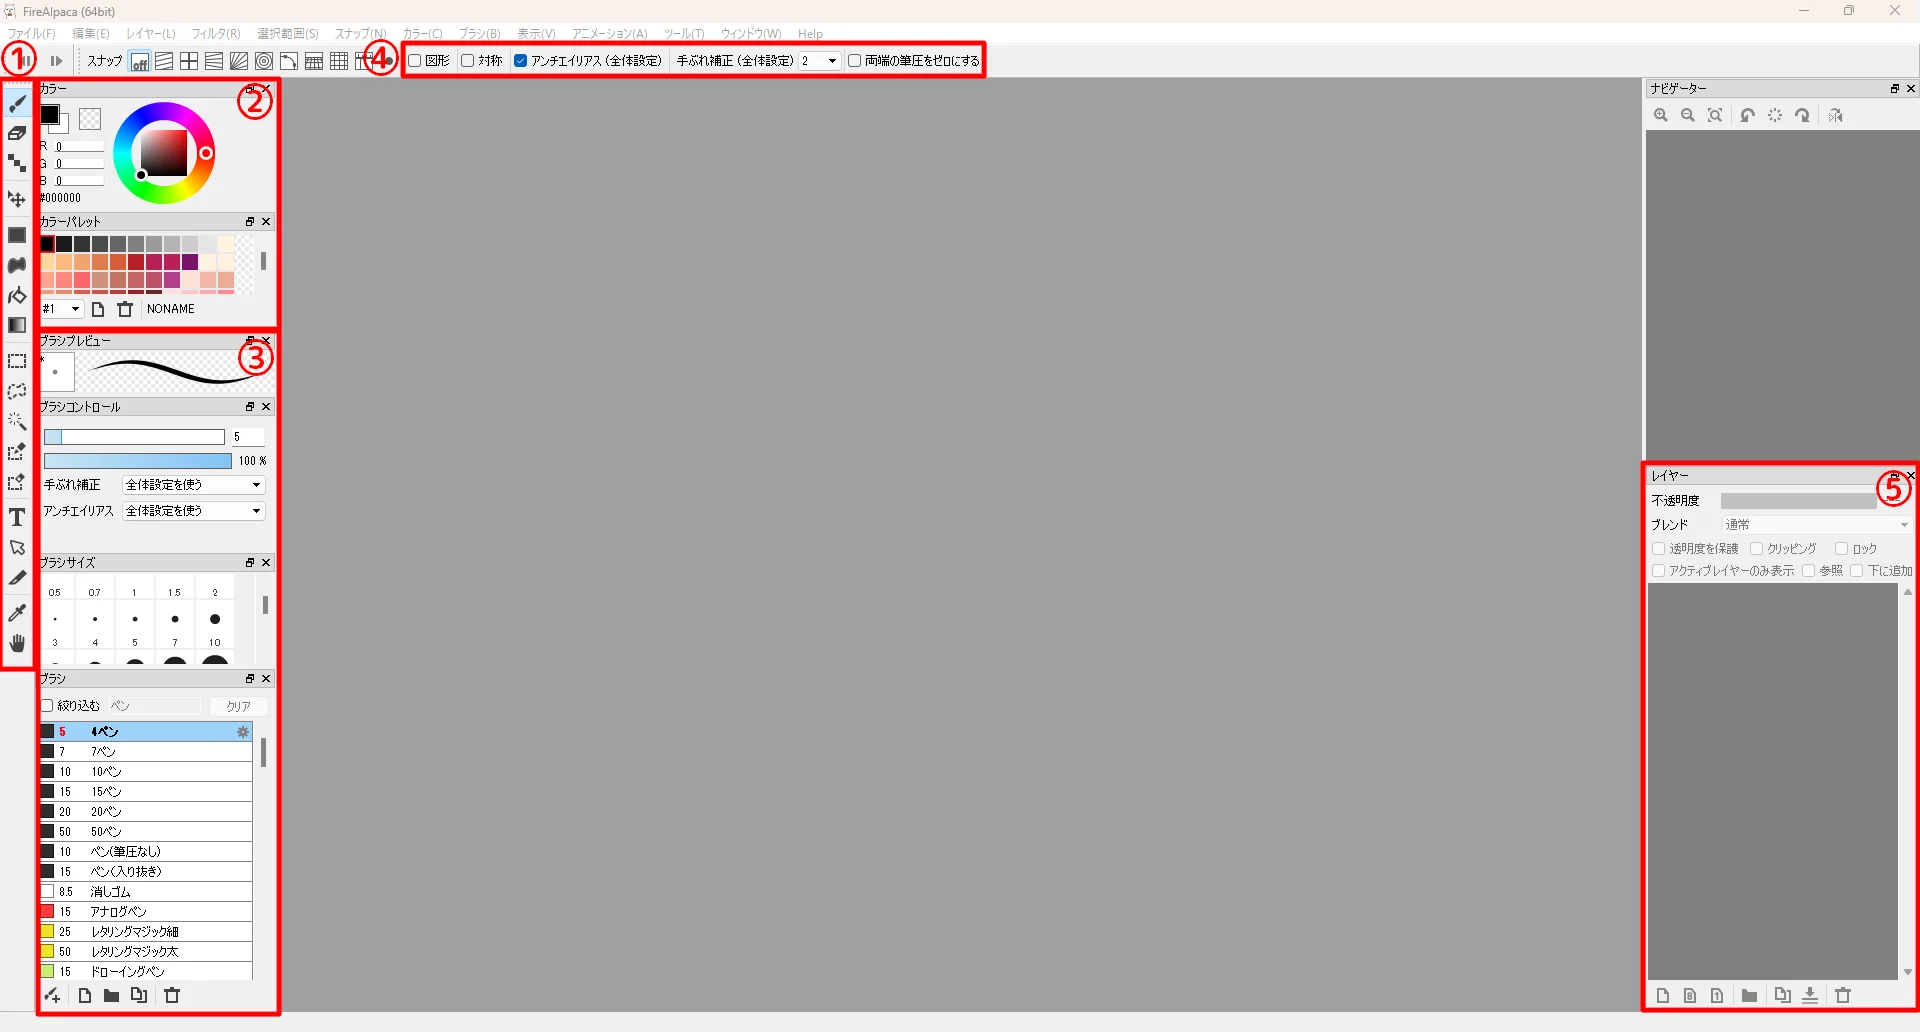
This screenshot was taken after I rearranged things like the brush size for my own use, so the exact layout will probably differ from the image above. For now, just get a rough idea of what is where.
| Area | What it does | |
|---|---|---|
| ① | Tools | Switch between tools such as brush, eraser and selection |
| ② | Color, Color Palette | Choose the color to draw with |
| ③ | Brush Control, Brush, etc. | Settings such as brush size, type and opacity |
| ④ | Tool settings | Settings for the selected tool. The items change when you switch tools |
| ⑤ | Layer | Add layers and switch them between shown and hidden |
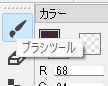
You do not need to memorize which icon in ① is which tool. Hover over an icon and the tool name appears.
If you accidentally close a window with the ✕ button at its top right, you can show it again from the Window menu.
Opening the image
First, open the AI-generated image.
Choose the image with File → Open, or drag and drop the image from a folder onto the FireAlpaca window.
Removing the background
First, to make leftover spots easier to find, put a layer filled with a dark color under the image.
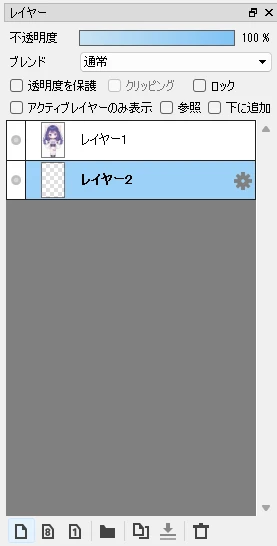
- Press the leftmost button in the Layer window to add a new layer (Layer2)
- Drag Layer2 below the image layer (Layer1)
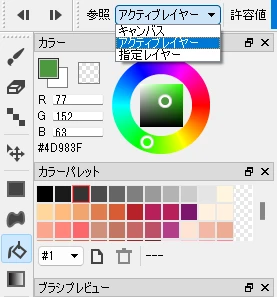
- With Layer2 selected, choose the bucket icon on the left edge (Bucket Tool)
- In the Color window, choose a dark color that is not used in the character. I chose a dark green
- In the tool settings at the top, set Reference to Active Layer
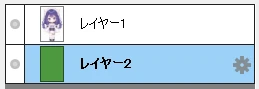
- Click the canvas. The whole new layer is filled with green
Next, select the background.
- Choose the magic wand icon on the left edge (MagicWand Tool). Set Reference in the tool settings to Canvas
- Click the background
Tolerance is the value that sets how close a color must be to the clicked color to be selected along with it. The white background of an AI-generated image is not pure white when you look closely; the color varies slightly, so with Tolerance left at 1, the background gets selected in patches.
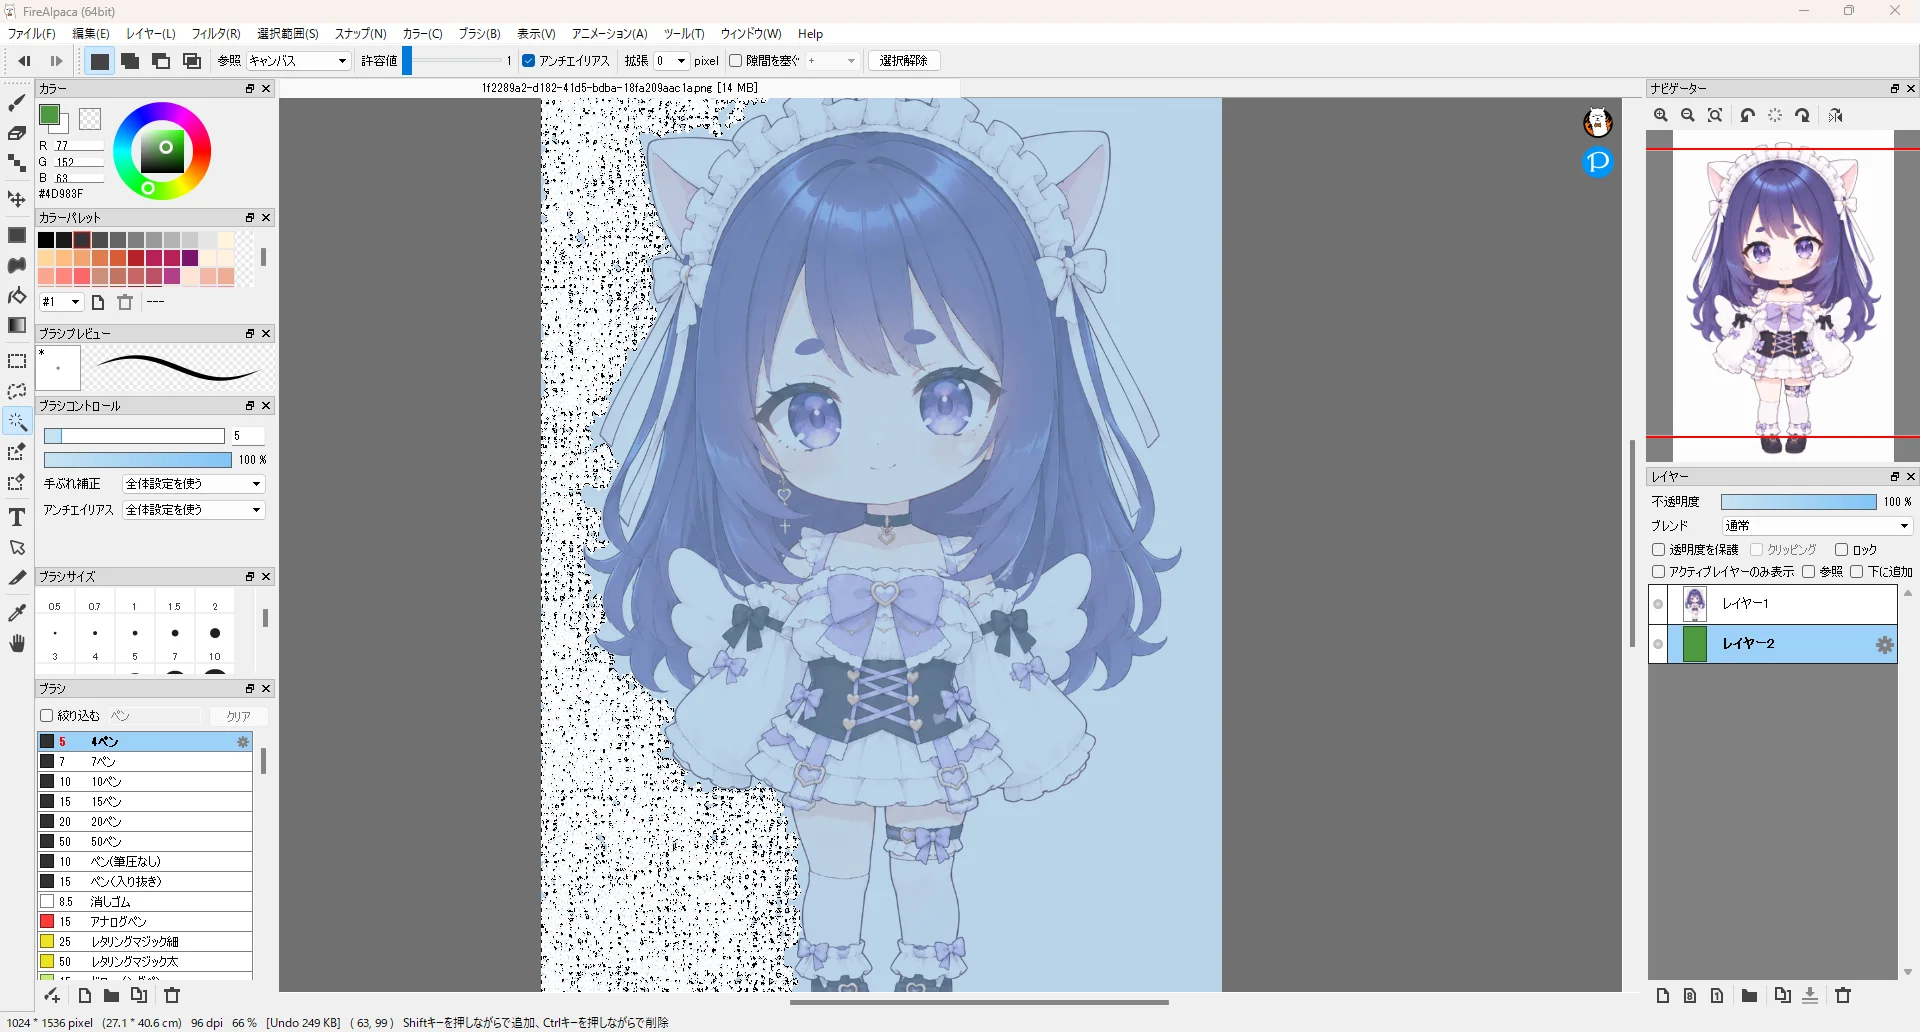
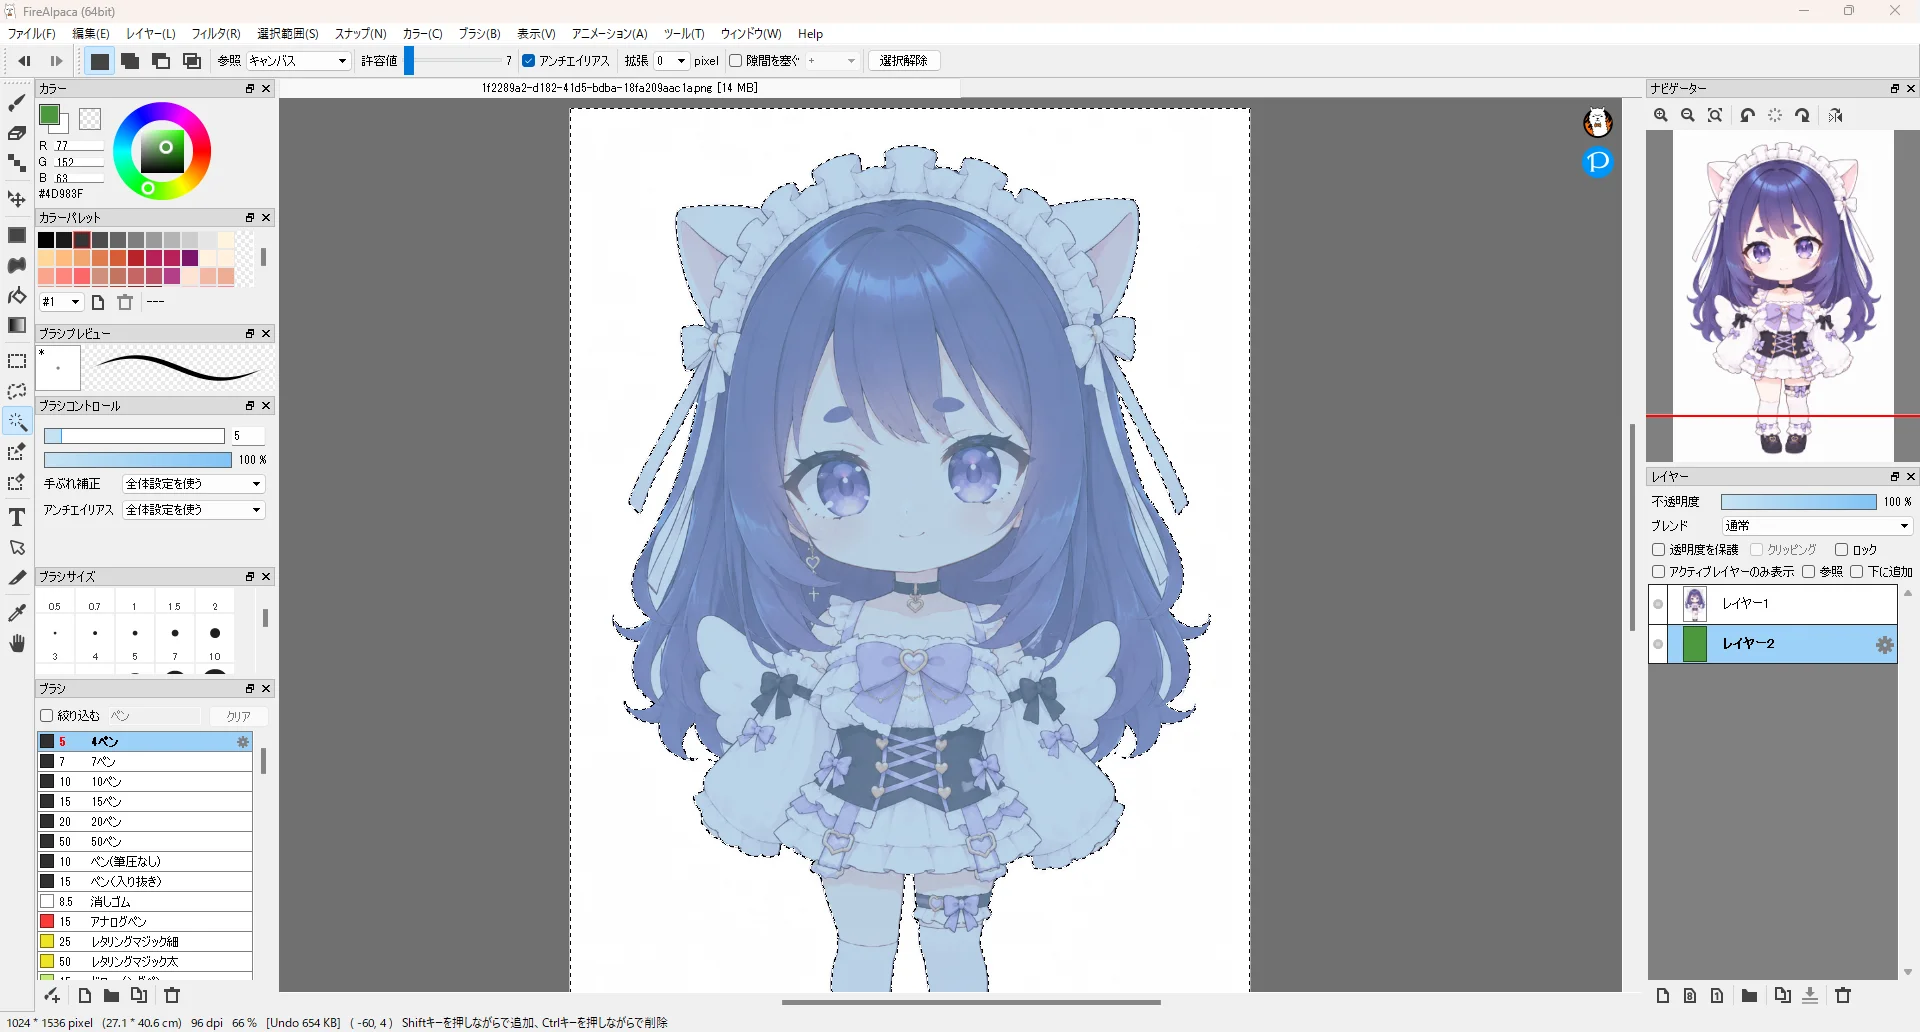
Raise this value little by little and find the value that selects just the background cleanly. Raise it too far and the white clothes and wings get selected too. To select again, clear the selection with Ctrl + D and click the background again. This time I set Tolerance to 7.
Small missed spots still remain, so switch to the select pen and paint over them.
- Choose the icon right below the magic wand on the left edge (SelectPen Tool). With the select pen, the selected area is shown in color
- Zoom in and out with the mouse wheel and look around the edges
- When you find white background without color (a missed spot), click to paint it into the selection. Paint small spots while changing the brush size. If you make a mistake, undo with
Ctrl+Z
Ctrl + Y. 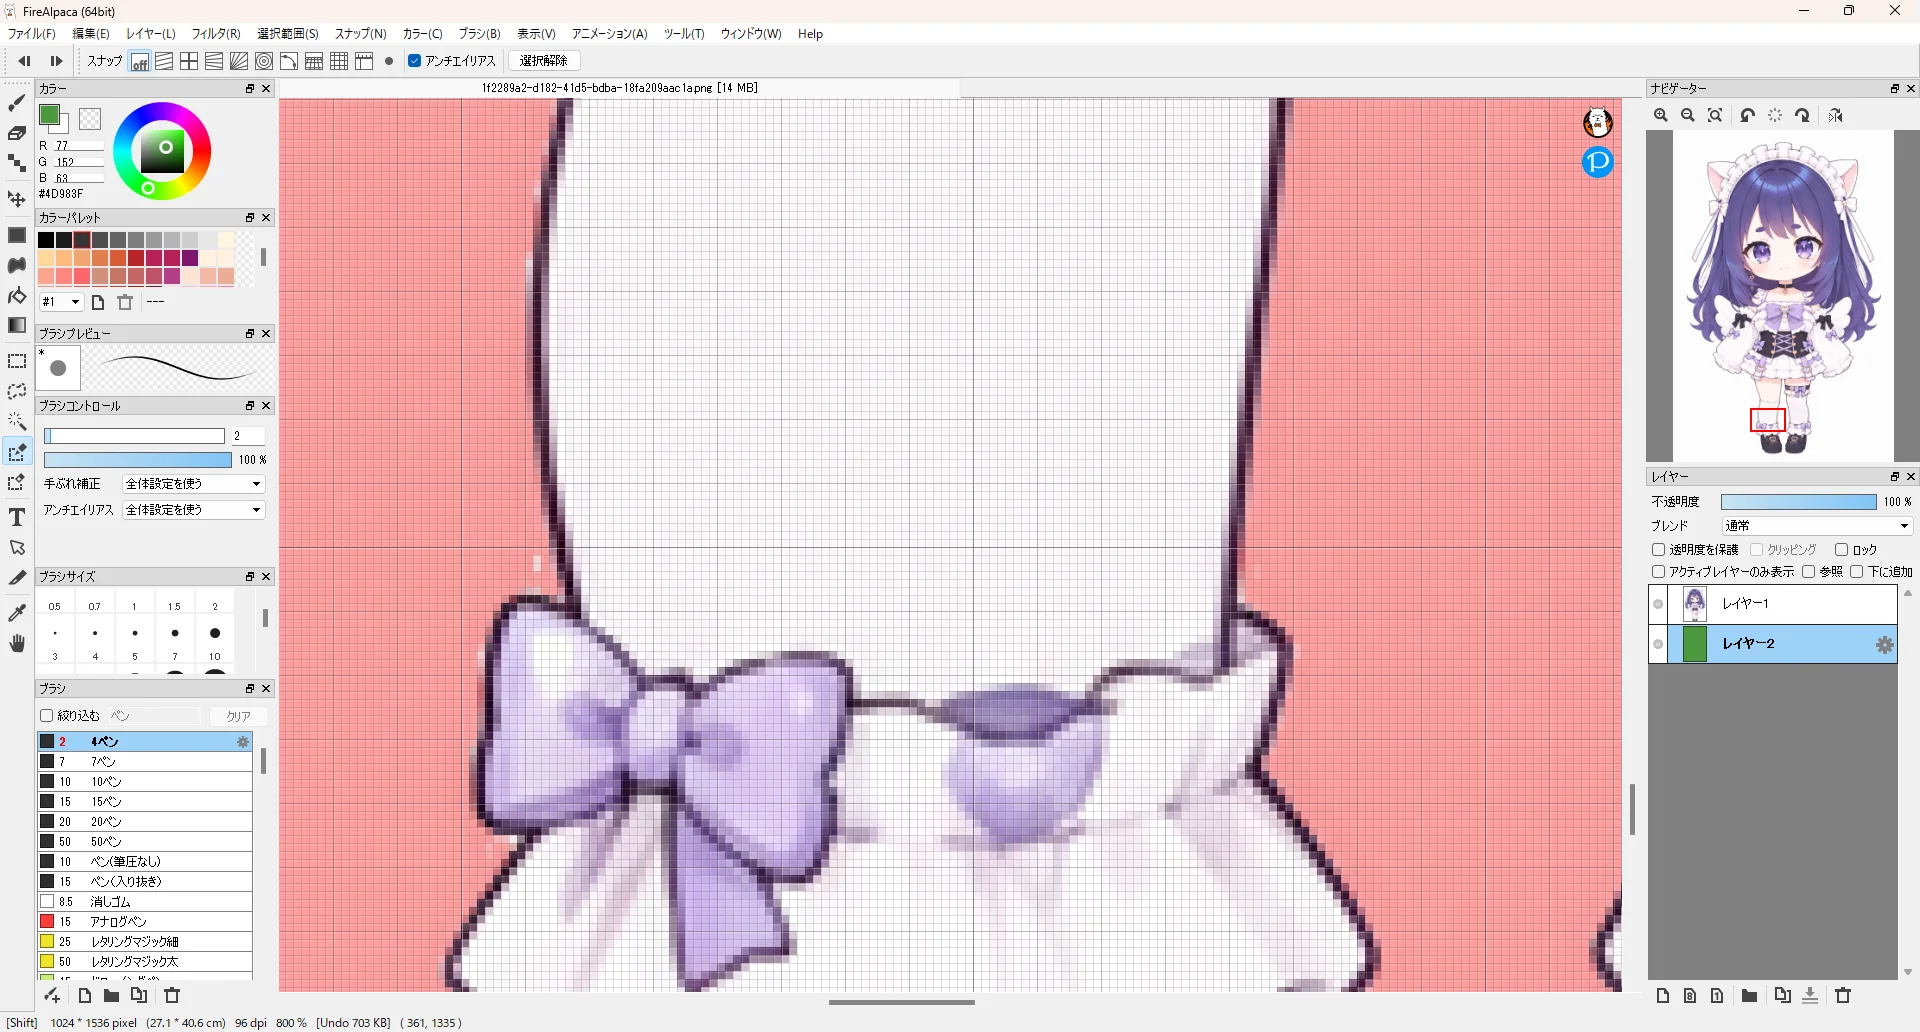
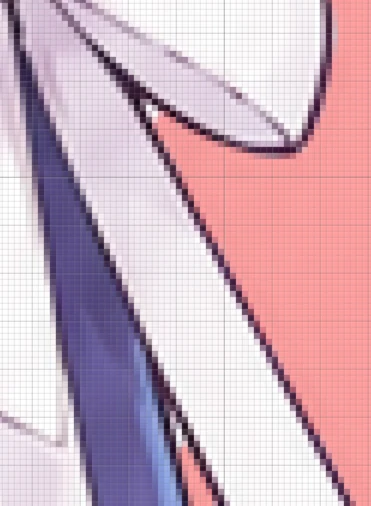
Watch out for narrow gaps between lines. The selection does not reach deep into the corners, so paint them by hand.
- In the Layer window, click the image layer (Layer1) and press
Deleteto remove the background. Be careful: if you pressDeletewith Layer2 still selected, the selected area is removed from the green Layer2 instead - Deselect with
Ctrl+D
The background disappears and the green below shows through. However, background enclosed by lines, such as the gaps between strands of hair, is still white.
- For the gaps in the hair too, select them with the MagicWand Tool, paint the missed spots with the select pen, and remove them with
Delete. It is a repeat of steps 7–13
Shift to select several areas at once. Click while holding Ctrl to remove that area from the selection. Sometimes a faint color remains even after you press Delete. The cause is anti-aliasing. Anti-aliasing is a feature that adds partly transparent color along edges to make them look smooth.
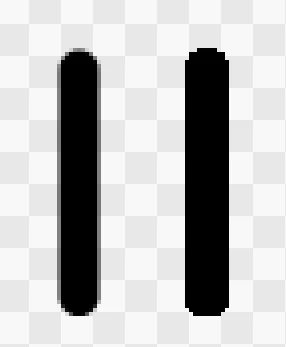
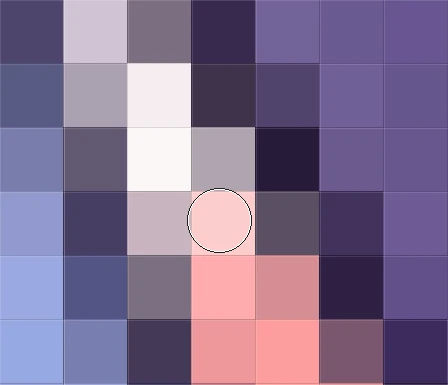
Anti-aliasing also applies to the select pen. When it is ON, the painted area becomes only faintly selected. In a faintly selected area, the color does not disappear completely when you press Delete.
The images below show a single click on the center pixel with the select pen (brush size 1) with anti-aliasing ON. After one click, the pixel is only faintly selected. Each click makes the selection color darker, and after about five clicks it ends up the same as painting with anti-aliasing OFF.
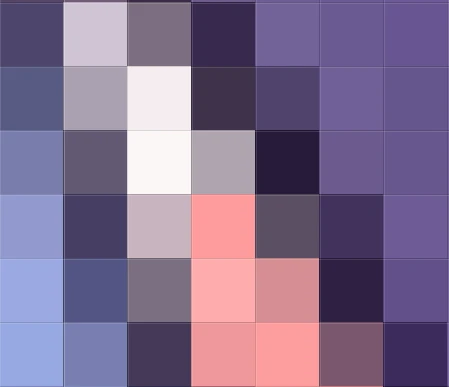
Anti-aliasing is ON by default, so switch it OFF as needed.

- If small areas are still left after removing the selection with Delete, erase them with the Eraser Tool.
Delete is easier. Small spots are not worth selecting, so erase them directly with the eraser. 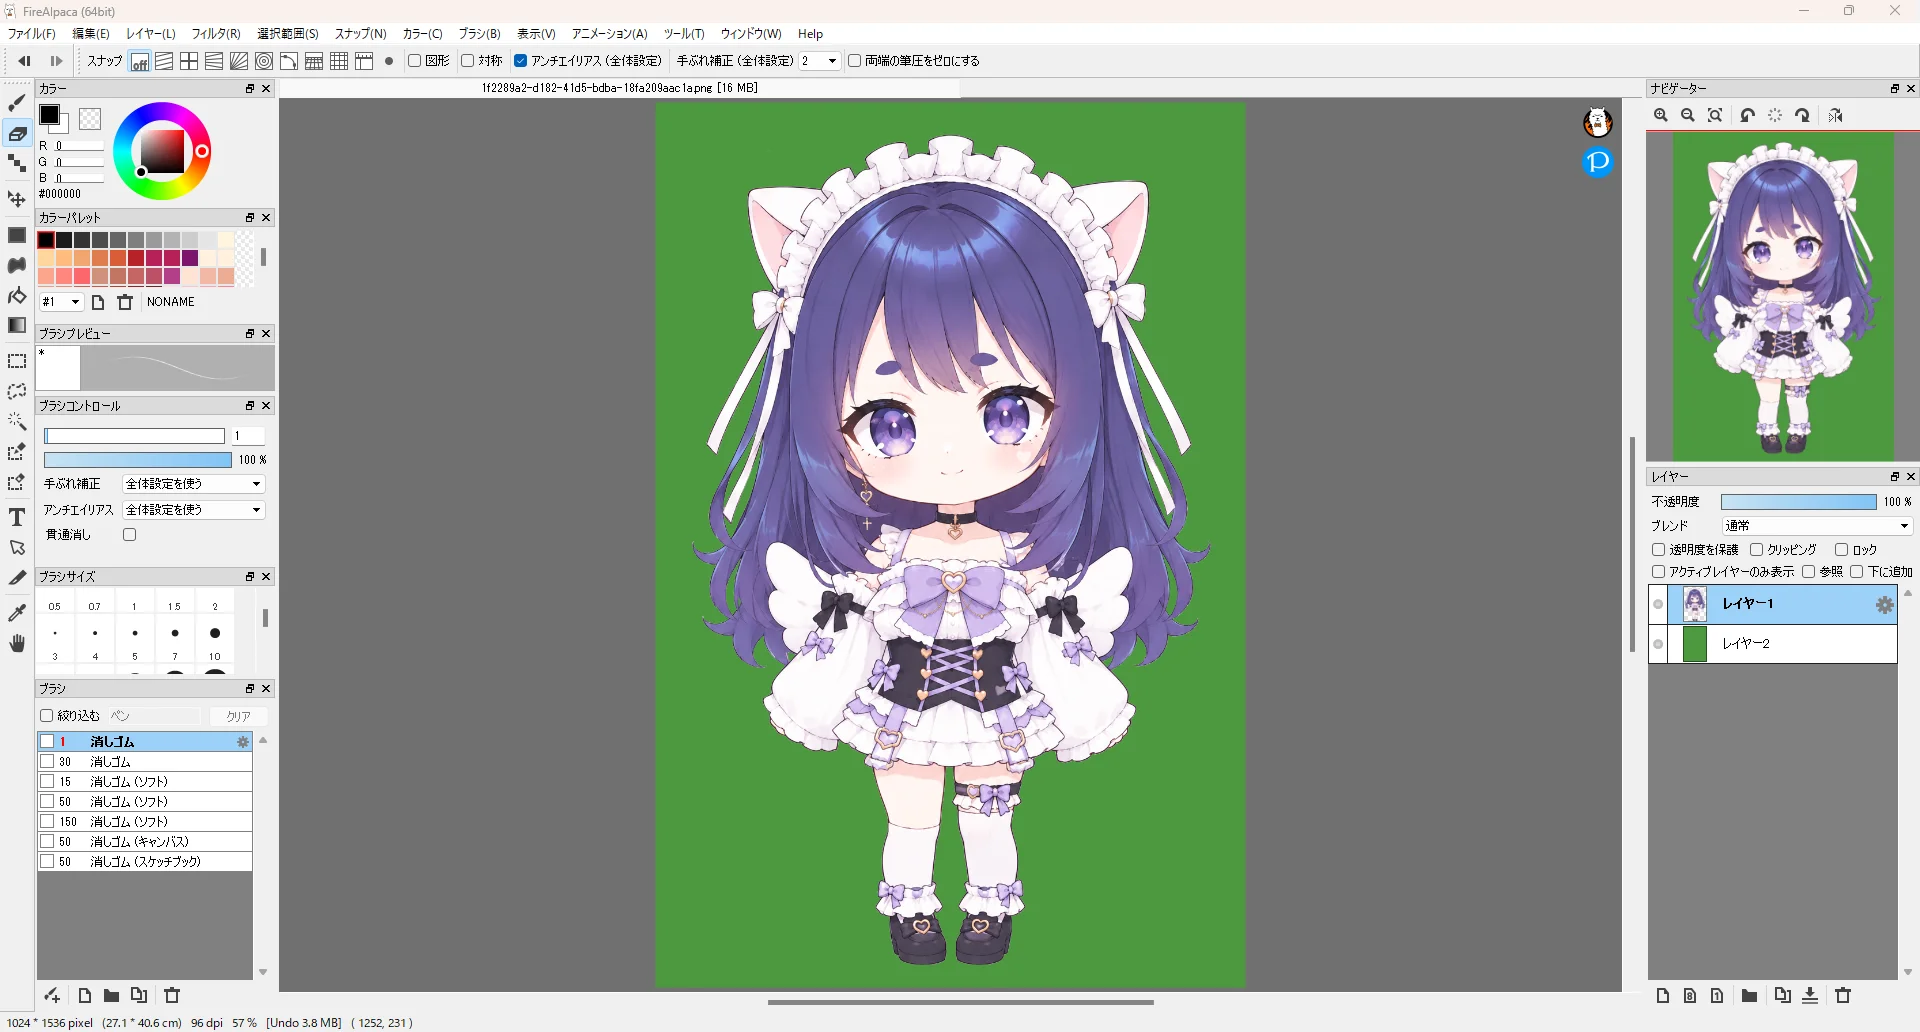
- Hide the green layer in the Layer window
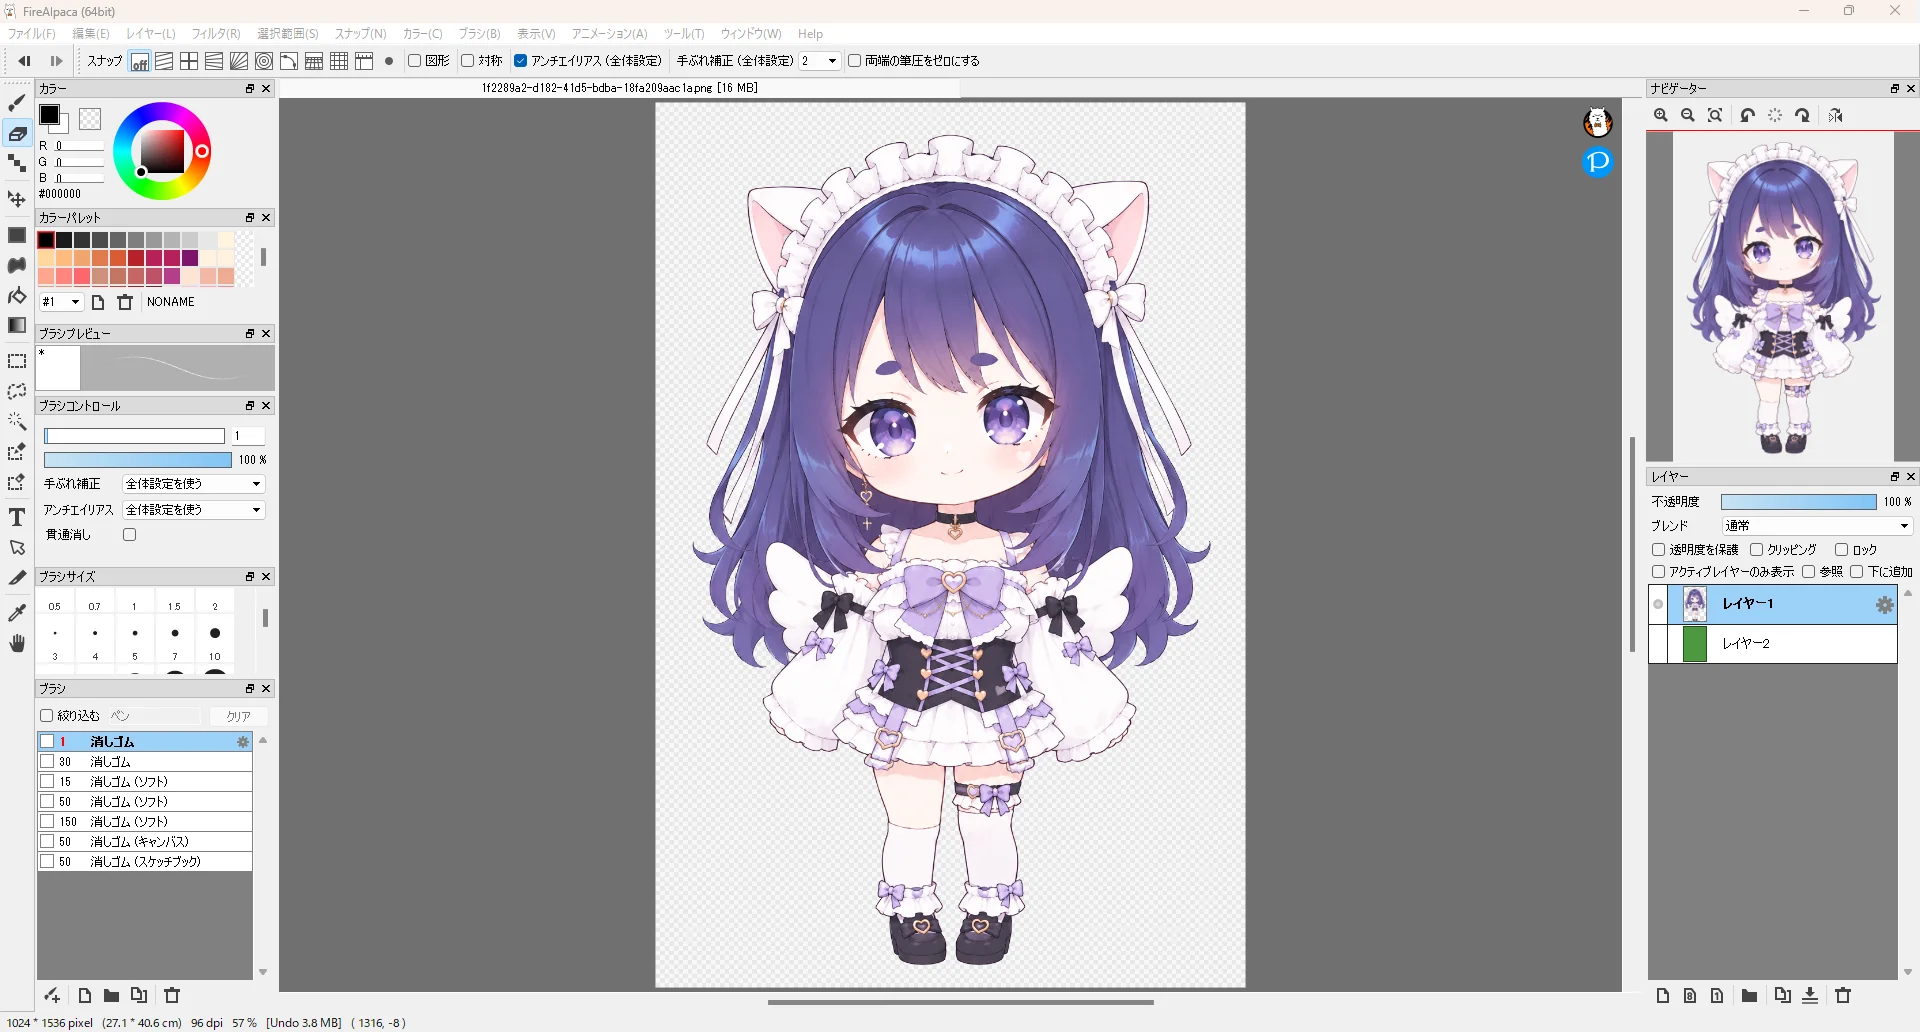
Ctrl + S) overwrites the .mdp. Polishing the artwork
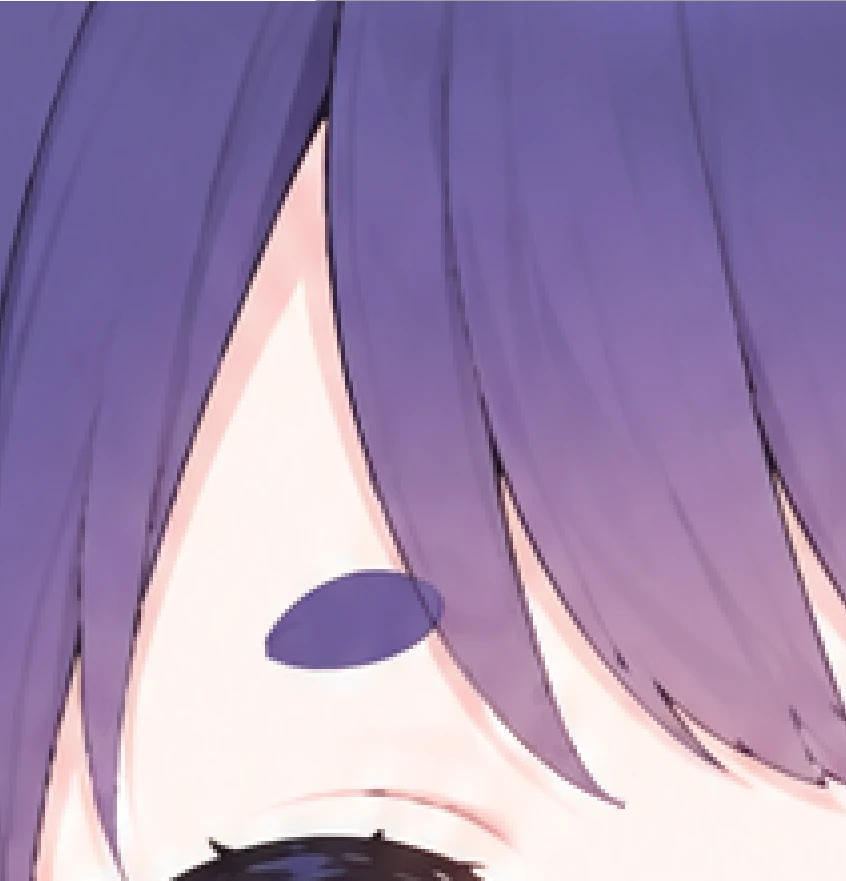
AI-generated images have odd spots when you look closely. This time, the spots circled in red bothered me. If small details like these do not bother you, you can skip this part.
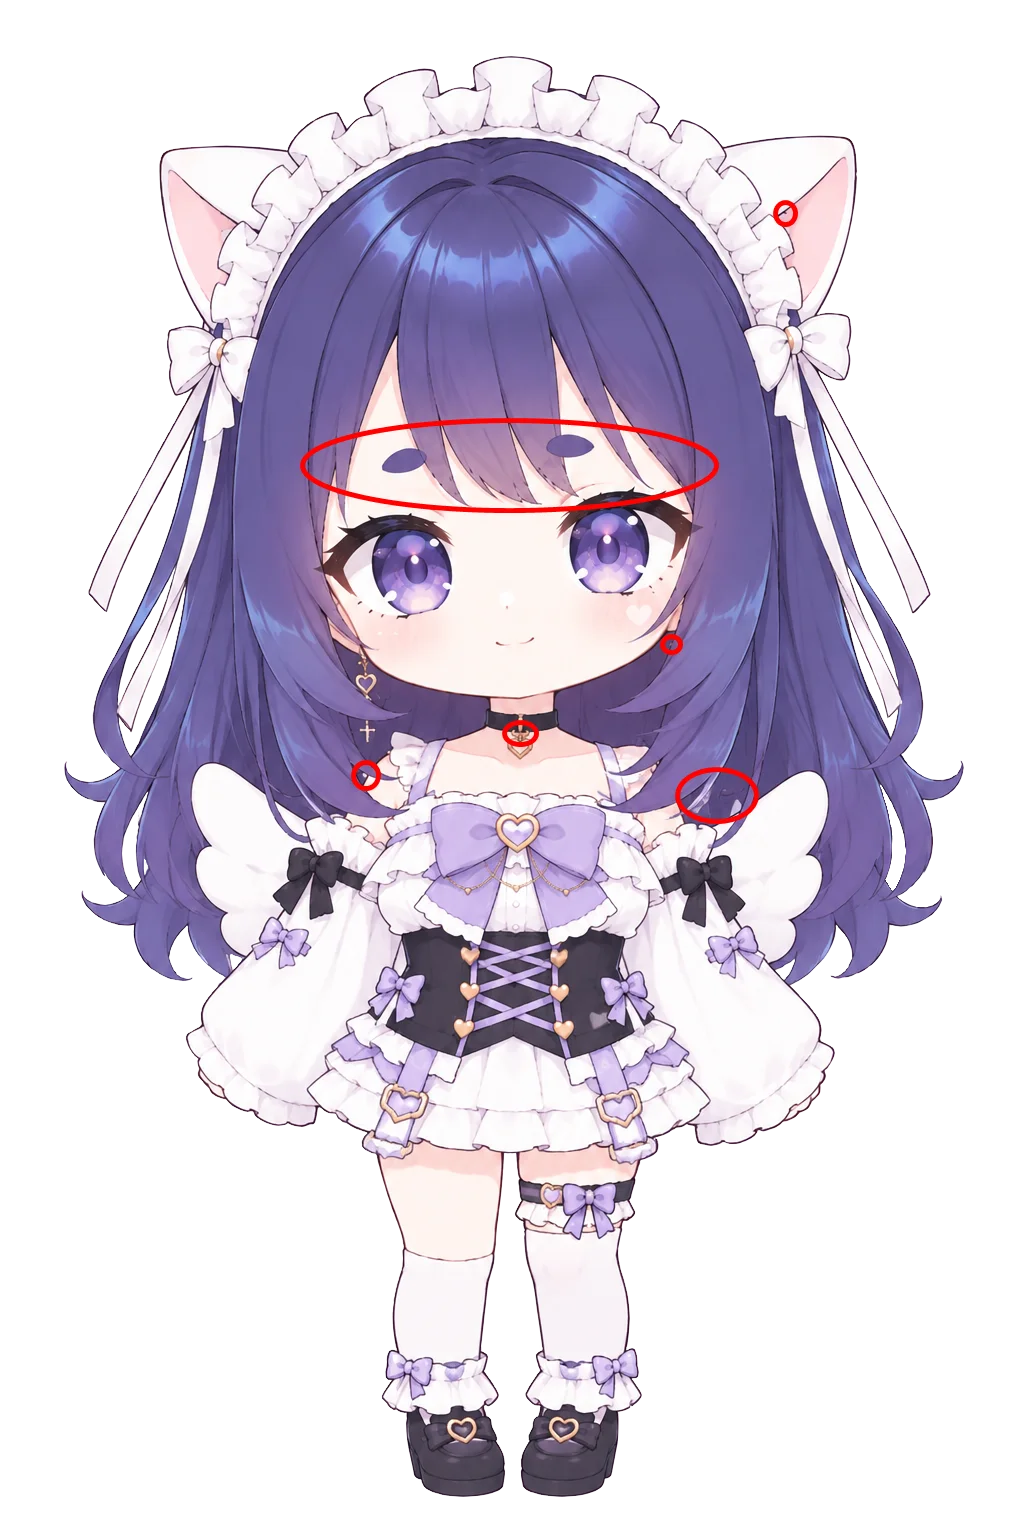
From a distance you can barely tell, so leaving them is fine. If you plan to use this avatar for chatting streams with your face in close-up, I think fixing them is a good idea. Personally, the jagged lines in images generated by ChatGPT bother me, especially in the bangs. On top of that, there are mystery lines that look like something was half-drawn and abandoned, and messed-up strands of hair — plenty that a perfectionist cannot stand.
Fixing the jagged bangs
- Add a layer above the image layer
- Choose the brush icon at the top of the left edge (Brush Tool)
- Zoom in with the mouse wheel
- Right-click near the spot you want to paint to pick up its color. With the Brush Tool still selected, a right-click picks up color like the eyedropper
- With the picked color, dab away with the mouse. When you reach a spot where the color changes, right-click to pick the color again
You are not painting directly on the original image, so if you make a mistake, you can go back by erasing the added layer with the eraser. Here is the result of partly fixing the bangs.
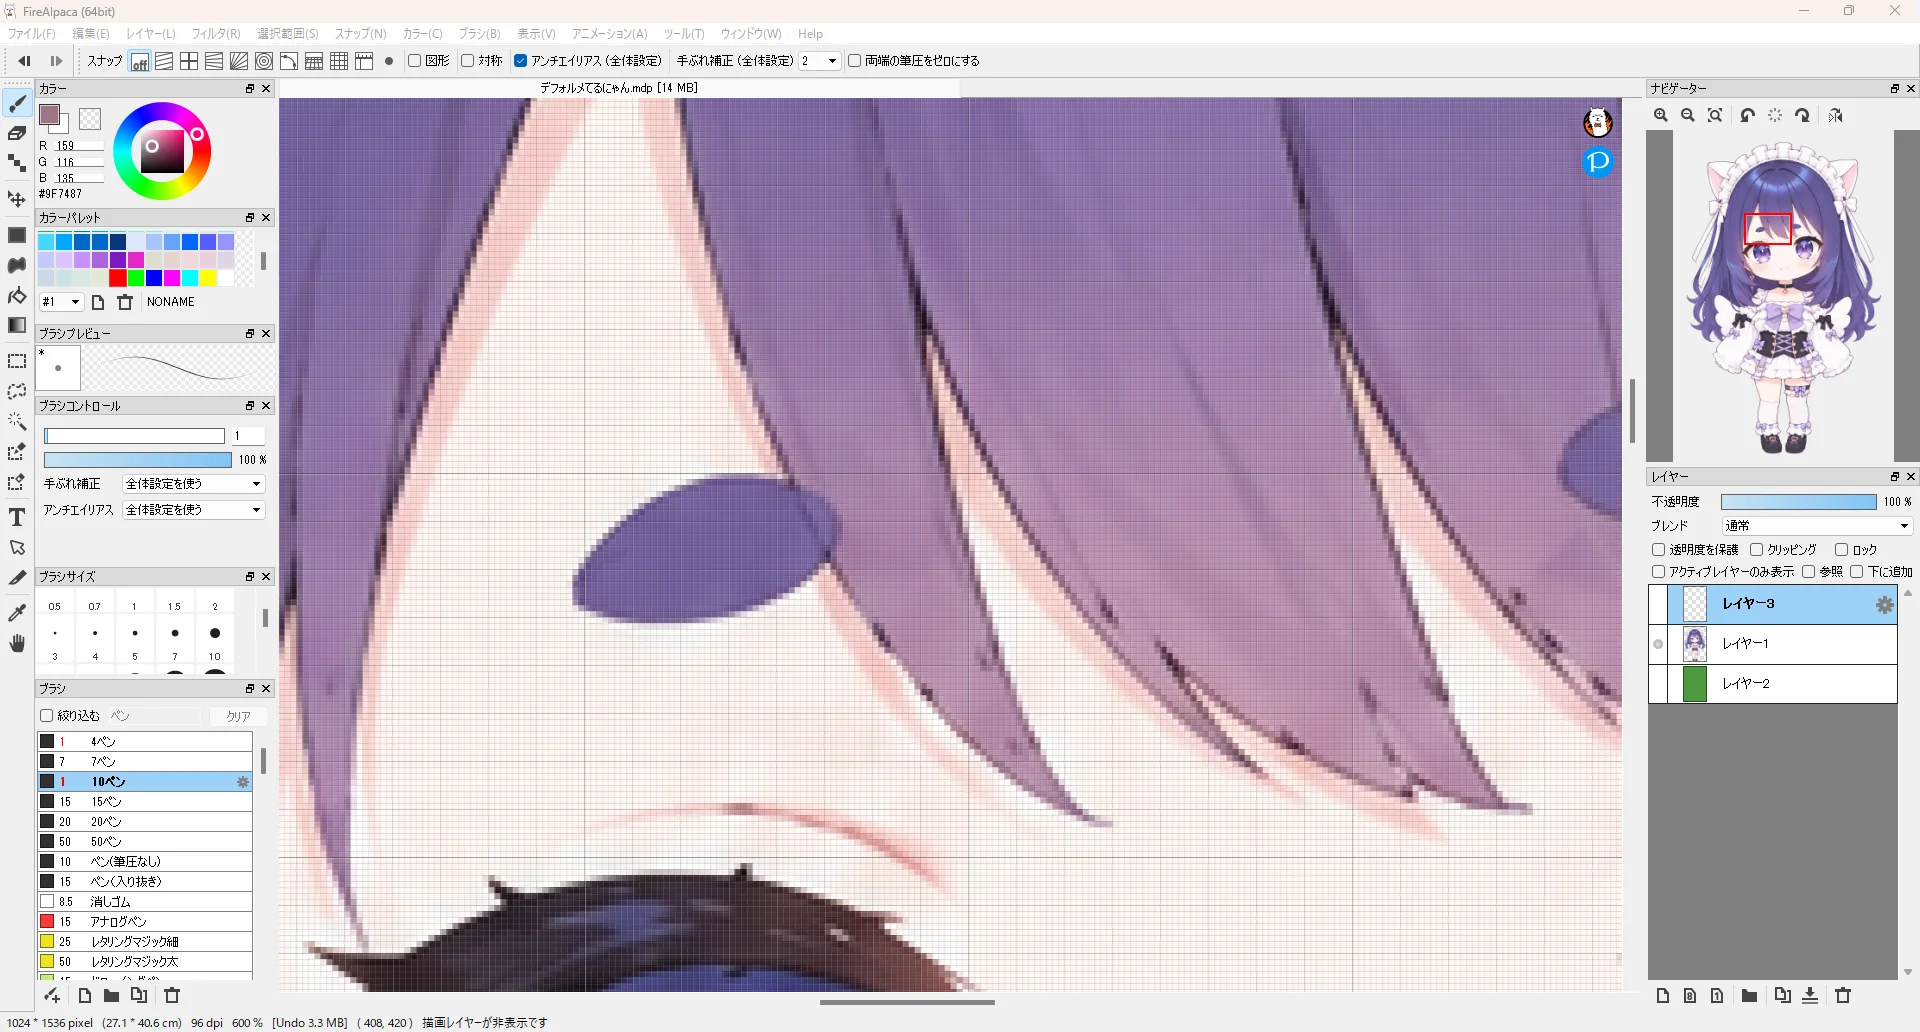
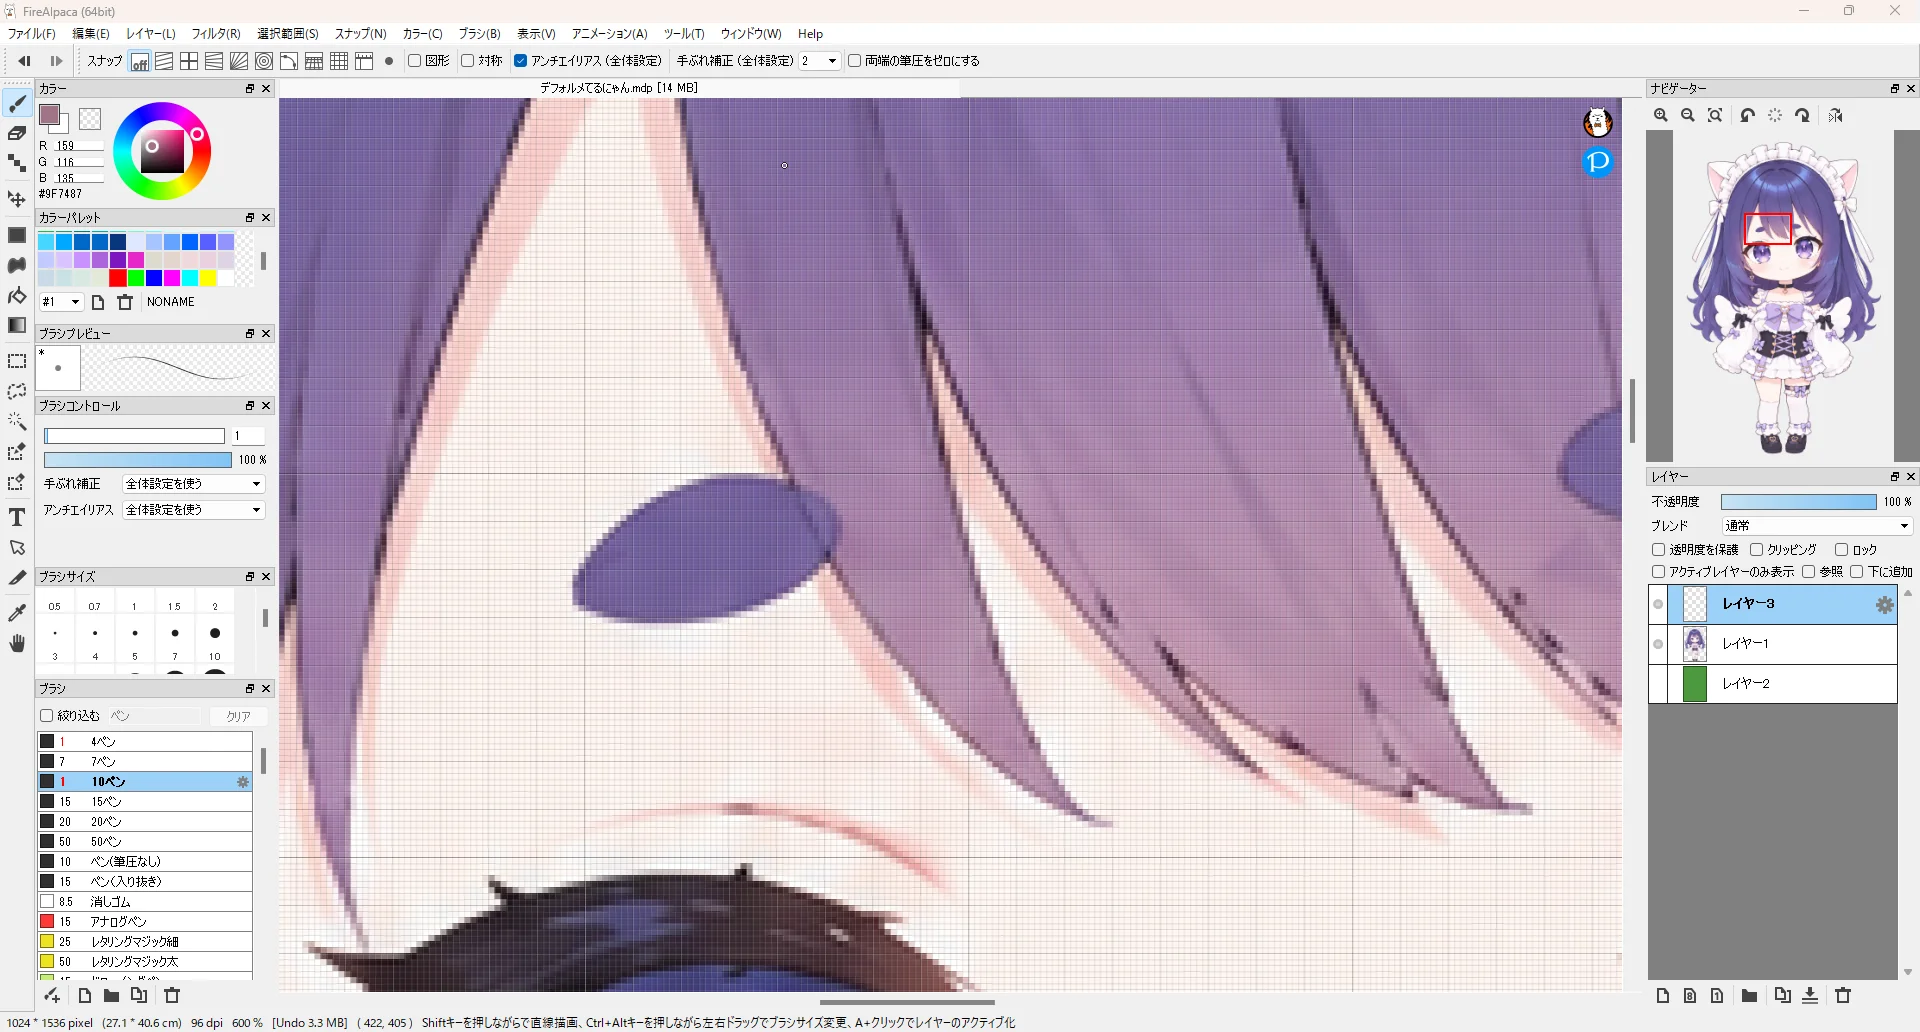
If you want to draw lines instead of dabbing, crank up Stabilizer (Global) in the tool settings. Even the max of 100 is fine. That way, your lines will not get jagged even when you draw slowly.
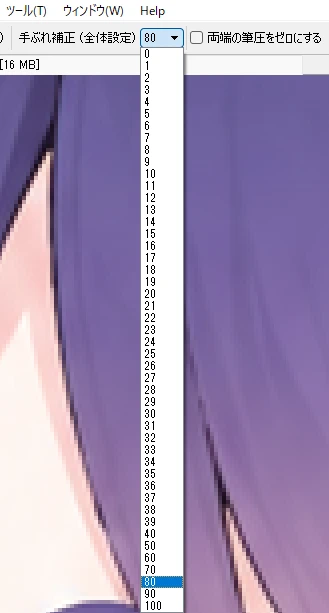
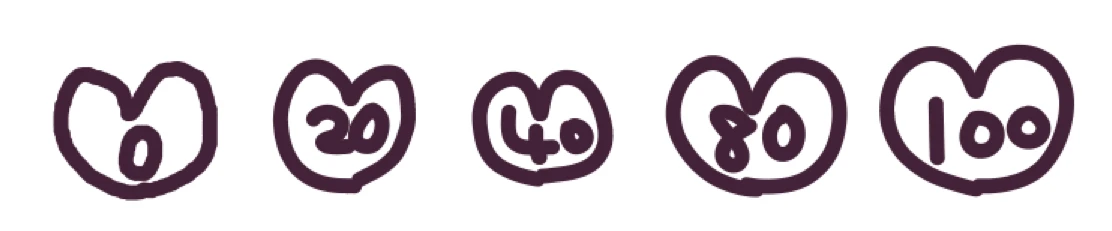
As a test, I drew hearts with a mouse at stabilizer 0, 20, 40, 80 and 100. My mouser skills turned out higher than I expected, so it may be hard to see, but the higher the value, the smoother the line. People with a pen tablet often adjust it between 0 and 50 depending on the kind of line they want. For a mouser, stabilizer 0 gives a super jagged line. Set it to 100 and draw slowly. The line follows slowly, but you can draw smoothly right where you want.
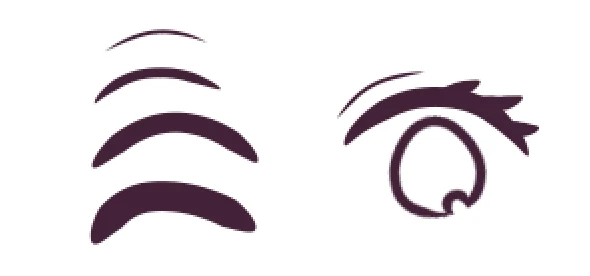
On top of that, checking Zero Pressure on Both Ends next to the stabilizer makes the start and end of each line thinner, so the line looks like it was drawn with a pen tablet. Using this, you can draw an eye like this even with a mouse.
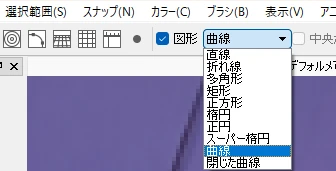
If you can only draw so-so lines even with the stabilizer, use the Curve shape.
- With the Brush Tool selected, check Shape in the tool settings and choose Curve from the list next to it
-
Trace the curve you want to draw by clicking along it
-
Double-click to confirm. The line is drawn at the thickness of the selected brush
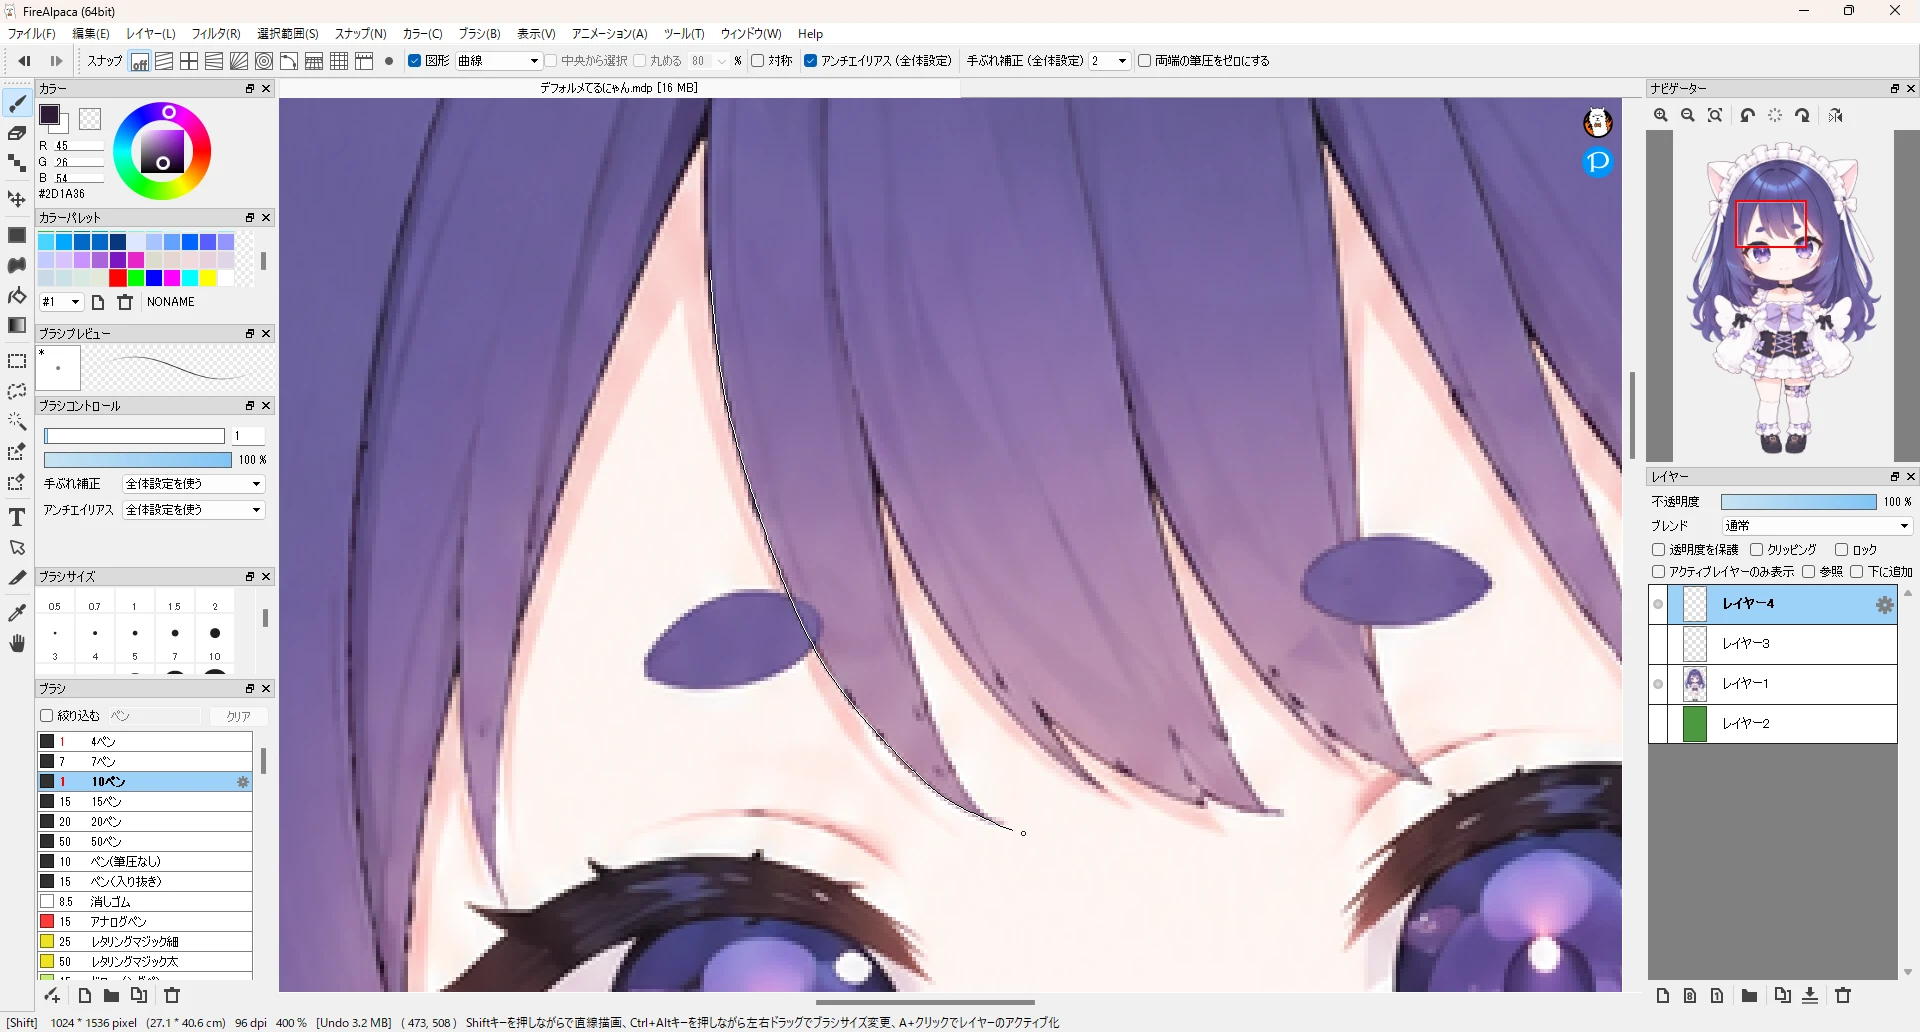
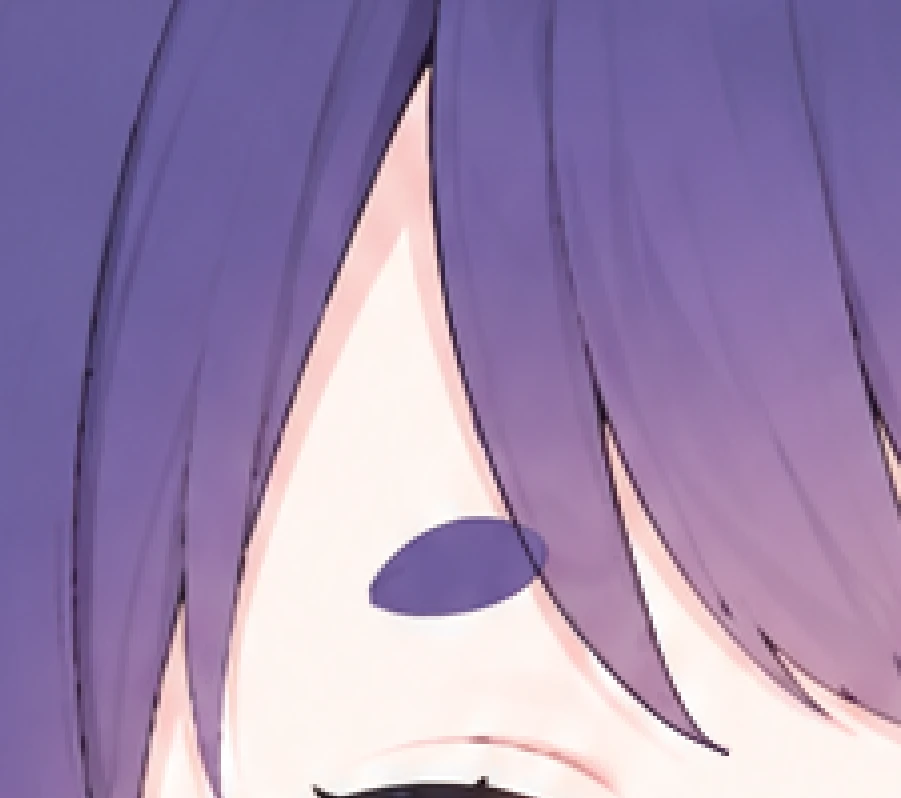
Zero Pressure on Both Ends does not work on lines drawn with the Curve shape. The line has the same thickness from start to end.
A curve can only be drawn in one color, so match the color of the line to its surroundings afterward.
- Check Protect Alpha in the Layer window. You can no longer paint anywhere except where the line is drawn
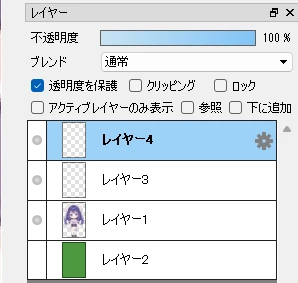
- Pick up the colors of the surrounding bangs with a right-click and paint parts of the line
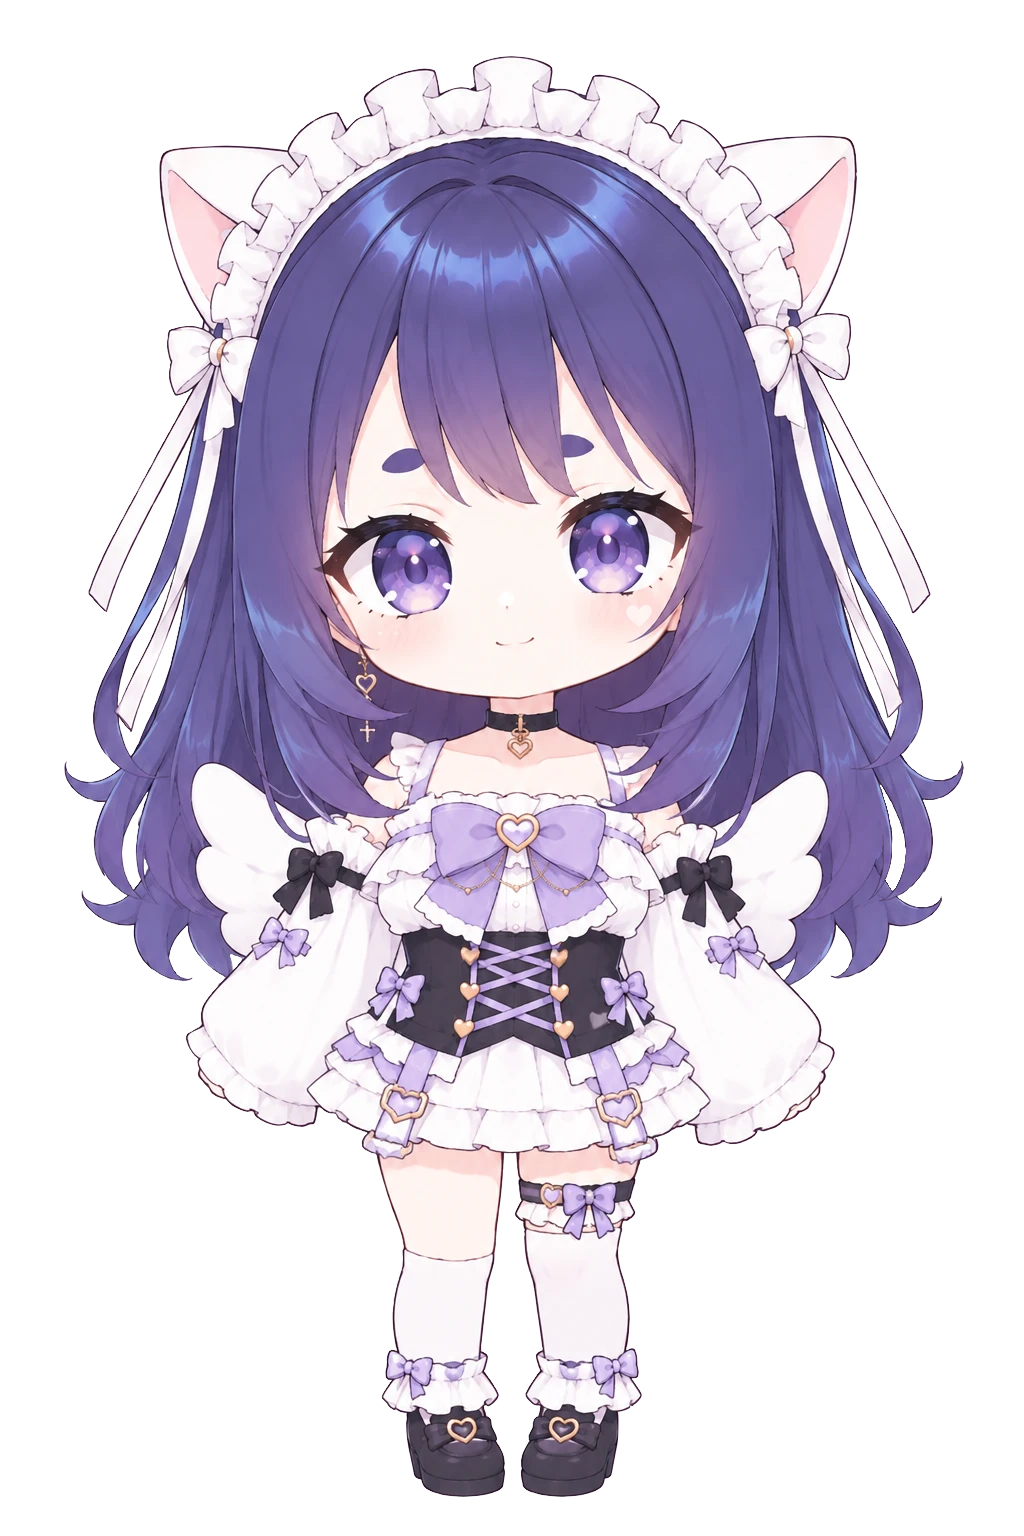
Use these steps to fix whatever bothers you across the whole image.
Making a blank face
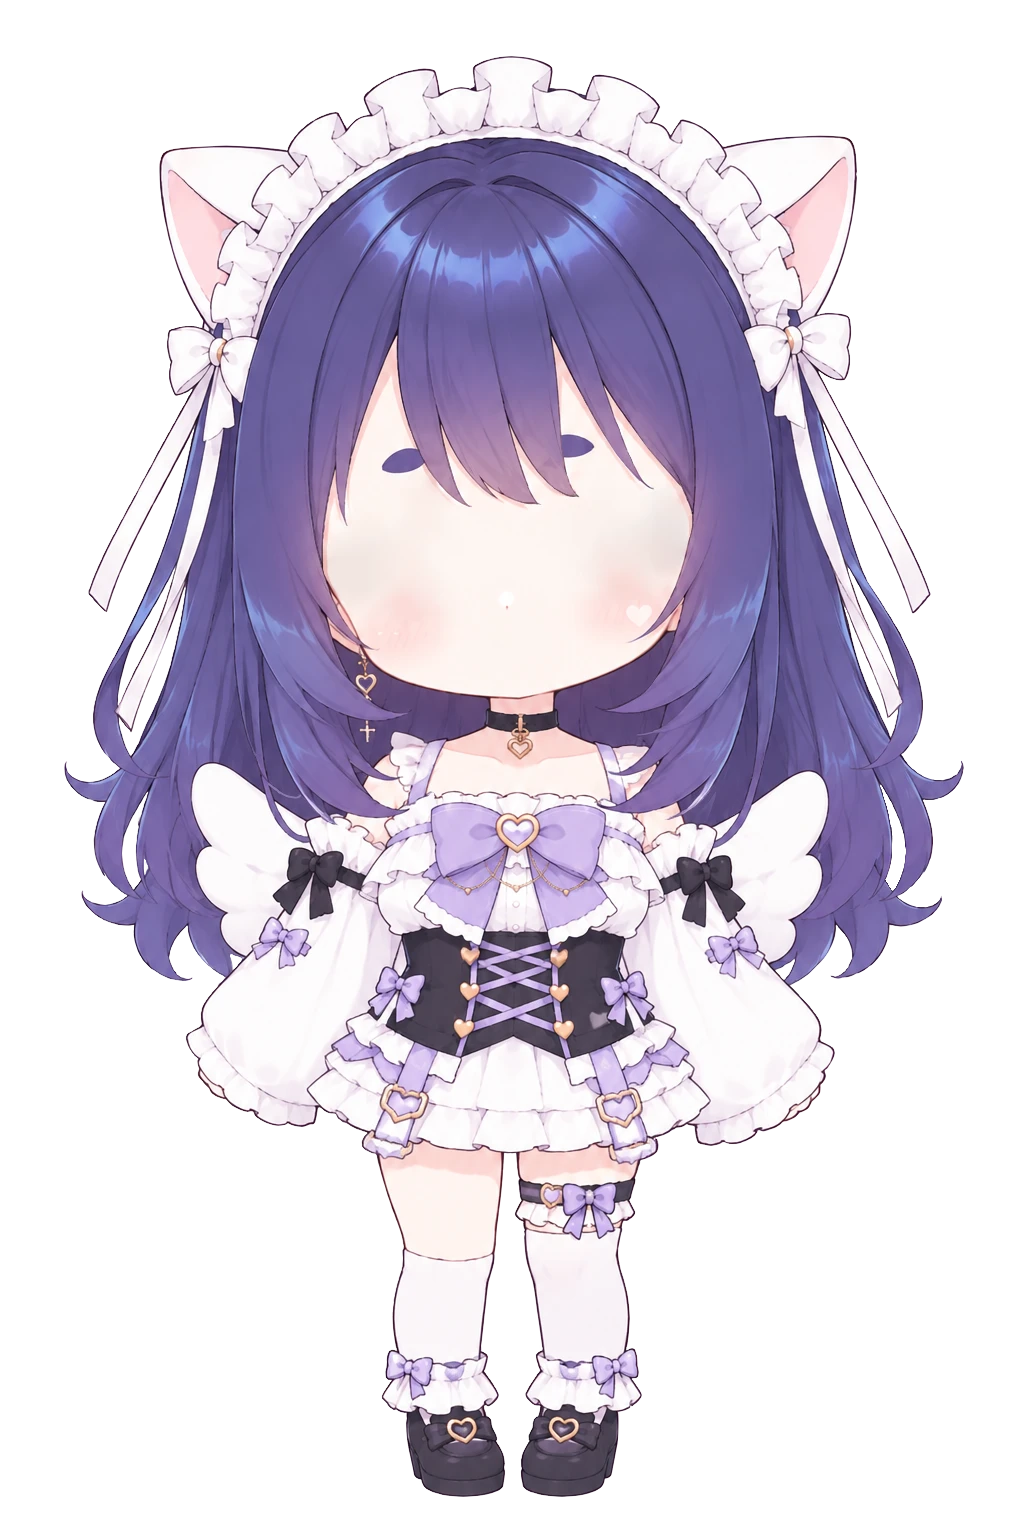
Paint over the eyes and mouth of the original image with the skin color.
- In the Layer window, select the original image layer and duplicate it with Layer → Duplicate. From here on, work on the duplicate
- With the Brush Tool still selected, right-click to pick up the skin color around the eyes, and dab it over the eyes. The skin color varies by spot, so pick it up again each time
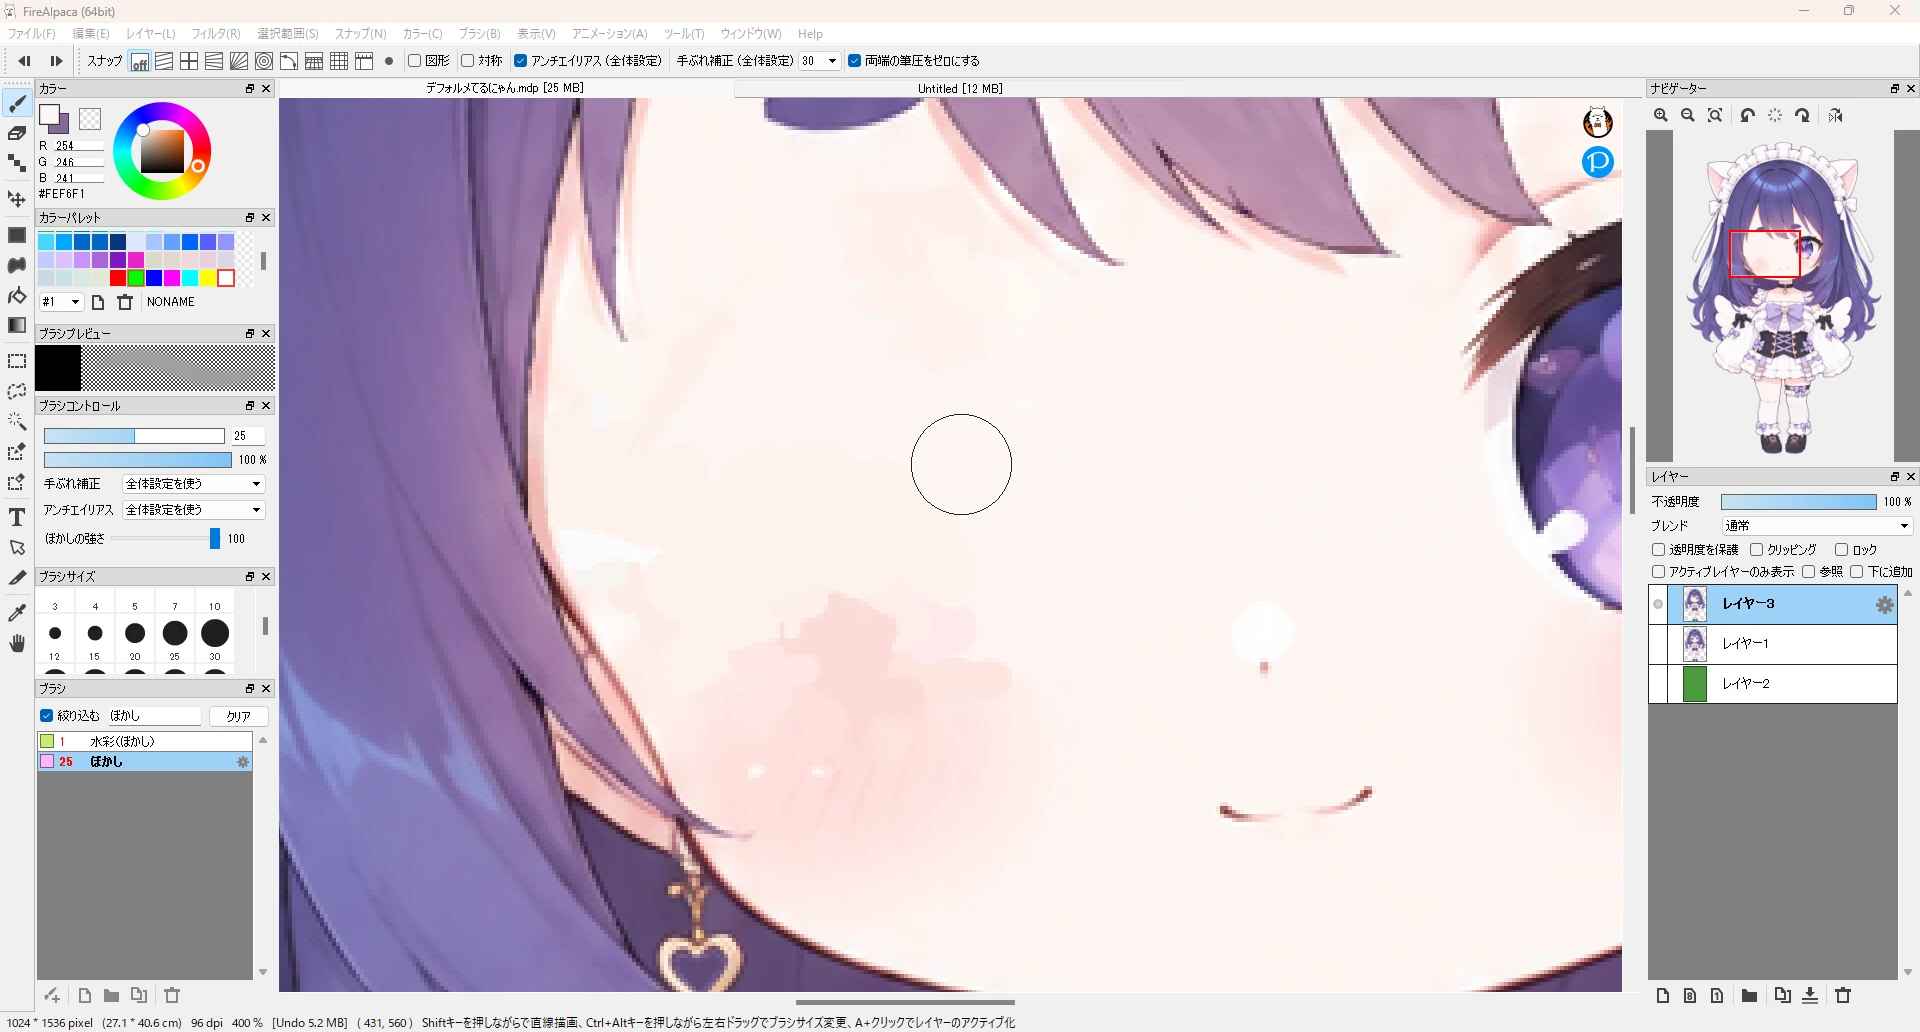
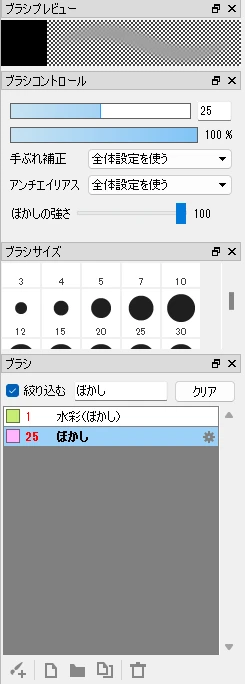
- As is, it does not blend in, so choose the Blur brush in the Brush window and raise Blur Intensity in the Brush Control window
- Go over the dabbed colors to blend them together with the blur
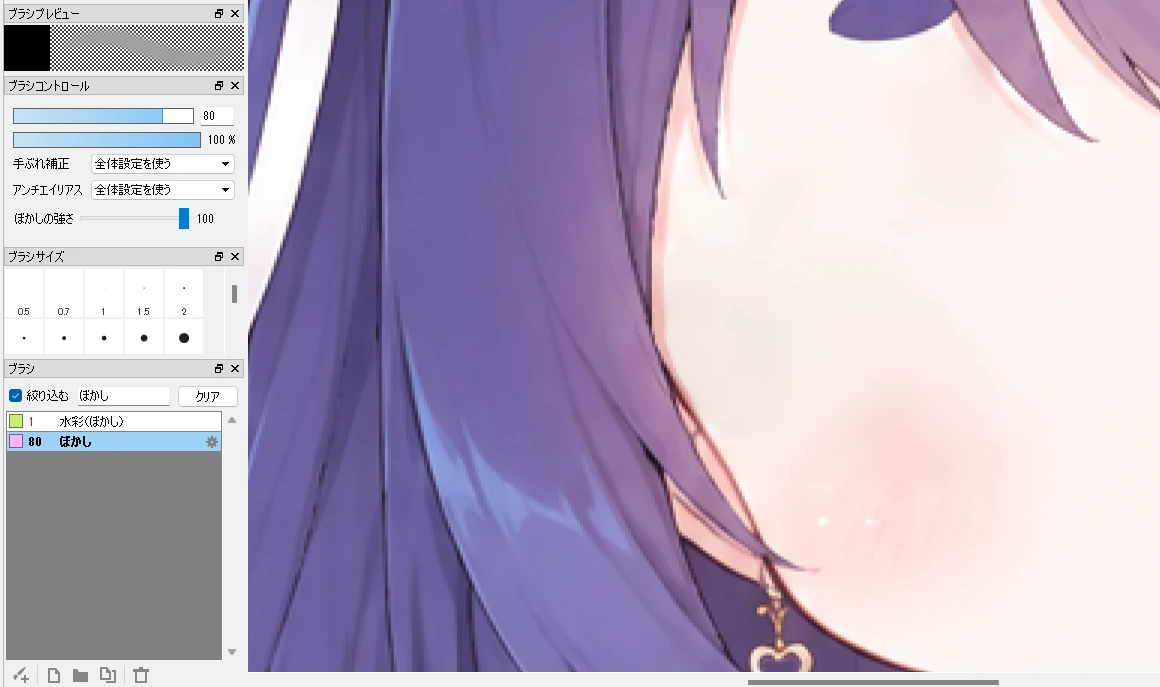
- Remove the mouth the same way
- Hide the original image layer and the green layer in the Layer window
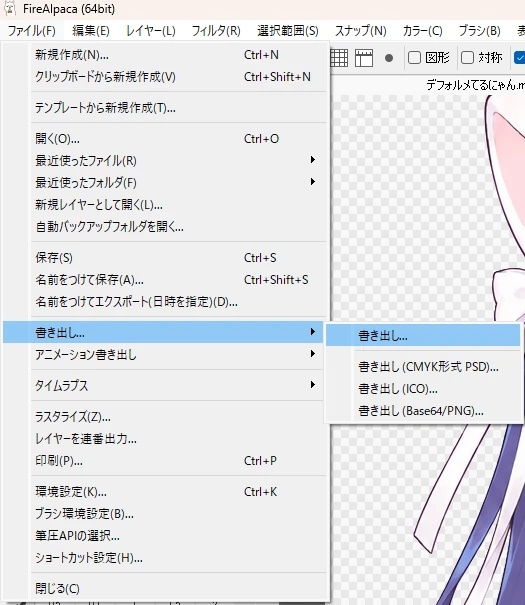
- Choose File → Export, then the top item of the submenu that appears
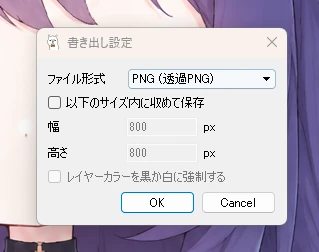
- In the Export Settings dialog box, choose Transparent PNG as the File Format and press OK
- Choose where to save and the file name, then press Save
Cutting out an eye
Cut out one eye from the original image to use as a part.
- Select the original image layer in the Layer window
- With the dotted-rectangle icon on the left edge (Select Tool), drag a rectangle around the left eye
- Copy with
Ctrl+C - With File → New, set the width and height to 200 to make a 200 × 200 canvas
- Paste the copied eye with
Ctrl+V - The pasted eye stays where it was in the original image, so choose Layer → Move → Align Center to move it to the center
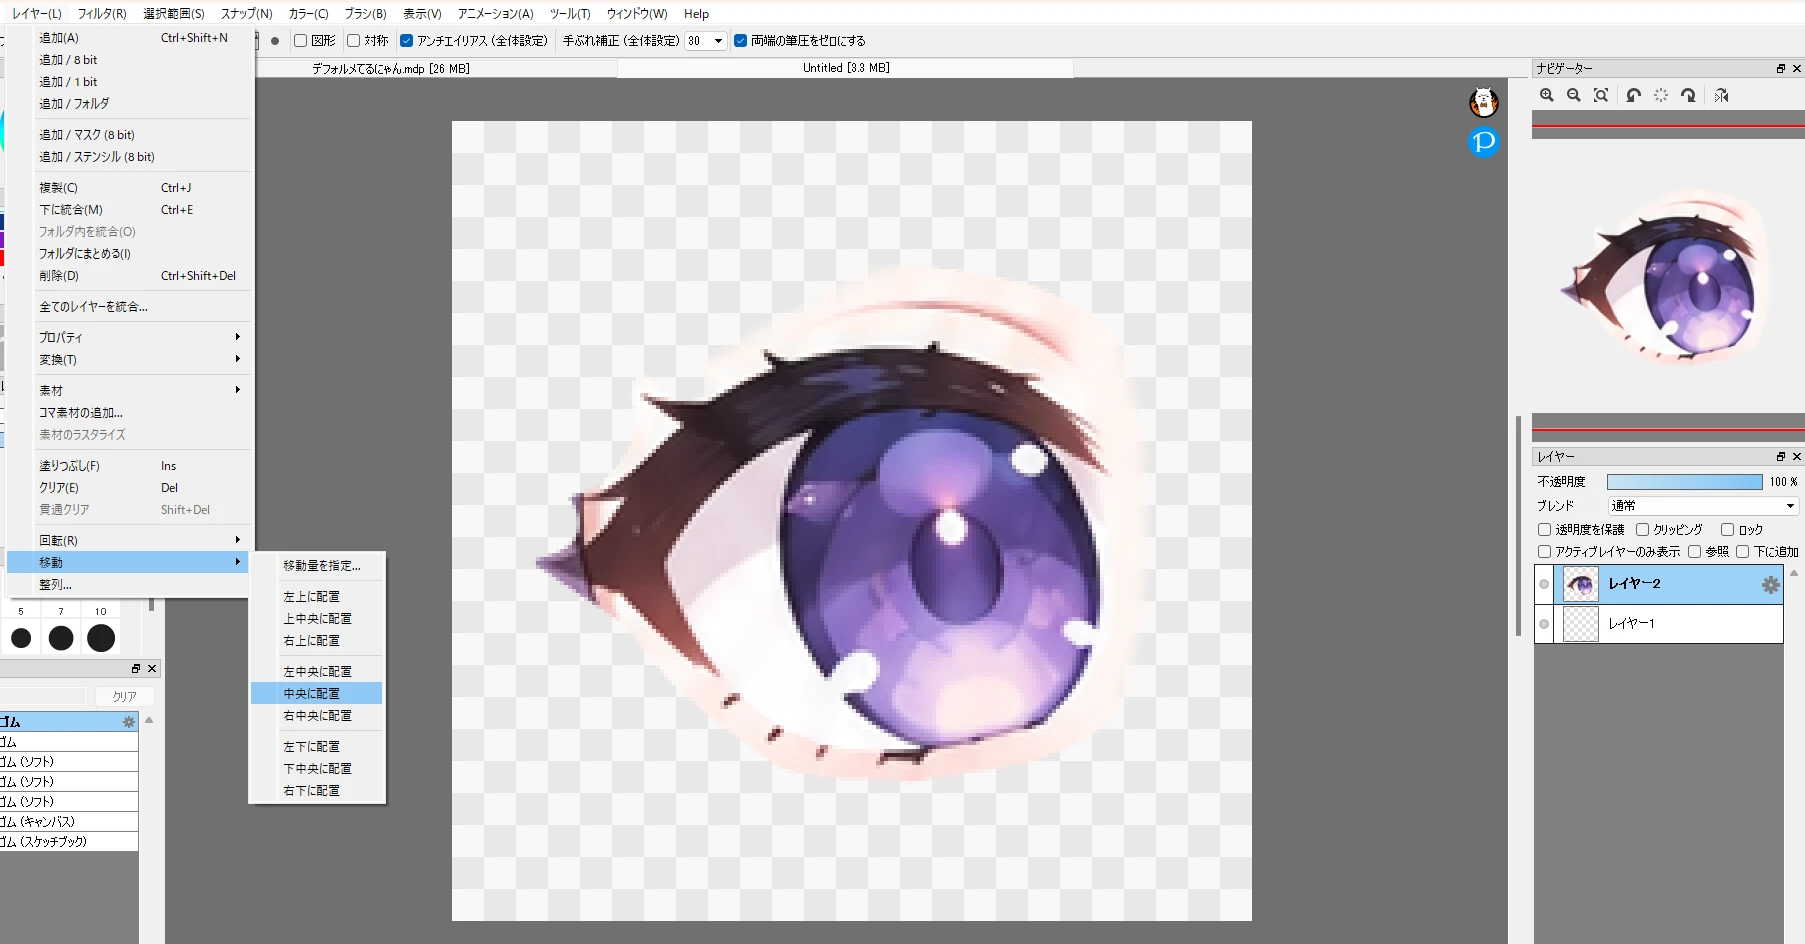
- Save it as a transparent PNG with File → Export
Even if some skin remains around the cut-out eye, it blends in once you place it over the eye position of the base image in Peraravatar+, so you do not need to clean it up perfectly.
Apart from using a mouse, everything else is the same as in the previous article.
Summary
- When the area to remove is large, select it and delete; erase small spots directly with the eraser
- Tolerance is the value that sets how close a color must be to the clicked color to be selected along with it
- Anti-aliasing is a feature that adds partly transparent color along edges to make them look smooth
- For small spots, zoom in with the mouse wheel and dab
- To draw lines, raise the stabilizer value or use the Curve shape
- With Protect Alpha checked, you can only paint where something is already drawn
- Work on separate layers. If you make a mistake, you can go back by removing that layer
- Save often
Contact
Bug reports & Feature requests
Use the form for "it doesn't work" or "I wish it could…". Easiest channel for me to triage.
Contact form ▶
Business & Other inquiries
For work requests and other inquiries, please email me.
Email ▶
Feedback & Cheers
An anonymous one-liner channel. Even just "I'm using it" makes me happy.
Marshmallow ▶